Assembly and
Setup
7.
Install the follower. Remove the
triangle follower
(49)
from the plastic
molding strip. Attach
it
to the follower
support
(46)
with
a screw
(47)
and
washer
(48).
NOTE
• The profile
of
the follower
must
match the profile
of
the cutter.
• SAVE the three extra followers.
You'll need them
if
you purchase
the round, square and diamond
cutters.
Table and Table
Support Assembly
Assemble and set up the table and
table support assembly according to
the following procedures:
NOTE
In
the inverted position, the out-
feed end of the table assembly can
be
identified by the two screw
holes
·which
are closest to the
edge.
1.
Attach the table supports to the f
table assembly.
(See
Figure 5 for Model
500,
Figure 6 for Model
510.)
With the
outfeed end
of
the table assembly
(32)
positioned as shown, attach the
two
table supports
(34)
to the table assem-
bly with the four bolts
(33)
and washers
(33A)
positioned exactly
as
illustrated.
Finger tighten the bolts just enough to
allow the table supports
to
be
moved.
NOTE
When
positioned
correctly,
the
distance between post hole cen-
ters
of
the table supports should
be 12" for Model
500,
15-1/2"
for
Model
510.
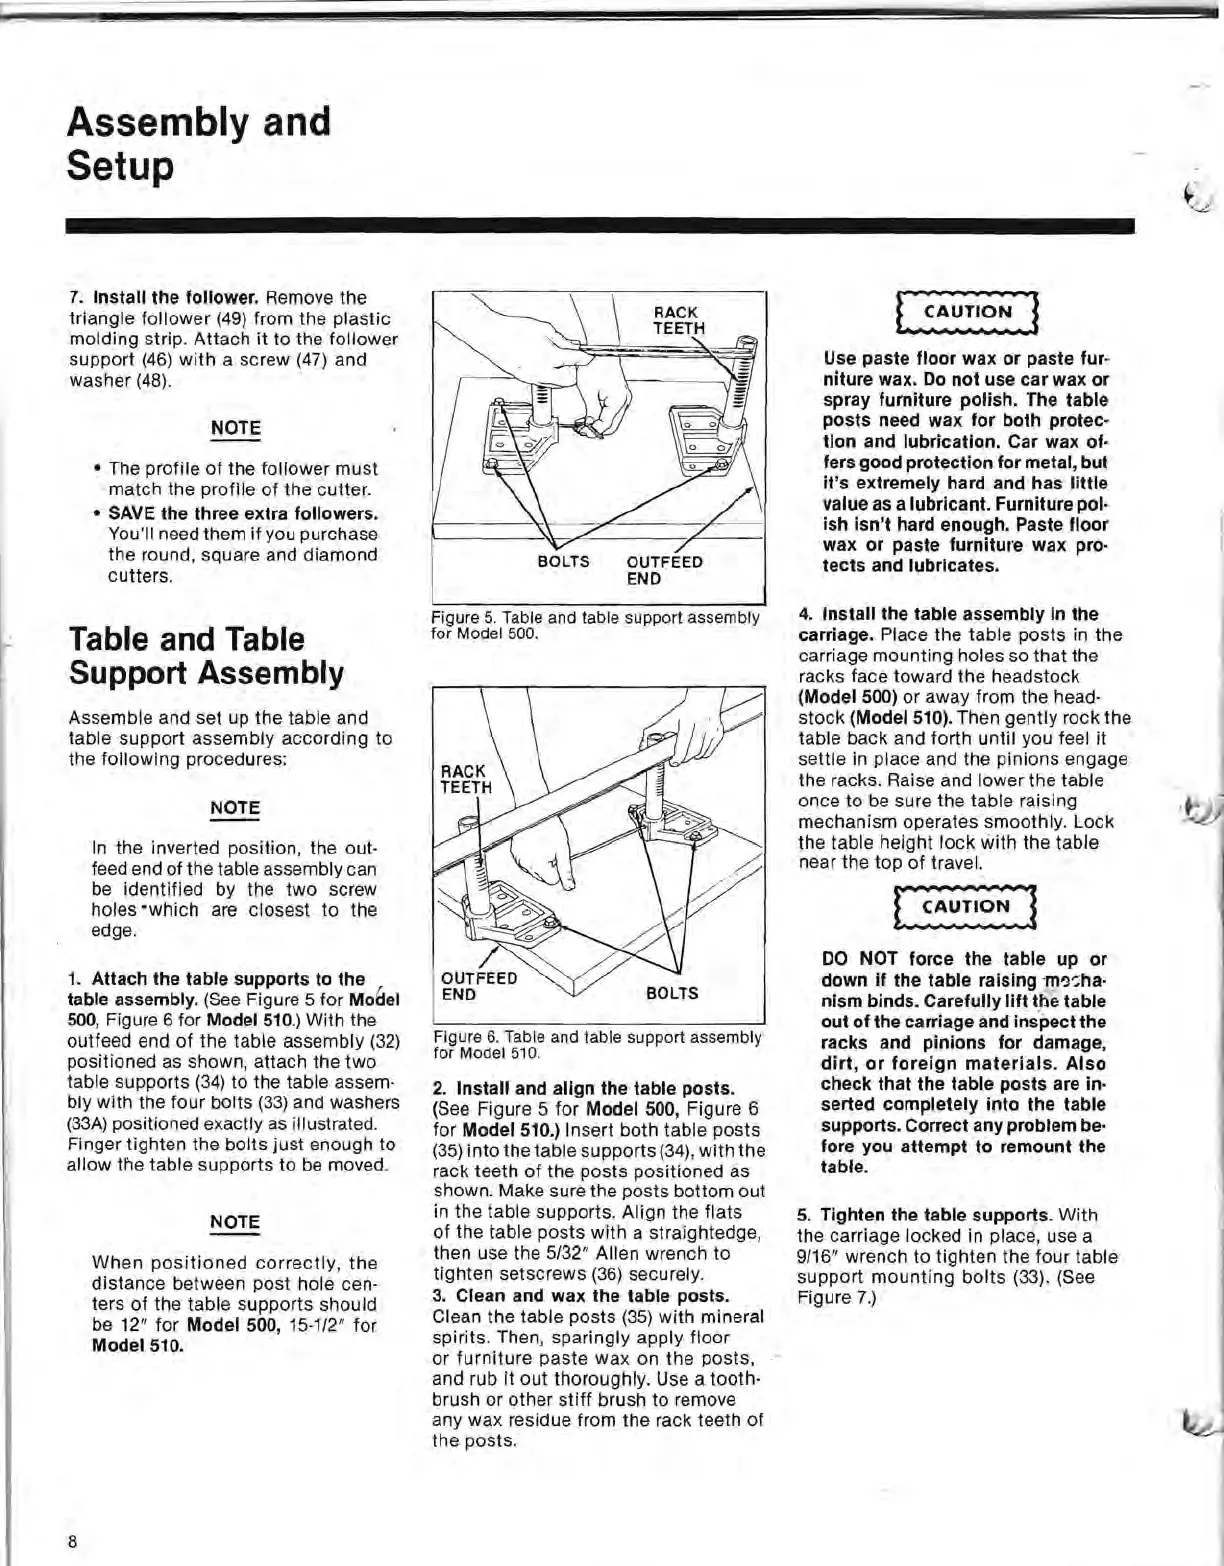
BOLTS
OUT FEED
END
Figure
5.
Table and table support assembly
for Model
500.
/
OUTFEED
END
BOLTS
Figure
6.
Table and table support assembly
for Model
510
.
2.
Install and align the table posts.
(See Figure 5 for Model
500,
Figure 6
for Model 510.) Insert both table posts
(35)
into the table supports
(34),
with the
rack teeth
of
the posts positioned as
shown. Make sure
th.e
posts bottom out
in the table supports. Align the
flats
of
the table posts with a straightedge,
then use the
5/32" Allen wrench to
tighten setscrews
(36)
securely.
3.
Clean and wax the table posts.
Clean the table posts
(35)
with
mineral
spirits. Then, sparingly apply floor
or
furniture
paste
wax
on the posts,
and rub it out thoroughly. Use a tooth-
brush or other
stiff
brush to remove
any wax residue from the rack teeth
of
the posts.
Use paste
floor
wax
or
paste fur·
niture wax.
Do
not
use
car
wax
or
spray furniture polish. The table
posts
need wax
for
both protec·
tion
and lubricatIon. Car wax of·
fers good protection
for
metal, but
it's
extremely hard and has
little
value as a lubricant. Furniture pol·
ish
isn't
hard enough. Paste
floor
wax
or
paste furniture wax pro·
tects
and lubricates.
4.
Install
the
table
assembly in the
carriage. Place the table posts
in
the
carriage mounting holes so that the
racks face toward the headstock
(Model
500) or away from the head-
stock
(Model 510). Then gently rock the
table back and forth until you feel
it
settle in place and the pinions engage
the racks. Raise and lower the table
once to be sure the table raising
mechanism operates smoothly. Lock
the table height
lock
with the table
near the top
of
travel.
DO
NOT force the . table up
or
down
if
the table raising
"1Tl-3-;ha·
nlsm binds. Carefully
lift
the table
out
of
the carriage and inspect the
racks and pinions
for
damage,
dirt,
or
foreign
materials.
Also
check
that
the table posts are in·
serted completely
into
the table
supports. Correct any problem be·
fore you
attempt
to
remount the
table.
5.
Tighten the table supports. With
the carriage locked in place, use a
9/16" wrench to tighten the four table
support
mounting
bolts
(33). (See
Figure
7.)
8
 Loading...