Channel and Support
Bracket Assembly
rr
20
"
/'29
:Ji)
,
. ';1 TJ
//
-'l/
0!
25
;27
~
I
'
,
~28
23
24
'0-
14
Assembly
and
,
Setup
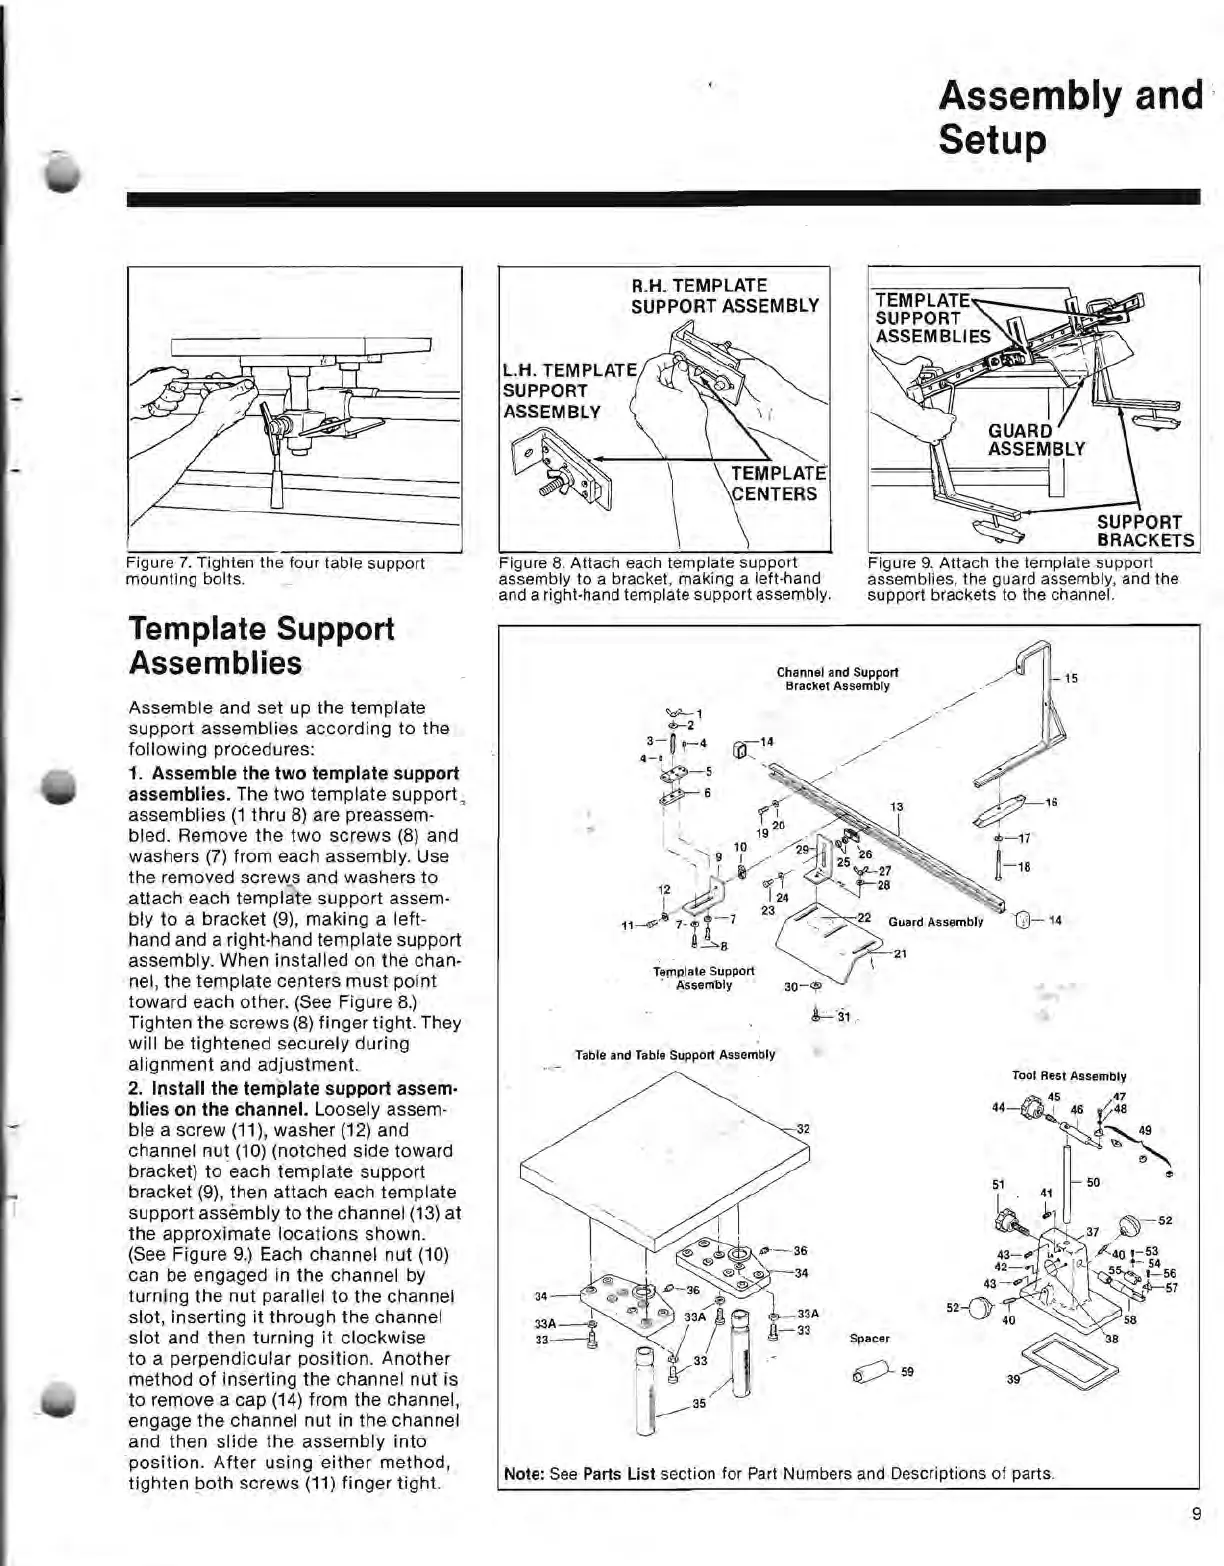
Figure
7,
Tighten the
four
table support
mounting bolts,
Template Support
Assemblies
Assemble and set up the template
support assemblies according to the
following procedures:
1.
Assemble the
two
template
support
assemblies. The
two
template
support,
assemblies
(1
thru
8)
are preassem-
bled. Remove the
two
screws
(8)
and
washers
(7)
from each assembly. Use
the removed screws and washers to
attach each templ
at
e support assem·
bly
to
a bracket
(9),
making a left-
hand and a right-hand template support
assembly. When installed on the chan-
nel, the template centers must point
toward each other.
(See
Figure
8.)
Tighten the screws
(8)
finger tight. They
will
be
tightened securely during
alignment and adjustment.
2.
Install the
template
support assem·
blies on the channel. Loosely assem-
ble a screw (11), washer
(12)
and
channel nut
(10)
(notched side toward
bracket)
to
each template support
bracket
(9),
then attach each template
support assembly
to
the channel
(13)
at
the approximate
locations
shown.
(See
Figure
9.)
Each channel nut
(10)
can
be
engaged
in
the channel
by
turning the nut parallel
to
the channel
slot, inserting it through the channel
slot and then turning it clockwise
to
a
perpendicular
position.
Another
method
of
inserting the channel nut is
to remove a cap
(14)
from the channel,
engage the channel nut in the channel
and then slide the assembly
into
position.
After
using
either
method,
tighten both screws
(11)
finger tight.
R.H. TEMPLATE
SUPPORT ASSEMBLY
L.H. TEMPLATE
SUPPORT
ASSEMBLY \
i
'
------"':--+--~
\~~MPLATE
~
• I
\ENTERS
Figure
8,
Attach each template support Figure
9.
Attach the template support
assembly
to
a bracket, making a left-hand
assemblies, the guard assembly, and the
and a right-hand template support assembly,
support brackets to the channel.
"»"-1
<f-2
3-~
:
-4
0-:::-14
4-0
I I
:-5
, ,
""
6
~
': I ,
I
"-
'
" 10
19
12 ,
fl'1
i
/
~
11-~
7-'i'
t-
7
22
Guard Assembly
~---">8
21
Te!J1Rlate
Support
. Assembly
30-~
,
Table and Table Support Assembly
Tool Rest Assembly
~
4~
! 47
32
"-'N~
'
50
~
51
~
41
~
~
,
'~'
~-52
37
~'/-40
,-53
O-
,-
54
'~5~'-56
i
~57
~8
Spacer
59
0
39~
Note:
See
Parts List section for Part Numbers and Descriptions
of
parts,
9
 Loading...