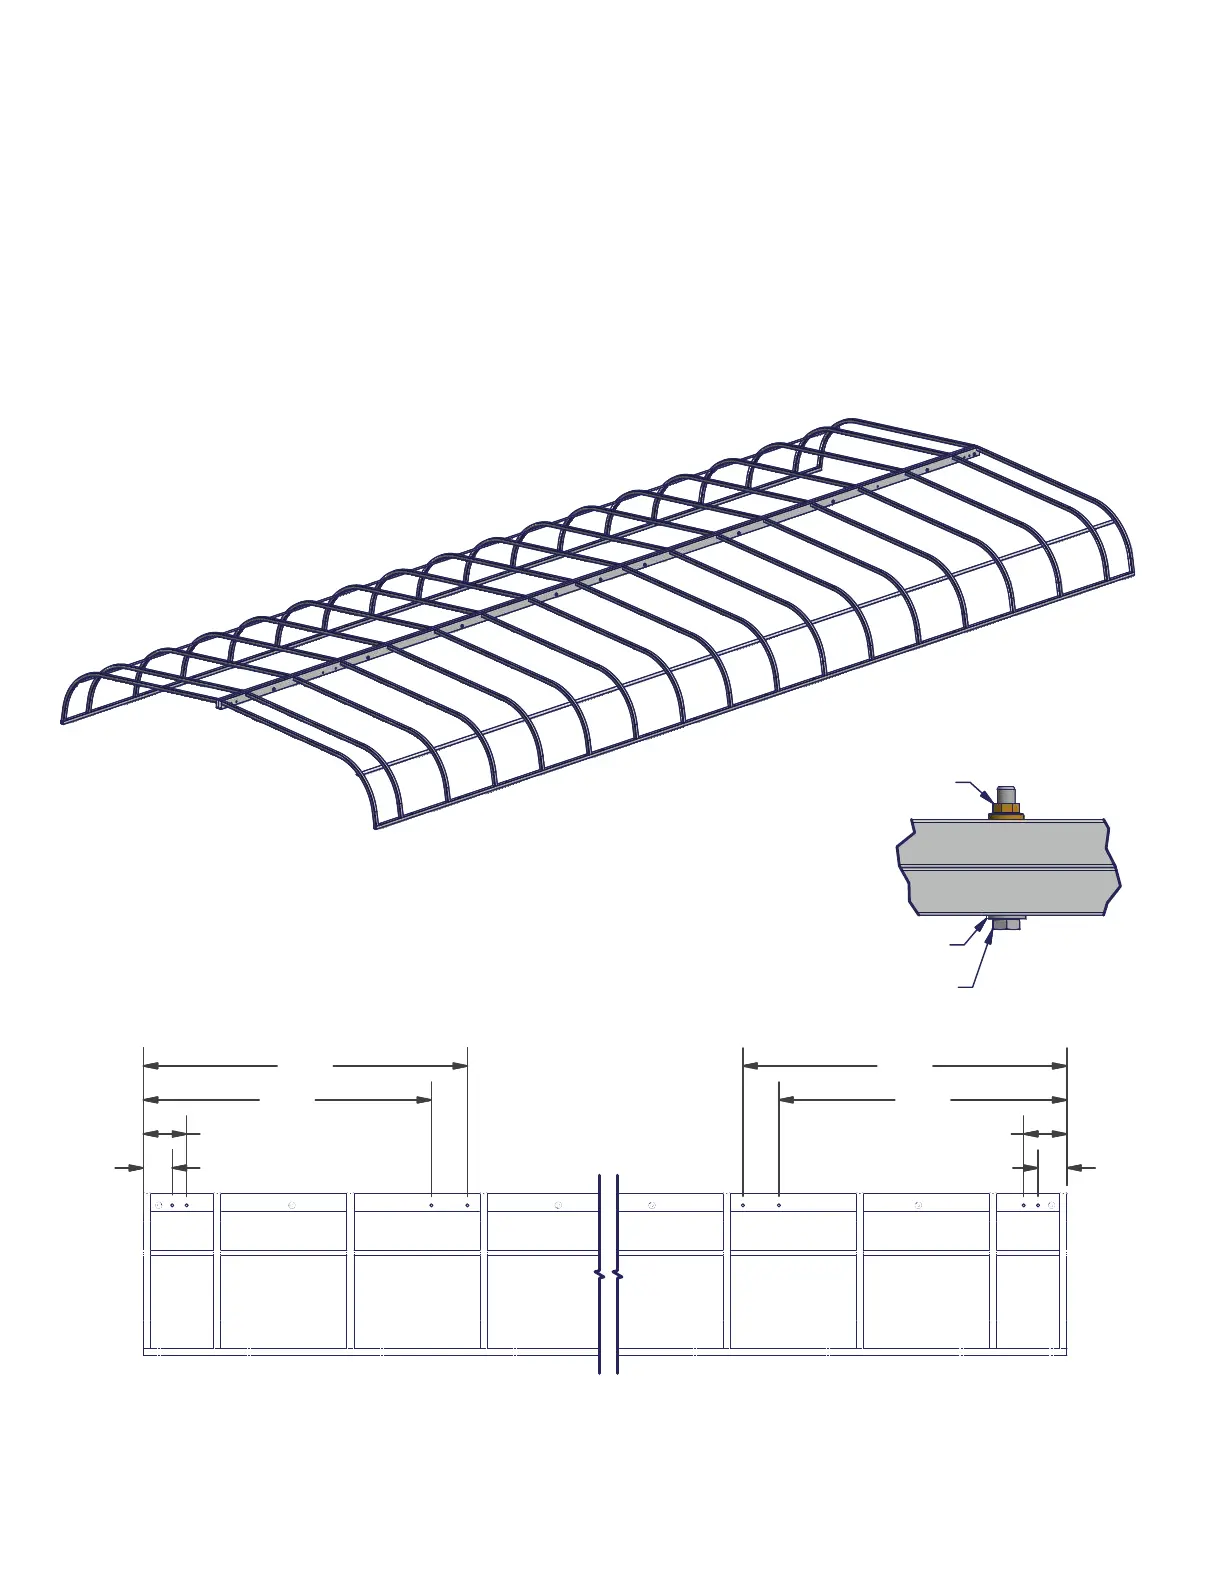
DETAIL A
SCALE 1 / 3
Parts List
DESCRIPTION
ITEM
Wdmt TowerMax Side
1
Washer Flat 3/8 SS
2
Bolt Hex 3/8-16 x 2.75 SS 304
3
Nut Flange 3/8-16 Brass
4
A
Assembly and Installation
4.0
6.0
40.0
45.0
4.0
6.0
40.0
45.0
Step 1. Fasten both full length canopy top weldments together using 3/8 x 2.75 bolts, one flat washer
on the bolt head side, and one 3/8 brass flange nut. Every hole along the center rib should get this
hardware, with the exception of the eight holes detailed below. These will be used later for the actuator,
and adjustable end.
NOTE: Measuring from each end, the holes located 4 inches, 6 inches, 40 inches, and 45 inches from
the end should be left open for now.
LEAVE THESE HOLE
LOCATIONS OPEN.
3/8 X 2.75 HEX BOLT
3/8 FLAT WASHER
3/8 BRASS FLANGE NUT