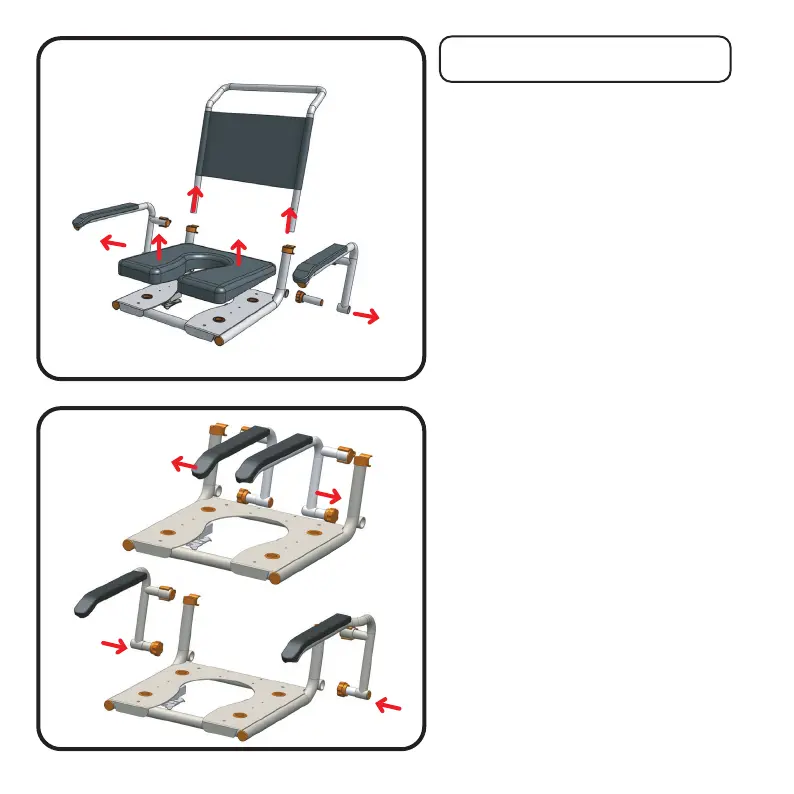
Step 1
Start by removing your handle, seat
cushion and arms as shown in the
illustration.
If needed you should refer to your
chairs user manual, if you don’t have
this you can find it on our website.
Note: If fitting to SB2T or SB3T you will
need to disconnect the tilt release
handle (part #75) from the chair push
handle. Refer to your chair user manual
Pediatric Kit Assembly
Both P1 and P2 kits are assembled in the
same way. A note will explain at each stage
where P1 & P2 options exist.
Step 2
Arm fitting is the reverse of step 1
using your newly supplied pediatric
arm assemblies.
If you are fitting the P1 kit, refer to the
top image, showing the arms being
inserted from the inside
If you are fitting the P2 kit, refer to the
bottom image showing the arms being
inserted from the outside.
P1 & P2 Pediatric Conversion Kit 4
P1
P2