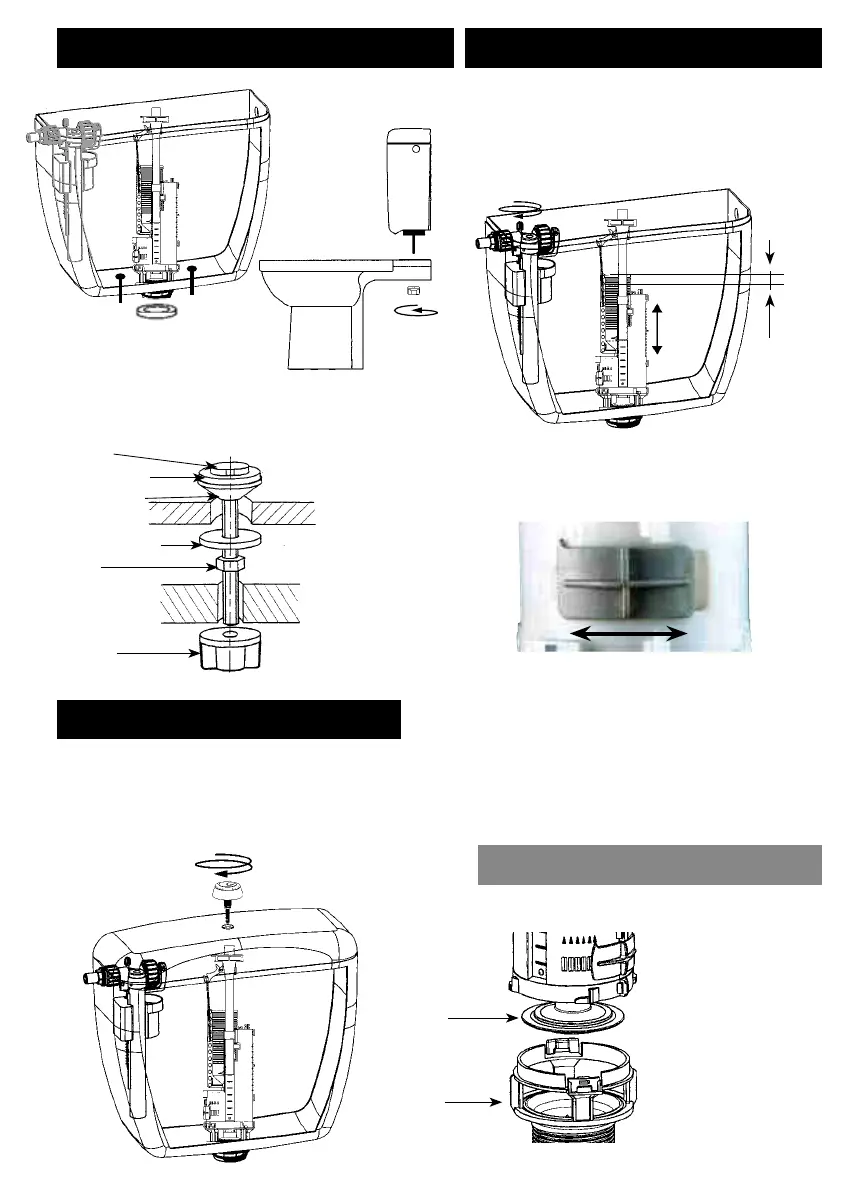
IV - SETTING WATER LEVELIII -
ASSEMBLING BOWL AND CISTERN
V - INSTALLATION OF BUTTON
VI - MAINTENANCE
Bottom of cistern
Wall of bowl
Conical seal
Hexagon nut
Washer
Wing nut
Washer
➊
Fix screws at the bottom
of the cistern (see order of
parts below)
➋
Position the latex foam
gasket on the nut (f)
➌
Position the cistern on
the bowl and secure it
with wing nuts
Changing the valve gasket
➊
After having opened
the cistern, turn the
mechanism 90° to
separate it from its
strainer
➋
Change the valve
gasket
➌
Reposition the
mechanism, locking it
into the strainer
➍
Close the cistern
again.
Valve gasket
Strainer
After having connected your ballcock to the water
supply, open the tap and set the level of the long flush
using the ballcock (see overleaf).
Note: The max. water level should be 20 mm lower
than the overflow tube (l).
To adjust the water level of the short flush, slide the
cursor along (j). Immerse the cursor of 40 mm.
Note : The closer the cursor is to 18, the more
water will be flushed.
➊
Once the set-up has been completed, put on the lid
on the cistern
➋
If the hole in the lid (D) is > 38 mm and < 45 mm,
remove the escutcheon (b)
➌
Position the button on the lid and screw until tight.
20 mm
Overflow
Max.
water level
In some (rare) cases, the residual water level
(amount of water remaining after the long flush)
must be increased to ensure more efficient
cleaning. To do this, move the sliding valve (d) to
the left (the more it is open, the more the residual
water increases).
Note: Increasing the residual water reduces the
volume of water flushed. If necessary, readjust the
max. water level using the ballcock.
M6x78 screw
WATER LEVEL MAX 6L - MIN 4.5L PER FLUSH