© Arc Euro Trade Ltd, England 2012
- 12 -
-
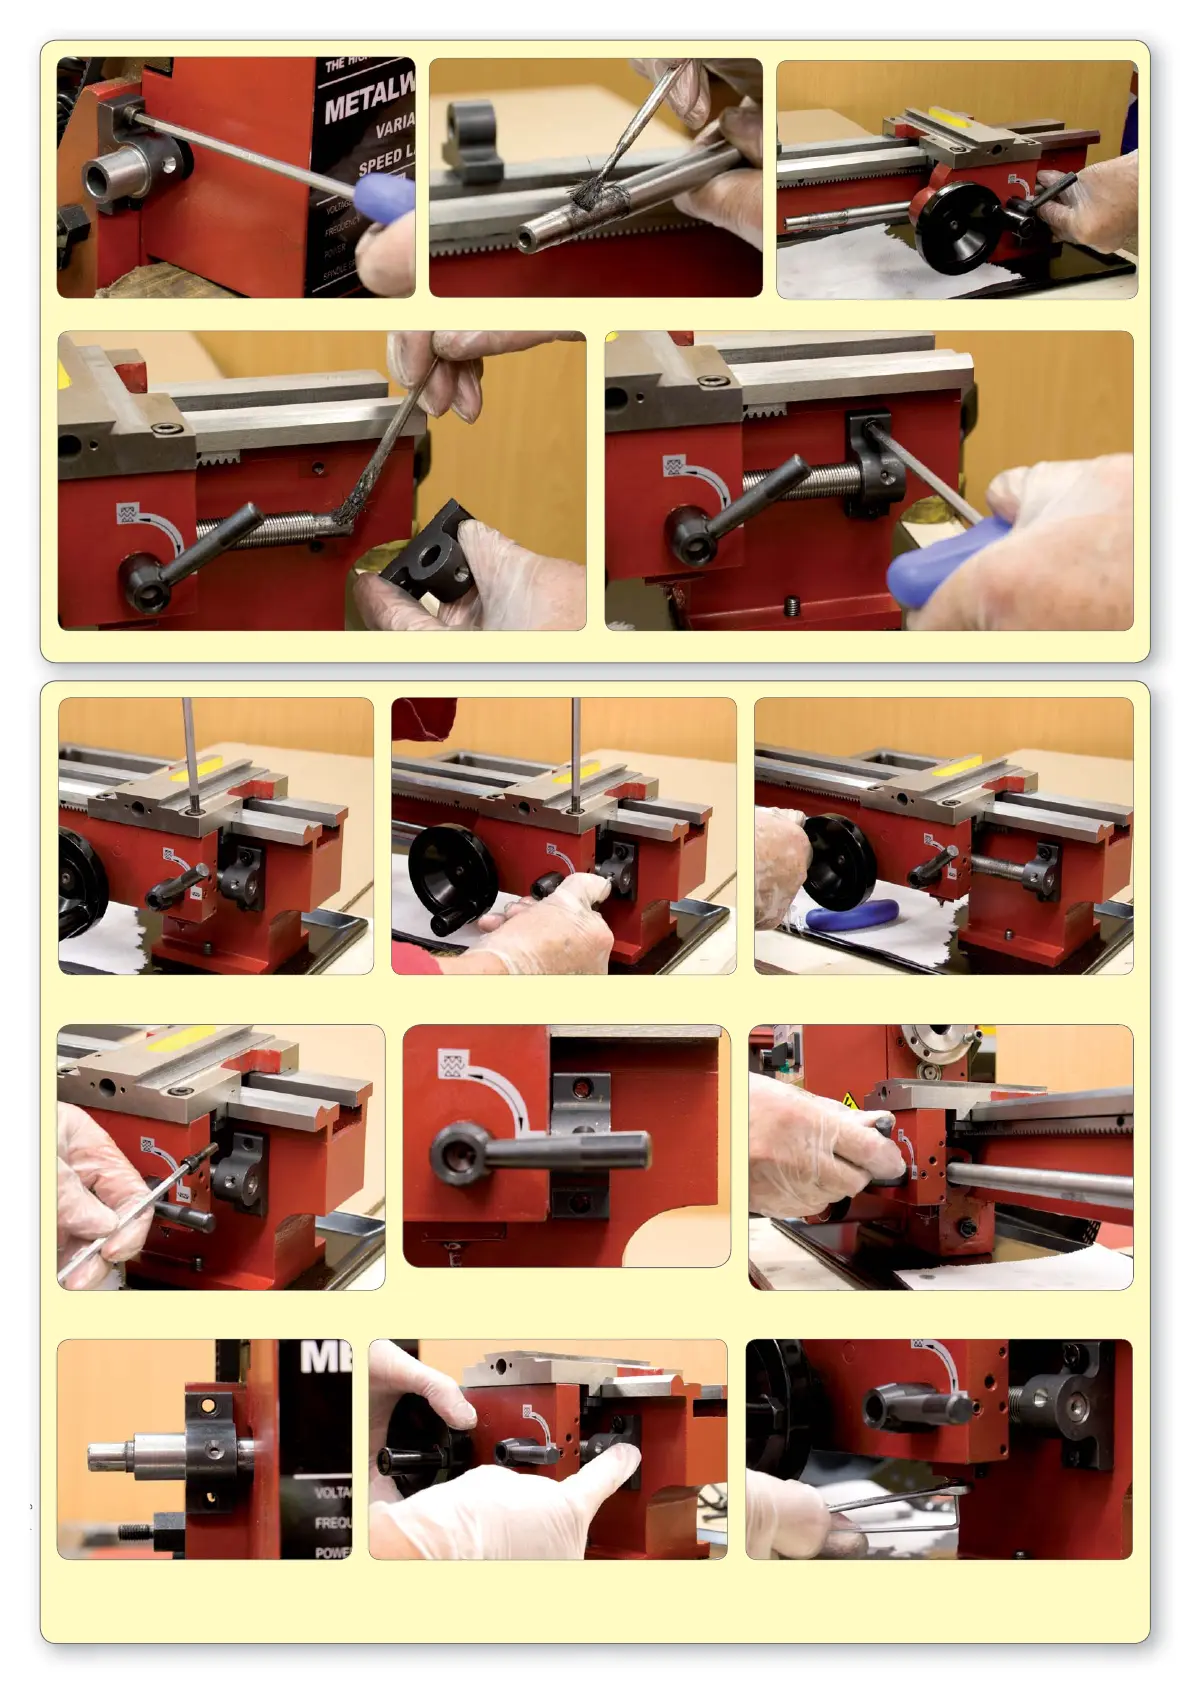
109. Loosely fi t leadscrew bracket & grease bore. 110. Grease end of leadscrew and feed through 1/2 nut and into bracket at headstock end.
111. Grease end of leadscrew and bracket bore and temporarily fi x in place.
112. Slightly loosen apron fi xing screws.
115. Return saddle close to leadscrew bracket
and lock 1/2 nuts. Remove bracket screws.
118. Check the bracket holes align
with holes in bed. If the holes are
misaligned, slot the bracket holes to
correct and refi x the screws.
113. Lock 1/2 nuts onto leadscrew and tighten
apron fi xing screws.
116. Check the bracket holes align with the holes
in bed. If holes are misaligned, slot the
bracket holes to correct and refi x screws.
119. Return saddle to tailstock end and lock 1/2
nuts. Rock handwheel back and forth with
fi nger over end of leadscrew to check for end
fl oat. Tap brackets in to remove end fl oat.
114. Unlock 1/2 nuts and rack saddle up and down
bed to check pinion has no tight spots on rack.
117. Move saddle to headstock end and lock 1/2 nuts.
120. Check bite of 1/2 nuts on leadscrew is not too tight.
Slacken 1/2 nut adjusting screw. Lock 1/2 nuts.
Screw in adjusting screw until it touches and then a
further 1/8th turn. Lock off.
 Loading...