This document describes the Gigaset AS180/AS185/AS280/AS285 cordless telephone system, covering its features, usage, and maintenance.
Handset Features
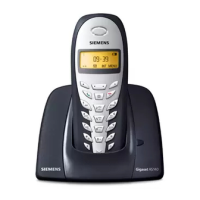
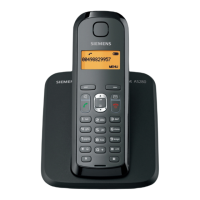
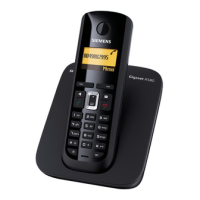
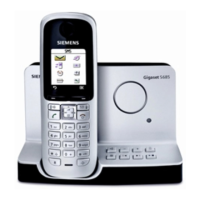
The handset includes several key components and functions:
- Charge status of the batteries (1): Indicates the current battery level.
- Answer machine icon (2) (AS185/AS285 only): Displays when the answer machine is active.
- Display keys (3): Context-sensitive keys whose functions are shown on the display.
- Message key (4): Flashes when new messages are received.
- Directory key (5) (AS180/AS185): Accesses the stored contacts.
- Handsfree key (5) (AS280/AS285): Enables handsfree talking.
- Control key (6) ([]): Used for navigation and adjustments.
- Talk key (7): Initiates or accepts calls.
- Directory key (8) (AS280/AS285, press down): Accesses the directory.
- End call and On/Off key (9): Ends calls or switches the handset on/off.
- Ringer on/off (10) (press and hold in idle status): Toggles the ringer.
- Keypad lock on/off (11) (press and hold): Locks or unlocks the keypad.
- Recall key (12): Used for consultation calls (flash) and dialling pause (press and hold).
- Microphone (13): For speaking during calls.
- "Microphone off" key (14): Mutes the microphone during a call.
Display Keys on Handset:
- INT: Calls other registered handsets (page 11).
- MENU: Opens the main/submenu (Menu tree, page 15).
- <: Goes back one menu level.
- ^/v: Scrolls up/down or adjusts volume.
- </>: Moves the cursor left/right.
- C: Backspace deletes one character at a time.
- OK: Confirms menu functions or saves entries.
Base Station Features
The base station for AS185/AS285 models includes:
- Registration/paging key (1): Briefly press for "Paging" (search for handsets, page 10); press and hold to register handsets (page 10).
- On/Off key (2): Activates/deactivates the answer machine. Lights up when the answer machine is active.
- Volume keys (3) (− = quieter; + = louder): Adjusts speaking volume during message playback or ringer volume during an incoming call.
- Play/Stop key (4): Plays back messages from the answer machine or cancels playback. Flashes for new messages or when a message is being recorded. Flashes quickly if memory is full.
- Delete current message (5): During message playback.
- Skip to start of current message (6): Press once; press twice for the previous message.
- Skip to next message (7): During message playback.
First Steps and Setup
Pack Contents:
The package typically includes a Gigaset base station (AS180/AS185/AS280/AS285), a mains adapter, a Gigaset handset (AS18H/AS28H), a phone cord, two batteries, a battery cover, and a user guide. Multi-handset models include additional batteries, covers, and charging cradles.
Setting up the Base Station and Charging Cradle:
- The base station and charging cradle should be placed in dry rooms with temperatures between +5°C and +45°C.
- Place the base station centrally on a flat, non-slip surface.
- Range: Up to 300 m outdoors, 50 m indoors. Range is reduced in Eco Mode.
- Connect the mains adapter (1) and telephone jack (2), then insert cables into ducts. Only use supplied mains adapter and phone cord.
Setting up the Handset:
- Remove the protective film from the display.
- Inserting Batteries: Use only recommended rechargeable NiMH AAA batteries (page 12). Insert with correct polarity.
- Closing Battery Cover: Slide the cover back until it clicks.
- Opening Battery Cover: Place a fingertip in the grooved area and slide down.
Placing the Handset in the Base Station and Registering:
- Place the handset with the display facing up in the base station.
- Registration can take up to 5 minutes. Do not remove the handset during this time.
- After successful registration, the idle screen is displayed.
- Battery Charge Status: Indicated by icons (flat to full, flashing for low or charging).
- For multiple handsets, repeat the process. Handsets are assigned internal numbers (1-4).
- Manual Registration: If automatic registration fails, refer to page 10.
- Initial Charging: Charge for 8 hours, then fully discharge before subsequent charging.
Setting Date and Time:
- MENU → Settings → OK → Date/Time → OK.
- Enter date (DDMMYY) and time (HHMM).
- Press OK to save.
- Press and hold to return to idle status.
Activating/Deactivating the Handset:
- Press and hold the end call key.
- Placing a deactivated handset in the base station or charging cradle automatically activates it.
ECO DECT Features
The Gigaset AS180/AS185/AS280/AS285 includes energy-saving features:
- Reduced Energy Consumption: Uses a power-saving adapter plug.
- Reduced Transmission Power: Handset transmission power reduces with distance to the base station. Base station transmission power is near zero when one handset is registered and in the base station.
- Eco Mode: 80% transmission power reduction in standby and during calls (reduces range).
- Eco Mode+: 100% transmission power deactivation in standby (icon ☑ displayed). Press and hold the talk key to check base station reachability.
Making Calls
External Calls:
- Enter the phone number and press the talk key.
- Adjust earpiece volume with ^/v.
- End calls with the end call key.
- Automatic network provider dialling code insertion is possible (Menu tree "Preselection", page 17).
Accepting Calls:
- Press the talk key.
- If "Auto Answer" is activated (Menu tree, page 17), simply remove the handset from the base station/charging cradle.
- Adjust call volume with ^/v.
Calling Line Identification (CLIP):
- Caller's number and name (if stored in directory) are displayed.
- Requires CLIP service from network provider.
- "≪≫" appears if CLIP is not requested.
- "Withheld" appears if the caller withheld CLI.
- "Unavailable" appears if CLI has not been requested.
Switch to Mute:
- Press the "Microphone off" key during an external call to mute/unmute.
Handsfree Talking (AS280/AS285 only)
- Activate while dialling: Enter number and press the handsfree key.
- Switching during call: Press the handsfree key to activate/deactivate.
- Adjust handsfree volume with ^/v.
Using the Directory and Lists
Directory:
- Open with the directory key.
- Stores up to 40 (AS180/AS185) or 80 (AS280/AS285) numbers (max. 32 digits) and names (max. 14 characters).
- Saving a new entry: Directory key → New Entry? → OK → (enter number) → OK → (enter name) → OK.
- Selecting an entry: Open directory, use ^/v to scroll, or enter the first character.
- Dialling: Select entry, press talk key.
- Other functions: Select entry, press MENU.
- New Entry: Save new number.
- Show Number: Display number.
- Use Number: Edit/add to number, dial, or select other functions.
- Edit Entry: Edit selected entry.
- Delete Entry: Delete selected entry.
- Send Entry: Send a single entry to another handset (page 8).
- Delete List: Delete all directory entries.
- Send List: Send the complete list to another handset (page 8).
- Shortcut: Assign current entry to a key (0, 2-9). Press and hold the key to dial.
Transferring the Directory:
- Both handsets must be registered to the same base station and support directory transfer.
- (select entry) → MENU → Send Entry / Send List → OK → (enter internal number of receiving handset) → OK.
Last Number Redial List:
- Contains the ten last dialled numbers.
- Dialling: (press briefly) → (select entry) → talk key.
- Managing entries: (press briefly) → (select entry) → MENU.
- Use Number: Edit/add to number, dial, or select other functions.
- Copy to Dir.: Copy entry to directory.
- Delete Entry: Delete selected entry.
- Delete List: Delete all entries.
Calls List/Voicemail (Network Mailbox) List:
- Advisory tone and flashing message key indicate new entries.
- Press the message key to display lists. If only one list has new messages, it opens automatically.
- Calls List: Requires CLIP (page 7). Contains answered, missed, or answer machine calls (AS185/AS285 only). Saves up to 25 incoming calls.
- Voicemail List (AS185/AS285 only): Listen to messages on the answer machine.
- Opening Voicemail List: VoiceMail 01+02 → OK. Playback starts with the first new message.
- Using other functions (Voicemail List): (select entry) → MENU.
- Continue: Resume paused playback.
- Volume: Set the volume.
- Copy to Dir.: Copy entry to directory.
- Delete all old: Delete all old messages.
Answer Machine Operation (AS185/AS285)
- Operated from handset or base station key (page 1).
- Supplied with a pre-recorded announcement.
- Switches off automatically if memory is full, reactivates when old messages are deleted.
Activating/Deactivating:
- MENU → Voice Mail → OK → Answer Mach. → OK (✓ = on).
- The icon appears when on.
Recording Your Own Announcement:
- MENU → Voice Mail → OK → Announcements → OK → Rec announce → OK → Speak after OK → OK.
- Record for at least 3 seconds. Press OK to confirm, or C/↔ to reject.
- Recording ends automatically after 170 seconds or 2 seconds of silence.
Playing Back/Deleting Announcements:
Playing/Deleting Messages:
- Open voicemail list to play messages.
- During playback:
- 2: Stop playback (press 2 again to resume).
- ^: Go to start of current message.
- <: Skip to previous message.
- >: Skip to next message.
- ^^: Go to next message but one.
- C: Delete current message (while paused).
- MENU → Delete all old → OK: Delete all old messages (during playback or pause).
Picking up a Call from the Answer Machine:
- Press talk key while the answer machine is recording. Recording stops, and you can speak to the caller.
Setting up the Answer Machine:
- Preset at factory. Individual settings via handset.
- Delay time, recording length, and call screening (Menu tree, page 15).
Setting a Different Language:
- MENU → 43921.
- Select language (0=German, 1=French, 2=Italian). Display shows "Saved".
Assigning Key 1 for Fast Access to Network Mailbox:
- Press and hold key 1 on the handset to connect to the network mailbox.
- See Menu tree, page 15.
Remote Operation:
- Check and activate your answer machine from any other telephone.
- Requirements: System PIN other than 0000 (page 17), and the remote phone must have touch tone dialling (DTMF).
- Calling and Playing Messages: Dial your own number, press key during announcement, enter system PIN.
Using Several Handsets
Making Internal Calls:
- Press INT, then (1...4 for specific handset) or * (all handsets).
- Press end call key to end.
Internal Consultation Call/Connecting a Call:
- During an external call, press INT and call one or all handsets. External participant hears hold music.
- Before internal participant answers: Press end call key to divert.
- After internal participant answers: Talk to them. Press end call key to divert, or display key 1 to reconnect to external participant.
Listening in to an External Call (Conference):
- Precondition: "Listening in" function must be activated.
- Activating/Deactivating: MENU → Settings → OK → Base → OK → Listening in → OK (✓ = on).
- Internal Listening: During an external call, press and hold key. All participants hear a signal tone.
- To end: Press end call key.
- If the first internal participant presses end call key, the "listened in" handset remains connected.
Setting the Alarm Clock
Activating/Deactivating:
- MENU → Alarm Clock → OK → Activation → OK (✓ = on).
- When activated: Set wake-up time → OK.
- When ringing, press any key to switch off for 24 hours. Icon and wake-up time are displayed.
Setting Wake-up Time:
- MENU → Alarm Clock → OK → Wake-up time → OK.
- Enter time (HHMM), press OK.
Phone Settings
- Audio Settings: Menu tree, page 15.
- System PIN: Menu tree, page 17.
Changing Display Language:
- MENU → Settings → OK → Handset → OK → Language → OK → select language → OK.
- Current language is indicated by ✓.
- If you choose an unknown language: MENU → 421, then select correct language with ^/v and OK.
Resetting the Handset:
- Resets individual settings, but retains directory, calls list, and registration.
- MENU → Settings → OK → Handset → OK → Reset Handset → OK.
- Cancel with C.
Restoring Base Station to Factory Settings:
- De-registers all handsets.
- Resets individual settings.
- Deletes all lists.
- Resets system PIN to 0000.
- Only date and time are retained.
Appendix
Entering Letters/Characters:
- Press the relevant key multiple times.
- Briefly press #º to switch between "Abc", "123", and "abc" modes.
- Standard Characters Table: Provides key presses for various characters including letters, numbers, and symbols.
Specifications:
- Recommended Batteries: Nickel-metal-hydride (NiMH) AAA (Micro, HR03), 1.2 V, 400-800 mAh.
- Recommended types: GP 550/700 mAh, Yuasa Phone 700/800 mAh, Peacebay 550/650 mAh.
- Base Station Power Consumption:
- Standby (handset in base station): approx. 1.3 W.
- Standby (handset outside base station): approx. 1.3 W.
- During a call: approx. 1.5 W.
- General Specifications:
- DECT standard: Supported.
- GAP standard: Supported.
- Range: Up to 300 m outdoors, up to 50 m indoors.
- Base station power supply: 230 V ~/50 Hz.
- Environmental conditions in operation: +5°C to +45°C, 20% to 75% relative humidity.
Safety Precautions
- Read the user guide and safety precautions carefully.
- Use only the supplied mains adapter.
- Use only recommended rechargeable batteries; never use other types or non-rechargeable batteries.
- May affect medical appliances.
- Do not hold the rear of the handset to your ear when ringing to avoid hearing damage.
- Do not install in bathrooms or shower rooms (not splashproof).
- Do not use in environments with explosion hazards.
- If giving the Gigaset to someone else, provide the user guide.
- Remove faulty base stations from use or repair them.
- Disposal: Dispose of batteries and electrical/electronic equipment separately from general household waste, according to local regulations.
- Emergency numbers cannot be dialled if keypad lock is active.
- Not all functions are available in all countries.
Care
- Wipe base station and handset with a damp cloth (no solvents) or antistatic cloth. Never use a dry cloth.
- Contact with liquid:
- Switch off handset and remove batteries immediately.
- Drain liquid.
- Pat dry, then place handset with open battery compartment and keypad facing down in a dry, warm place for at least 72 hours (not in microwave/oven).
- Do not switch on until completely dry.
Service (Customer Care)
- Online Support: www.gigaset.com/customercare (24/7 support, FAQs, user guides, software updates).
- Service Centre (Ireland): 18 50 77 72 77. Have proof of purchase ready.
- Replacement/repair services are not offered in countries where the product is not sold by authorised dealers.
Authorisation
- Intended for use with analogue telephone lines on the Irish network.
- For use within the European Economic Area and Switzerland.
- Country-specific conditions considered.
- Gigaset Communications GmbH declares compliance with Directive 1999/5/EC.
- Declaration of Conformity available at www.gigaset.com/docs.
- CE 0682
Guarantee Certificate
- Manufacturer's Guarantee: 24 months for defects from manufacturing/material faults. Parts subject to wear (batteries, keypads, casing) have a 6-month warranty.
- Invalid Guarantee: Improper care/use, non-compliance with user manuals, third-party intervention, unauthorised repairs, manipulated components/software, damage from dropping/breaking/lightning/moisture/mechanical/chemical/radio interference/thermal factors, or unauthorised accessories.
- Proof of Purchase: Required for invoking guarantee. Claims must be submitted within two months of the default.
- Ownership: Replaced components become property of Gigaset Communications.
- Applicability: Applies to new devices purchased in the European Union. For Ireland, issued by Gigaset Communications UK Limited.
- Exclusions: Other claims are excluded. Does not limit customer statutory rights or manufacturer's liability for death/personal injury from negligence.
- Duration: Not extended by services rendered under guarantee terms.
- Charges: Gigaset Communications reserves the right to charge for replacement/repair if no guarantee default exists.
- Contact: Gigaset Communications helpdesk on 1850 777 277.