Do you have a question about the Siemens iQ700 SN Series and is the answer not in the manual?
Read use and installation instructions carefully for important information. Retain documents for future use.
Check packaging and appliance for transit damage. Dispose of packaging environmentally. Keep children away from packaging.
Ensure safe installation, follow electrical connection specs, avoid heat sources, secure unit if needed.
Read and observe safety info and instructions for use on packaging for cleaning agents.
Appliance may only be repaired by technician; disconnect power if damaged. Call customer service for defects.
Make redundant appliances unusable to prevent accidents. Dispose of appliance environmentally.
Prevent injuries by opening door briefly; place sharp items down; do not lean on door.
Do not add solvents to rinsing compartment; risk of explosion.
Open door carefully when programme is running; risk of hot water spraying.
Use childproof lock; keep children away from appliance, detergents, and rinse aid.
Protects children from hazards; activate/deactivate as shown. Always close door when leaving.
Dispose of plastic parts sorted by type; ask dealer for disposal means. Follow delivery safety instructions.
Follow disposal safety instructions; appliance identified with WEEE directive for collection and recycling.
Diagrams of control panel parts are found at the front; individual positions are referred to in the text.
Diagrams of appliance interior parts are found at the front; individual positions are referred to in the text.
Used to display additional programme information.
Set the time as follows: open door, switch on, press Info button, scroll, set time, confirm.
Initial setup includes language, time format, time setting, and rinse aid dispensing.
Change factory preset settings for convenience: time, format, language, rinse aid, sensor, extra dry, etc.
Open dispenser, add rinse-aid to max mark, close lid, wipe overflow.
Set amount from 0-6 for drying result; adjust if streaks or stains appear.
Turn off indicator if combined detergents impair its function; set amount to 0.
Lists items not suitable for dishwashers: wood, delicate glass, plastic, copper, tin, soiled items.
Causes include glass type, detergent, water temp; use dishwasher-proof items.
Remove food remnants; place utensils securely, openings down, allow drainage, do not obstruct spray arms.
Arrange cups and glasses in the upper basket.
Arrange pots and plates in the lower basket.
Place cutlery unsorted, tips down; use knife shelf for long items.
Arrange cutlery in the drawer for easier removal after washing.
Use for small cups/glasses or cutlery; can be folded up or height adjusted.
Spikes can be folded down to arrange pots, bowls, and glasses.
Used to securely attach light plastic parts in the upper basket.
For long knives and other utensils in the upper basket's knife shelf.
For cleaning large trays, grilles, and plates; requires removing upper basket.
Empty from bottom up to prevent dripping; let utensils cool before handling.
Adjust upper basket height to create more space for taller items.
Instructions for adjusting upper basket height using side levers.
Instructions for adjusting upper basket height using roller pairs.
Pour detergent into dispenser; follow dosage instructions; close cover.
Select suitable programme based on utensil type and soiling.
Test institutes can request conditions by email; quote appliance number and production date.
Reduces running time by 20-50%; increases water/energy consumption.
Saves water, energy, time for few items; use less detergent.
Increases temperatures for disinfection; ideal for hygiene-sensitive items.
Washes soiled pots/pans in lower basket with normal items in upper.
Increases rinse water/drying time to prevent stains and improve drying.
Change factory presets for convenience: language, time, sensor settings, extra dry, etc.
Optical sensor measures water turbidity to optimize rinsing and reduce consumption.
Uses Zeolith mineral to store and release heat/moisture for efficient drying.
Change display to show remaining time or ready time.
Adjust sensor sensitivity (Standard, Sensitive, Very sensitive) for auto programmes.
Final rinse uses higher temperature for improved drying result.
Displays average water/energy consumption of selected programme.
Appliance switches off automatically after 1 min or 2 hours to save energy.
Interior lighting can be switched on or off.
Switch the front display on or off for additional programme information.
Optical display on the floor shows programme information; can be switched on/off.
Light spot on floor indicates programme status; can be switched on/off.
Allows changing the 'Start programme' setting.
Adjust the volume of end-of-programme signals.
Control volume of button press signals or switch off.
Electronic lock to protect children from hazards; difficult to open door when active.
Option to switch off the brand logo that appears on startup.
Reset all settings back to original factory values.
Procedure to turn on the appliance and start a programme.
Delay programme start by up to 24 hours.
Indicates programme completion on display and floor (if active).
Procedure to turn off the appliance after the programme ends.
Procedure to safely interrupt a running programme and save its state.
Procedure to cancel and end a running programme.
Cannot change programme after START; requires reset.
Interior self-cleans; deposits may require manual removal with detergent.
Special programme for cleaning the dishwasher; recommended for preventing faults and odours.
Check and clean coarse, flat fine, and microfilters after each wash cycle.
Check and clean spray arms for blockages from limescale and contaminants.
Faults indicated on display with possible remedies (e.g., E22 for filter system).
Clean pump if blocked by food remnants; disconnect power, remove baskets and filters.
Lists error codes, causes, and remedial actions for various faults.
Follow steps: delivery check, installation, drainage, water, electrical connections.
Lists included items: dishwasher, manuals, installation materials, power cord.
Follow safety instructions under 'Installation' on page 6.
Appliance checked at factory; may have water stains which disappear after first wash.
Details weight, voltage, power, fuse, water pressure, temperature, capacity.
Required dimensions, leveling with adjustable feet, securing appliance.
Connect waste-water hose to siphon; ensure it's not kinked.
Fasten water connection to tap; ensure hose is not kinked; use new hose when replacing.
Connect to cold or hot water (max 60°C); hot water connection saves energy.
Connect to 220-240V socket with earth conductor; socket must be accessible.
Steps for removing appliance: disconnect power, turn off tap, undo connections, loosen screws.
Empty dishwasher, secure parts, drain appliance using highest temp programme.
Empty appliance completely if stored in a room with frost risk.
| Brand | Siemens |
|---|---|
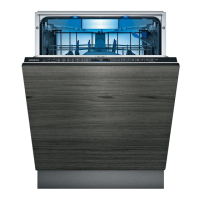
| Model | iQ700 SN Series |
| Category | Dishwasher |
| Energy Efficiency Class | A+++ |
| Capacity | 14 place settings |
| Water Consumption per Cycle | 9.5 liters |
| Delay Start | Yes |
| Half Load Option | Yes |
| Child Lock | Yes |
| Dimensions | 60 x 60 x 85 cm |
| Programs | Intensive, Eco, Quick, Glass |
| Size | Full size |
| Special Features | VarioSpeed |
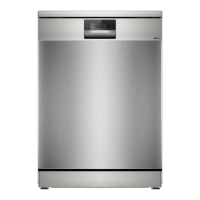
| Type | Freestanding |
| Drying System | Zeolith Drying |