en
25
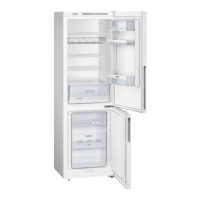
Fittings
Shelves and containers
You can vary the shelves inside the
appliance and the containers in the door
to suit your requirements. Pull the shelf
forwards, lower and swing it out to the
side. Lift the container and remove.
Special fittings
(not all models)
Butter and cheese compartment
To open the butter compartment, gently
press in the middle of the butter
compartment flap.
To clean the compartment, lift it at the
bottom and take out.
Breakfast set
Fig. 5
The containers for the breakfast set can
be taken out and filled individually.
You can take out the breakfast set for
loading and unloading. To do this, lift the
breakfast set and pull out. The holder of
the container can be moved.
Bottle tray
Fig. 6
Bottles can be securely stored on the
bottle tray.
Ice tray
Fig.
1. Fill the ice tray ¾ full of drinking water
and place in the freezer compartment.
2. If the ice tray is stuck to the freezer
compartment, loosen with a blunt
implement only (spoon-handle).
3. To loosen the ice cubes, twist the ice
tray slightly or hold briefly under
running water.
Freezer calendar
Fig.
To prevent the quality of the frozen food
from deteriorating, do not exceed the
storage period. The figures next
to the symbols indicate the permitted
storage period of the frozen food
in months. In the case of commercially
available frozen food observe the date of
manufacture or use-by date.
Ice pack
The ice pack can be removed to cool
food temporarily, e.g. in a cold bag.
If a power failure or malfunction occurs,
the ice pack can be used to slow down
the thawing process.
Sticker “OK”
(not all models)
The sticker “OK” lets you check whether
the refrigerator compartment achieves
the safe temperature ranges of +4°C or
colder recommended for food. If the
sticker does not indicate “OK”, gradually
reduce the temperature.
Note
Once the appliance is switched on, it
may take up to 12 hours until the set
temperature is reached.
Correct setting
 Loading...