6
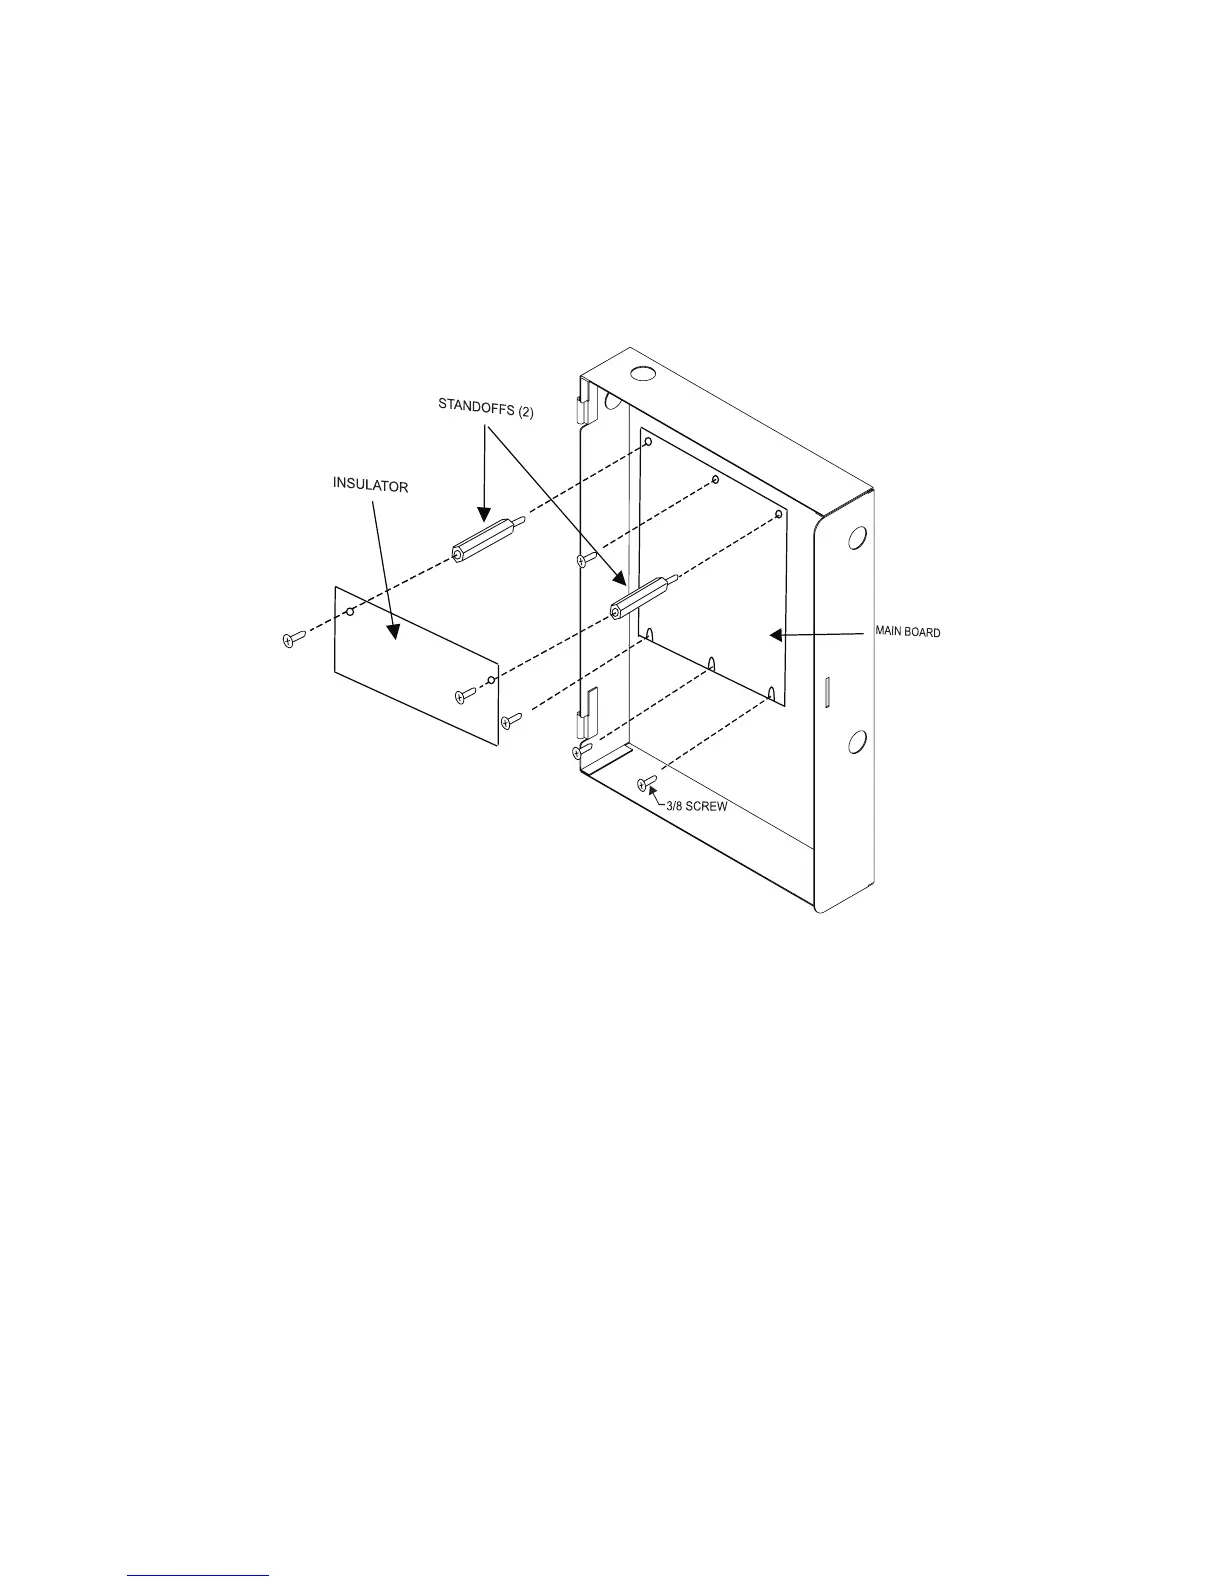
2.2 CONTROL UNIT MOUNTING
To install the main board, install 3 screws loosely into the bottom mounting holes or mounting rails. Slide
the bottom of the board behind the screws, aligning the screws with the slots in the board. Install a screw
in the center position at the top of the board, and two male standoffs in the top left and top right corners of
the main board. Tighten all fasteners. Next, install the insulator to the standoffs using the two remaining
screws. All mounting hardware is included with the PAD-3 main board. See Figure 2-1 below for details.
Figure 2-1. Mounting the PAD-3-MB
Before installing the PAD-3, the input must first be wired into the building’s main electrical power through
the TB1 terminals. See Figure 2-2 on page 8. Shut off the electrical power to the PAD-3, and then
complete the general installation of the PAD-3 using the information in this section.
 Loading...