Functions
5.7 Closed-loop control
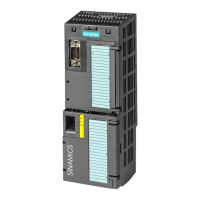
Frequency inverter
116 Operating Instructions, 08.10. 2008, t.b.d.
CAUTION
Use a shielded cable to connect the speed encoder. The shield must not be interrupted by
terminal points between the encoder and frequency inverter.
Setting the encoder voltage
The encoder voltage is set using the DIP switches at the front of the CU. If you use either a
BOP or a PC Connection Kit, you must remove this module in order to be able to access the
switches.
Table 5- 27 Encoder voltage settings
Encoder type Setting of the DIP switches at the front of the CU
No encoder
9VXSSO\
9VXSSO\
7HUPLQDWLRQ
(QFRGHU$
7HUPLQDWLRQ
(QFRGHU$
7HUPLQDWLRQ
(QFRGHU$
21
234
5
67
$,
$,
2))
TTL encoder
Supply voltage: 5 V
9VXSSO\
9VXSSO\
7HUPLQDWLRQ
(QFRGHU$
7HUPLQDWLRQ
(QFRGHU$
7HUPLQDWLRQ
(QFRGHU$
21
234
5
67
$,
$,
2))
HTL encoder
Supply voltage: 24 V
9VXSSO\
9VXSSO\
7HUPLQDWLRQ
(QFRGHU$
7HUPLQDWLRQ
(QFRGHU$
7HUPLQDWLRQ
(QFRGHU$
21
234
5
67
$,
$,
2))
DIP switches 1 and 2 are of no significance when setting the encoder voltage
WARNING
If DIP switch 3 is set to ON (24 V), a TTL encoder (voltage level 5 V) must not be
connected to the frequency inverter.
 Loading...