EasyManua.ls Logo

SIG Rascal 110 - User Manual

SIG Rascal 110
34 pages
Print Icon
To Next Page IconTo Next Page
Loading...
RASCAL 110 ARF ASSEMBLY MANUAL
INTRODUCTION:
SIG's RASCAL 110 ARF represents one of the largest, best built
R/C model aircraft ever offered to modelers. The distinctive and
classic lines of the Rascal are reminiscent of the beautiful personal
aircraft designs of the thirties and post WWII periods. The elegant
good looks of the Rascal design seem to bridge the gap between
modern small aircraft and airplanes from the golden age of flight.
Designed specifically for modelers who have always wanted a
large, giant-scale airplane without all of the large airplane hassles,
the Rascal 110 ARF kit offers a perfect balance of size,
performance, looks, and versatility. From experience, we can tell
you that the Rascal 110 ARF will almost always draw a crowd of
admiring onlookers. But when the airplane takes to the air, the
smooth flight characteristics and sheer size make it even more
impressive.
You will have never flown an easier to handle airplane than the
Rascal 110 ARF. Take-offs and landings are spectacular in their
smoothness and when it comes to what goes on in the air, the
Rascal 110 is positively elegant. Despite it’s large size, the Rascal
110 can be easily flown at most typical R/C flying sites, either
grass or asphalt fields. Landings can be very slow and predictable
and the take-off runs are usually less than many .40-size trainers.
Powered with typical 1.20 4-stroke engines, the Rascal 110 is
capable of mild aerobatics, such as loops, lazy rolls, inverted flight,
etc. Power the airplane with larger engines and things can get a
bit more interesting. Our Rascal 110 models, powered with 1.50
or 1.80 4-stroke engines and 1.50 2-stroke engines, turned into
very capable aerobatic airplanes! Of course, the Rascal 110 ARF
is not a pure aerobatic machine and was never intended for IMAC
competition. None-the-less, with practice, it will deliver an
amazingly nice flight routine.
The Rascal 110 ARF is very well built, with attention paid to every
detail of its construction and finish. Even the functional aluminum
wing struts have been expertly built and factory painted, providing
just the right "look" to the model. The fiberglass cowl and wheel
pants are equally impressive, giving the airplane that "finished"
look, truly setting it apart from anything else available. The
airframe has been expertly covered with AeroKote
, employing a
trim scheme that is highly visible in flight and very attractive on the
ground. The kit includes all of the detailed decals seen on the box
art, allowing you to make the model very realistic. SIG has even
included a beautiful scale-like tailwheel assembly that fits the look
of this airplane almost perfectly!
Because of its size and lifting ability, the Rascal 110 ARF is a great
choice for use as a camera ship, either still or video. Properly
powered, it would also make a good glider tug and is also certainly
capable of towing banners. Properly modified, it could also be
used to drop candy or parachutes. Another potential use for this
versatile model is night flying. Because the trim scheme employs
the use of transparent covering material in the open areas of the
structure, lighting systems - such as those made and sold by Ram
Products - would be very effective!
Assembly of the Rascal 110 is easy, quick, and straightforward.
This assembly manual is fully illustrated and includes all detailed
instructions in the correct sequence. This allows you to get the
airplane from the box to the flying field in a very short amount of
time. We strongly suggest that you read through this manual first
to get familiar with the various parts and their assembly
sequences. The proper assembly and flying of this aircraft is your
responsibility. If you are new to the sport/hobby of radio control
model airplanes, we urge you to seek the assistance of a qualified
person to help you assemble this R/C model aircraft correctly. If
you do not understand a particular assembly step or sequence,
DO NOT guess - find qualified help and use it.
RADIO EQUIPMENT:
The Rascal 110 ARF requires a 4-channel radio system, with five
servos. Because of its size and the wide variety of engines that
can be used in this airplane, we highly recommend that you use
servos with at least 60 in/ounces of torque. Such servos are more
appropriate for a model of this size.
We use and can highly recommend either the Airtronics™
RD-6000 Sport system or the Hitec™ Flash 4X system for this
airplane. Both of these affordable and reliable computer radio
systems offer all the features you'll need for this and the many
other R/C aircraft in your future. For reference, this assembly
manual shows the installation of Hitec™ #HS-545BB servos for
aileron, rudder, and elevator controls. A Hitec™ #HS-300
standard servo is used for throttle control. We used a Hitec™
#23873 RCD 3800 Supreme Shift Select receiver and a Hitec™
#57215 Standard Switch Harness. We also used one Hitec™
#54606 36" servo extension for the elevator servo and two Hitec™
#57346 24" servo extensions for the aileron servos. A Hitec™
#57350 Y-Harness to connect the aileron servo leads to the
receiver. All of these items are available separately as after-
market equipment at very affordable prices. See your local hobby
shop for more information.
We like to use Du-Bro after-market servo output arms. These are
exceptionally strong and always seem to be the right shape and
geometry for most of our applications. Du-Bro makes their output
arms to fit any available servos, just use the right part number for
your particular brand of servos. Because our assembly manual
model is using Hitec™ servos, we chose the Du-Bro #675 set.
With an R/C model as large as the Rascal 110 - especially when
using five servos - we always suggest using airborne battery packs
with larger capacity than the typical battery packs supplied with
most radio systems. For example, we used an after-market
1400mAh four-cell battery pack in the model shown in this
assembly manual. Be sure you have a charger capable of properly
charging these larger battery packs.
1
R

Other manuals for SIG Rascal 110

Question and Answer IconNeed help?

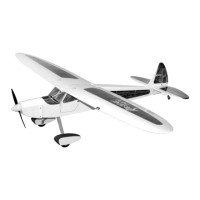
Do you have a question about the SIG Rascal 110 and is the answer not in the manual?

Summary

Introduction

Radio System Requirements

Requires a 4-channel radio system with five servos, recommending servos with at least 60 in/ounces torque.

Recommended Radio Systems

Recommends Airtronics RD-6000 Sport or Hitec Flash 4X systems, listing specific Hitec components used.

Engine Selection

Glow Engines

Discusses using 2 or 4-stroke glow engines, noting fuel consumption and exhaust residue.

Twin-Cylinder 4-Stroke Engines

Suggests twin-cylinder 4-strokes in 1.60 to 1.82 sizes, mentioning potential cowl installation challenges.

Smaller Gasoline Engines

Recommends smaller gas engines (1.3-1.6 cu in) for good performance, reliability, and ease of cleanup.

Covering Material

Wrinkle Removal

Explains how to remove wrinkles from AeroKote covering using a hobby iron and protective cloth.

Seam Sealing

Emphasizes sealing all seams with an iron, especially important for preventing exhaust residue contamination.

Required Tools

Basic Aircraft Parts

Sub Assemblies

Miscellaneous Wood Parts

Main Wing Joiner Parts

Control Surface Hardware Parts

Pushrod Assemblies

Throttle Linkage Package

Miscellaneous

Optional

Striping Tape Application

Suggests using striping tape for accents and framing, applied before assembly for easier handling.

Wings

Wing Structure and Transport

Describes the 2-piece wing system joined by an aluminum joiner, noting easier transport and storage.

Fuel Tank Assembly

Two-Line Fuel System

Explains assembling a two-line fuel system for the tank, connecting pick-up and overflow lines.

Fuel Tank for Gasoline Engines

Gasoline Compatibility

Emphasizes using gas-compatible parts like Tygon tubing and stoppers for gasoline engines.

Engine and Fuel Tank Installation

4-Stroke Engine Installation Notes

Details installing 4-stroke engines, noting pre-incorporated thrust adjustments and firewall markings.

Gasoline Engine Installation Notes

Discusses considerations for gas engines, ideal setups, and SIG's laser-cut engine spacers.

4-Stroke Engines

Saito 1.50 Inverted Mount

Details the installation of a Saito 1.50 four-cycle engine in an inverted position for the model.

Motor Mount Usage

Provides important notes on using provided motor mounts, emphasizing proper bolt installation and avoiding tapping.

Tools 101

Proper Tool Selection

Stresses the importance of using the correct tools, especially Phillips head screwdrivers, to avoid damaging hardware.

Optional

Cowl Surface Details

Describes adding panel lines, latches, and rivets to the cowl for enhanced realism, followed by painting.

Gasoline Engines

Engine Choice Considerations

Discusses engine size, mounting bolt patterns, firewall spacers, and ideal Pitts-style muffler setups.

Ignition System Separation

Emphasizes separating radio components from ignition system components to prevent RF interference.

Gasoline Engines

Fueling Valve Installation

Recommends installing a Du-Bro fueling valve for simple fueling/de-fueling, using the provided mounting bracket.

Ignition Battery Pack

Details mounting the ignition battery pack and the need for a separate switch for the ignition system.

Fuselage Preparation & Servo Installation

Tail Fairing Installation

Guides gluing the two remaining tail fairings to the fuselage sides for added gluing area and support.

Servo Bay Preparation

Details opening the elevator servo bay and clearing the factory installed pull-pull exit tubes.

Servo Installation

Covers installing elevator, rudder, and throttle servos, including routing linkages and connections.

Tail Group Mounting & Final Assembly

Wing Panel Joining and Mounting

Guides joining wing panels with the main joiner and mounting them to the fuselage using nylon wing bolts.

Stabilizer and Fin Attachment

Explains how to glue the horizontal stabilizer and vertical fin in place, ensuring correct alignment.

Elevator Pushrod and Rudder Installation

Elevator Pushrod Assembly

Details making the elevator pushrod and connecting it to the servo and control horn using a solder link.

Rudder Installation and Push-Pull Setup

Covers hinging the rudder, mounting control horns, and setting up the pull-pull linkage system.

Radio Installation

On;Off Switch Mounting

Describes mounting the on/off switch internally or externally for convenient operation and protection.

Receiver Placement and Testing

Guides placement of the receiver in the fuselage, connecting servos, and testing the radio system.

Decal Application

Decal Application Procedure

Provides a step-by-step procedure for accurately applying large decals using cleaning solutions and spreaders.

Landing Gear and Wheel Pant Assembly

Landing Gear Assembly

Details the assembly of the main landing gear legs and mounting them to the fuselage.

Wheel Pant Attachment

Explains how to align and secure the self-aligning wheel pants to the landing gear.

Spinner Assembly

Spinner Installation

Guides installing the SIG 3" spinner assembly, including backplate, propeller, and cone attachment.

Installing the Instrument Panel

Instrument Panel Fitment

Describes cutting out and fitting the printed instrument panel into the cockpit area for a realistic look.

Side Window Installation

Side Window Mounting

Details fitting and gluing the plastic side windows into the fuselage openings for a finished look.

Wing and Wing Strut Attachment

Wing Strut System

Explains the functional wing strut system, its importance, and the recommended tools for installation.

Center of Gravity

Establishing CG

Explains how to establish the correct Center of Gravity (CG) for the airplane, including balancing points.

Control Surface Travel

Low Rate Settings

Provides recommended low rate control surface movements for smooth and predictable flight characteristics.

High Rate Settings

Offers recommended high rate control surface movements for more responsive flight control.

Flying

Pre-Flight Checks

Emphasizes routine checks for controls, linkages, and radio system range before flight.

Takeoff and Trim

Guides smooth takeoff procedures, gradual throttle advancement, and making necessary trim adjustments.

Flight Maneuvers

Suggests basic maneuvers like loops and stall checks, and describes the airplane's handling characteristics.

Product Reference

Radio Systems

Lists manufacturers for radio systems and related accessories available at hobby shops.

Engines and Hardware

References engine manufacturers and suppliers for parts, fuel, adhesives, and hardware.

Warning! This Is Not a Toy!

Safety and Responsibility

Stresses that model airplanes are not toys and highlights the user's responsibility for safe assembly and operation.

Customer Service

Contact Information

Provides contact details for SIG Manufacturing Company for assembly assistance, parts orders, and technical support.

Limit of Liability

User Responsibility

States that the builder/flyer determines the product's suitability and assumes all risk and liability.

SIG Rascal 110 Specifications

General IconGeneral
BrandSIG
ModelRascal 110
CategoryToy
LanguageEnglish

Related product manuals