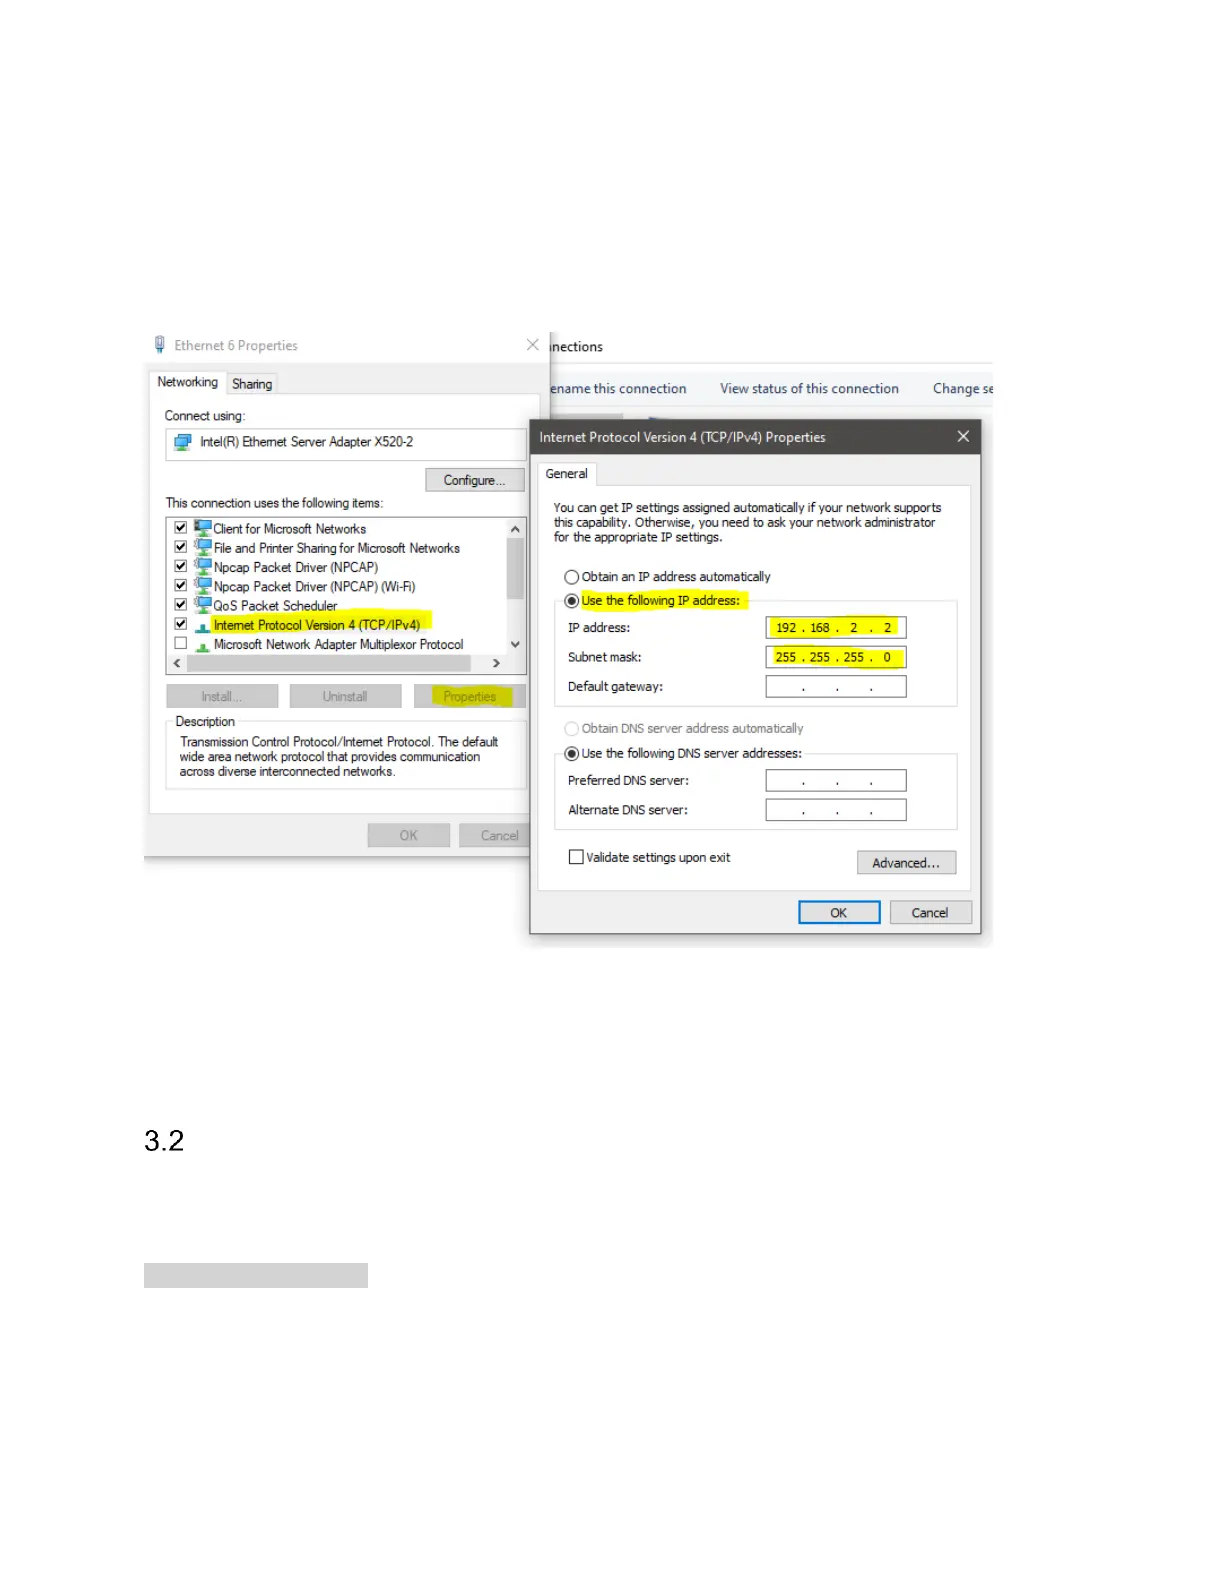
The next step is to setup the TCP/IPv4 IP address and subnet mask. Re-enter the interface
properties menu and select the Internet Protocol Version 4 (IPv4) line and press properties to
bring up the IPv4 properties dialog. In this dialog, select “Use the following IP address” and
manually fill out the highlighted lines with the corresponding values. Select OK when done.
At this point the interface should be properly configured and the device can be connected in Spike.
Use the File->Manage Ethernet Devices menu in Spike, add a new device using the default
network parameters, and connect to the device using the File->Connect menu.
ARP
As a troubleshooting step, the arp command can be used to verify the network and device are
partially configured. In an administrative command prompt, ping the device with the command
ping 192.168.2.10
Assuming the default IP address on the device. The device will not respond to the ping request,
but the PC will also update the ARP table in response to the ping. Once the ping command
completes (it will end in request timed out), the ARP table can be viewed with
 Loading...