AP09 Datum 04.05.2000 Art.Nr. 78091 Z.Nr. 8665013 Änd.Stand 140/00 1 1
(To subsequently modify the cable outlet in
steps of 90°, turn the inner plug element)
• Fix the pressure screw.
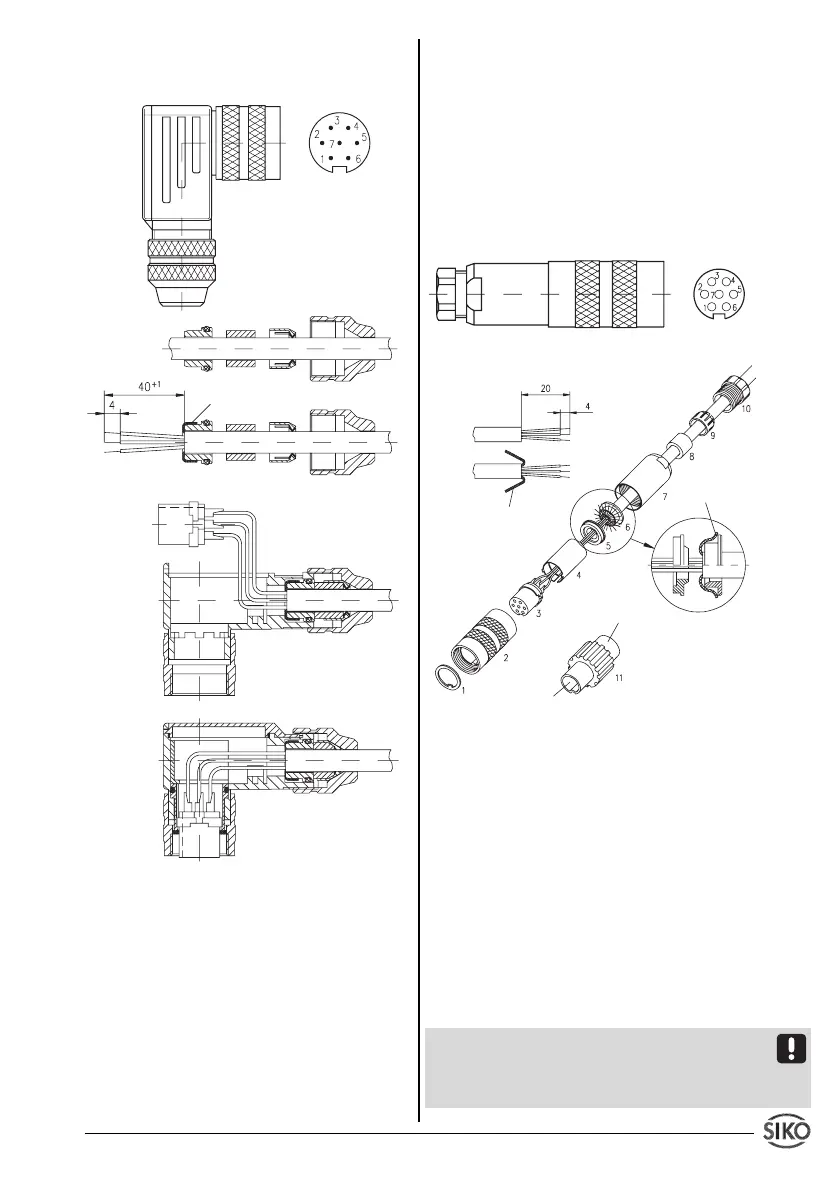
Fig. 4: Plug assembling
Plug assembling E4
1. Slip parts 6 to 10 over outer cable.
2. Strip cable.
3. Turn down screening.
4. Push part 5 onto ferrules.
5. Solder stranded wires at part 3 (follow connec-
tion diagram).
6. Open spacer (part 4) and put it over ferrules,
squeeze and push it onto part 3. Slot and
keyway of parts 3 and 4 must align.
7. Press parts 6 and 5 together; cut prodruding
screening.
8. Push parts 2 and 7 together and screw
part 11 using appropriate tool.
9. Push part 8 into part 9 and slide both parts into
part 7.
10. Screw parts 10 and 7 together.
11. Push part 1 into part 2.
Fig. 5: Plug assembling
4.2 Battery back-up (only if included, see identi-
fication plate)
The lithium battery allows storage of program-
med yparameters, current value and to capture
movements during power loss. Battery life is
approx. 5 to 8 years - depending on operating
time and frequency of moves during power loss.
When message
"batt"
is displayed then battery
should be exchanged by a SIKO agent or at the
parent company. In case you intend to exchange
the battery yourselves, please note the following
information.
Safety information
Attention-Battery: Inflammable, explosion and
burning hazard. Cannot be recharged and must
not be punctured, burned or exposed to tempe-
ratures above 100° C.
screening
viewing side =
soldering side
viewing side =
soldering side
screening
socket
pin
screening
 Loading...