9
8.
Note: make sure lettering is right side up. (See Side View).
DO NOT tighten bolt (#22) at this time. (See Figure 7.)
9.
IMPORTANT! Nylon washers (#5) adequately space
painted parts at all pivot points. Neglecting the use of
these washers will result in rusted parts.
NOTE: All board arms are made of rectangular tubing.
Tightening hardware too tight may damage tubing
and make adjustment of system difficult.
Figure 8
DO NOT DUNK ON THIS UNIT .
DO NOT HANG FROM ANY PART OF THIS
UNIT , INCLUDING THE BACKBOARD, RIM,
SUPPORT BRACES OR NET
.
4L-8152-01
WARNING
!
DO NOT DUNK ON THIS UNIT .
DO NOT HANG FROM ANY PART OF THIS
UNIT , INCLUDING THE BACKBOARD, RIM,
SUPPORT BRACES OR NET
.
4L-8152-01
WARNING
!
SIDE VIEW
DO NOT DUNK ON THIS UNIT .
DO NOT HANG FROM ANY PART OF THIS
UNIT , INCLUDING THE BACKBOARD, RIM,
SUPPORT BRACES OR NET.
4L-8152-01
WARNING
!
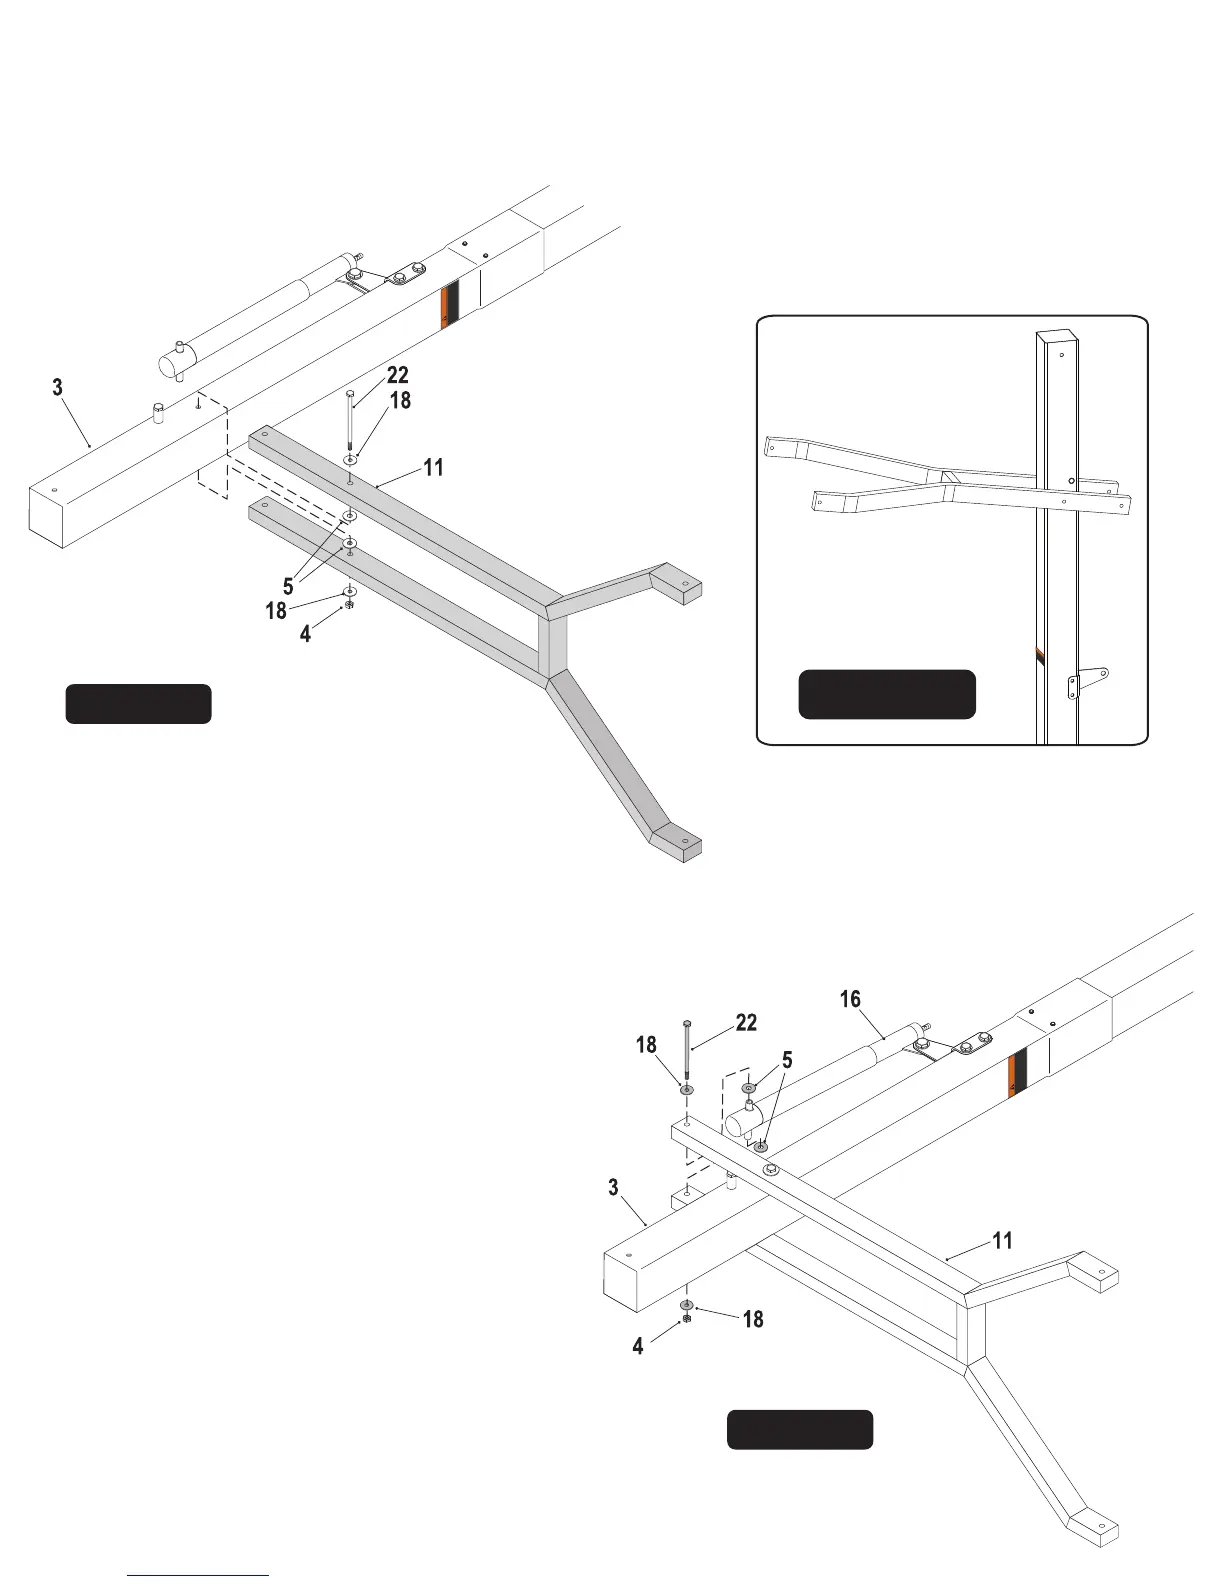
Note: Small amounts of clear tape can be used to adhere
Plastic Washers (#5) to Pole. This will make assembly easier.
Figure 7
Attach lower arms (#11) to Top Pole (#3), as shown in
Figure 7, using a hex bolt (#22), two flat washers (#18),
two plastic washers (#5) and lock nut (#4).
Secure Actuator (#16) to Lower Arms (#11) using one
bolt (#22), two flat washers (#18), two plastic washers
(#5) and one lock nut (#4). See Figure 8. Tighten
both bolts (#22) snug but, do not over tighten.
Board Arms must pivot freely.