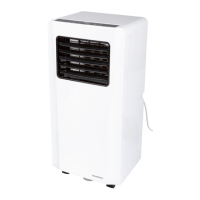
GB/IE/NI/CY/MT16
By pressing the SPEED button
23
you can
set the desired air speed. Here you can choose
between HIGH and LOW.
The current setting is indicated by a lit indicator
lamp.
To switch off the unit, press the POWER on/off
button
18
, the display
2
remains lit.
4.1.2 Dehumidification mode
Note: In dehumidification mode, you can remove
the hot air outlet hose
14
from the appliance.
Press the POWER button
18
to switch the
unit on.
Press the MODE button
20
repeatedly until
the "DRY" indicator light and "dh" on the display
2
light up. The control lamp and the display
2
light up permanently during operation.
The temperature cannot be set manually in this
mode. The fan speed is automatically set to low
(LOW) and displayed in the fan speed indica-
tor. The fan speed cannot be set manually in this
mode.
To switch off the unit, press the POWER on/off
button
18
, the display
2
remains lit.
4.1.3 Ventilation mode
Note: In ventilation mode, you can remove the hot
air outlet hose
14
from the appliance.
Press the POWER button
18
to switch the
unit on.
Press the MODE button
20
repeatedly until
the "FAN" indicator light and "FA" on the dis-
play
2
light up. The control lamp and the dis-
play
2
light up permanently during operation.
The temperature cannot be set manually in this
be set manually in this mode.
Press the SPEED button
23
to set the desired
air speed. The LED of the set air speed HIGH or
LOW lights up.
To switch off the unit, press the POWER on/off
button
18
, the display
2
remains lit.
4.1.4 Sleep mode
Note: The sleep function is only possible in cooling
mode.
In cooling mode, press the SLEEP button
19
to switch on sleep mode.
The fan automatically reduces the speed.
Sleep mode is activated for two hours and the
set temperature automatically increases by one
degree per hour. The target temperature re-
mains unchanged even after the increase of two
degrees. The appliance continues to run.
The appliance is energy-saving and quiet.
4.2 Timer setting
With the timer function, a switch-off time can be
selected in hour increments (1-24). The unit then
switches off automatically.
Press the TIMER button
24
when the appli-
ance is switched on. The display
2
flashes.
Press the plus button
22
to increase the
timer by 1 hour.
Press the minus button
21
to decrease the
timer by 1 hour.
Wait approx. 5 seconds. The entry is automati-
cally accepted.
If a timer has been set that you want to cancel,
press the TIMER button
24
twice. The
display
2
goes out.
 Loading...