13 GB
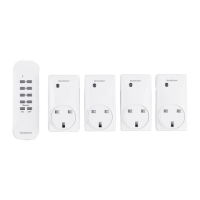
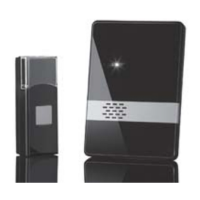
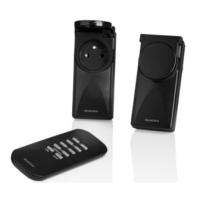
Setting up
with the aid of a coin or a
screwdriver, then removing the
lid (open).
2. Insert the round cell battery
type CR 2032. Make sure you
fit the battery with the correct
polarity (+ = up).
3. Place the battery compartment
cover
4
back on and lock it in
place by turning it in a clock-
wise direction (close).
4. Press one of the ON / OFF
buttons
2
or
3
to test whether
the remote control works; if it
does, the power indicator light
will come on
1
.
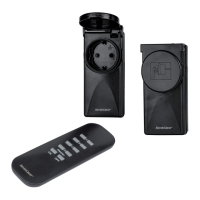
Setting up the remote
-
controlled socket
(fig. B)
1. Plug the wireless socket into an
earthed mains socket. You now
have 30 seconds to complete
steps 2 and 3.
Note: Always plug in the
wireless socket in the direction
indicated on the product label
to maintain the splash water pro-
tection (arrow
must point up).
Protection against water spray
is only guaranteed when a
socket of the same protection
rating (classification IPX4) is
connected.
2. Point the remote control at the
remote-controlled socket at a
distance of approx. 50 cm.
3. Push the respective ON button
of the Channel ON/OFF but-