13
GB
Assembly
Inserting/removing the hose
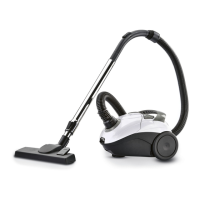
• Insert the hose1 into the connection
opening8 on the top of the device. The
hose must audibly click into place.
• To remove the hose1 press the two re-
lease buttons6 and pull out.
Attaching the telescopic tube
• Insert the hose1 with the handle16
into the upper end of the telescopic
tube14. For a better grip, turn the han-
dle slightly back and forth.
Attaching/removing the nozzle
• All nozzles can be attached directly to
the handle16 of the hose1 as well as
to the lower end of the telescopic
tube14.
• Plug in the desired nozzle. Turn the noz-
zle slightly back and forth for a better
grip.
• To remove, gently turn the nozzle back
and forth and pull it.
Adjusting the length of the tele-
scopic tube
1. Push down the slider13 on the tele-
scopic tube14 and set the desired
length.
2. Release the slider13 and continue to
move the telescopic tube14 until it
clicks into place.
Using the nozzle
Floorhead12
Suitable for carpets and smooth floors.
Switch between the two functions using the
foot button11.
- For smooth floors such as
tiles, tilt the foot button11
to the „brush extended“
symbol. The brush on the
underside is extended.
- For carpets, tilt the foot but-
ton11 to the „brush retract-
ed“ symbol. The brush is re-
tracted.
Upholstery nozzle3
The upholstery nozzle3 is
suitable for upholstered fur-
niture, mattresses and car
seats, etc.
Crevice/brush nozzle2
The crevice nozzle2 is suit-
able for skirting boards,
corners, columns and uphol-
stery etc.
• Fold the brush out in the direction of the
arrow to turn the crevice nozzle2 into a
brush nozzle.
This is suitable e.g. for uneven objects,
lamps, profile strips.
__374192_2104_Bodenstaubsauger_Short_OS.book Seite 13 Freitag, 16. Juli 2021 1:45 13
 Loading...
