7
GB
WARNING! Risk of material
damage
~ Use the original accessories only.
~ Never place the device on hot surfaces
(e.g. hob plates) or near heat sources
or open fire.
~ Do not cover the plug-in power unit to
prevent overheating.
~ Do not use any astringent or abrasive
cleaning agents.
4. Items supplied
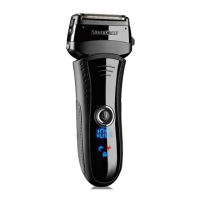
1 Men's shaver
1 Protective lid|10
1 Plug-in power unit with corresponding ca-
ble|13
1 Cleaning brush|14
1 Storage pouch|15
1 Operating Instructions
5. Charging
NOTES:
• Charge the battery for at least 2 hours
before using the device for the first
time. After that, a charging time of
90 minutes is sufficient.
• In order to increase the service life of
the battery, we recommend …
… to use the device regularly and with-
out long storage times,
… to discharge the battery prior to the
charging procedure (LED 00|7 is
shown, display is lit red).
•The display|7 shows the capacity/
charging state of the battery in percent
(00, 10, ... ,100 in increments of ten).
• The display …
… is lit blue, when the device is
switched on or being charged.
… is lit red, if the battery is almost dis-
charged. After the display lighting
changes to red only
one
normal
shave is still possible. The display is
still lit red for a short time when
charging, until the battery has
reached a capacity of approx. 10
%
.
• It takes about 5 minutes to charge the
device sufficiently for one shave.
• When the battery is fully charged, the
device can be used for approximately
90 minutes without being connected to
the power supply.
1. Switch off the device with the on/off
switch|6 if necessary.
2. Connect the plug-in power unit|13 to
the socket|8 on the device.
3. Insert the plug-in power unit|13 in into
an easily accessible wall socket, the
voltage of which corresponds to the
rating plate.
4. The battery symbol on the display|7
flashes and the battery is charged.
When the battery is fully charged, 100
is shown.
BB*5$B+HUUHQUDVLHUHUB%ERRN6HLWH)UHLWDJ-XQL
 Loading...