SHSS 28 A1
GB│IE
│
7 ■
Before first use
■ Remove all packaging materials and protective
stickers from the appliance, especially the pro-
tective sticker on the contacts on the back of
the hand element 3.
■ Place the cradle
o onto the stand until the
cradle o clicks into place.
NOTE
► The appliance batteries are not charged
upon delivery. The batteries must be charged
for 5–6 hours before using the appliance
for the first time.
Charging the appliance
NOTE
► Ensure that the appliance is switched off
before starting to charge the batteries.
■ To charge the appliance, connect the mains
adapter
u to a mains socket. Plug the barrel
plug i into the charging socket p on the
underside of the cradle o. Feed the cable
through the recess on the rear of the cradle o
so that the cradle o is not resting on the cable.
■ Place the handle rod with the attached hand
element
3 onto the cradle o. The charge
indicator lamp
2 lights up red. When the
appliance is fully charged, the charge indicator
lamp
2 lights up blue.
■ Do not recharge the batteries until the suction
power of the appliance has become noticeably
weaker.
NOTE
► When the batteries are weak, the charge
indicator lamp
2 starts flashing blue. When
this happens, the appliance can be operated
for another 3 to 5 minutes.
► Once the batteries are completely discharged,
the charge indicator lamp
2 flashes red five
times and the appliance switches off.
Assembly/disassembly
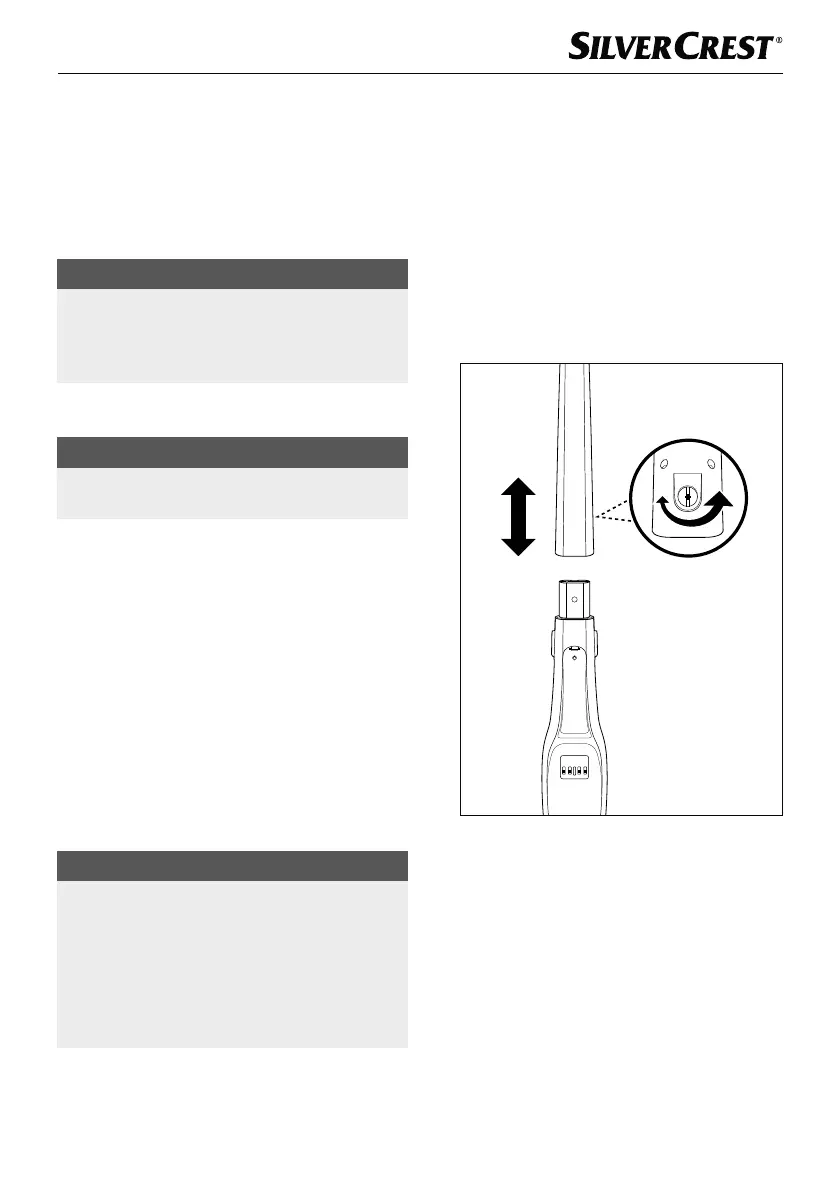
Fitting the handle rod
1) Loosen the screw q at the back of the handle
rod 0 with a screwdriver in anticlockwise
direction. Pull the screw
q out of the screw
hole on the handle rod 0.
2) Attach the handle rod 0 to the handle rod
bracket of the appliance. Push the handle rod
0 all the way onto the handle rod bracket
until it is firmly seated on the appliance.
(Fig. 1).
2 IN 1 TEC HN OLOGY
Fig. 1
3) Insert the screw q into the screw hole at
the back of the handle rod 0. Tighten the
screw q clockwise with a screwdriver (Fig. 1).
 Loading...