Do you have a question about the Silvercrest SKKM 200 A1 and is the answer not in the manual?
This appliance is intended exclusively for grinding roasted coffee beans.
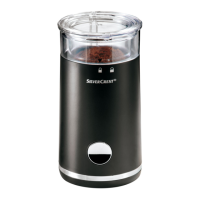
The appliance is supplied with the following components as standard.
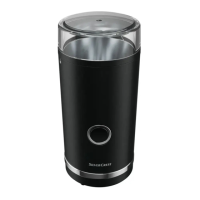
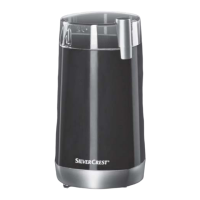
Details components of the coffee grinder and its technical specifications.
Connect appliance only to correctly installed mains power sockets supplying a mains voltage of 220-240 V~, 50-60 Hz.
This appliance shall not be used by children. Keep appliance and cord out of reach of children.
Do not use appliance to grind or chop any food other than roasted coffee beans.
Every coffee grinder is tested at the factory using coffee beans.
When starting the appliance for the first time, you may notice a small amount of smoke and a slight odour.
If all coffee beans have been ground, stop the process to prevent the mechanism from running empty.
Tap the coffee powder container lightly before removing to collect residue.
Turn the coffee bean container until the arrow is above the desired grind setting on the scale.
Fine powder for espresso, medium-fine for filter coffee, medium-fine to coarse for cafetière.
Cup numbers are for orientation; quantity depends on bean type, roast, and grind setting.
Open silicone plug, insert container, press start/stop button to grind.
Push the portafilter holder as far as the stop into the guide rails.
Set quantity, press start/stop to grind, compact powder, restart if needed.
Disconnect power before cleaning. Do not use abrasive materials or moisten grinding mechanism.
Clean grinding mechanism parts and output opening using the cleaning brush.
Wash components in lukewarm water; some parts are dishwasher-safe.
Clean appliance surfaces with a damp cloth, using mild detergent for stubborn dirt.
Wipe appliance clean, wind power cable, and store in a clean, dry location.
Check container insertion, dial position, power connection, and socket.
Check for foreign bodies in the grinding mechanism and clean if necessary.
Dispose of appliance through approved centre; packaging is recyclable.
Warranty valid for 3 years from purchase; requires proof of purchase and description of fault.
Warranty period not prolonged by repairs; report damage immediately after unpacking.
Covers material/production faults; not normal wear, fragile parts, or damage from misuse.
Have receipt and item number ready; contact service by telephone or email.
Provides contact details for service in Great Britain and Ireland.
Details the address of Kompernass Handels GmbH.
| Brand | Silvercrest |
|---|---|
| Model | SKKM 200 A1 |
| Category | Coffee Grinder |
| Language | English |