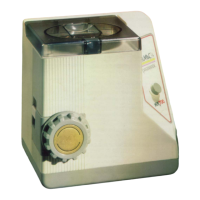
Do you have a question about the Simac PastaMatic MX700 and is the answer not in the manual?
Place the base on a clean, dry surface near an electrical outlet, with the logo facing you. Slide the rotary housing all the way into the open side of the base, ridged side down and rectangular opening facing up.
Insert the rotary screw, metal end first, all the way into the rotary housing. It will be necessary to rotate the screw for it to fit in completely. The end of the screw should be flush with the end of the rotary housing.
Grasp the shutter slide, and firmly push it all the way into the slot over the rotary housing. It will click in place. Ensure the slide is fully in place before adding ingredients.
Insert the bowl onto the base, matching the notch on the top edge of the bowl with the tab of the opening located towards the front of the base, and pressing down firmly.
Fit the blade, kneading foot down, over the central metal shaft extending up through the bowl. Rotate it until it sits firmly down on the bottom.
Place the locking nut on top of the blade shaft and turn it clockwise until it is firmly in place. Your machine is now assembled and ready to work.
Ensure the bowl is firmly in place, the bowl cover lip is inserted in the back slot, and the latch is securely locked in the front.
Ensure the main switch is OFF. Be sure the bowl is empty of accessories. Push the Shutter Slide all the way into the slot.
Insert the bowl into the main housing with the Bowl's Locking Tab fitted to the Bowl Locking Notch, toward the front of the PastaMatic.
Fit the Cover Lip into the Slot toward the rear of the top. Push the Cover Latch and press down to lock the cover. Plug the electric cord into a grounded outlet and push the ON/OFF switch to ON.
Unlatch the cover and remove it. Ensure the slide is fully in place before adding ingredients, covering the bottom opening completely.
Measure one pound of flour accurately, preferably using a scale. Place the flour into the mixing bowl. Put the cover in place, lock it, and turn the PastaMatic ON.
Fill the liquid measuring cup to the 1 Lb line with water or eggs precisely. The left side is for water, the right for eggs.
Slowly pour the measured eggs or water through the liquid intake hole in the lid. Begin to time the kneading process.
Knead the dough for 3 minutes. Remove the cover, check consistency (walnut-sized lumps, moist but not sticky). Adjust with water if too dry.
Check dough consistency. If too wet or dry, repeat Step 8. Be ready for extrusion when dough is like moist, non-sticky walnut-sized lumps. Turn machine OFF, replace cover.
Pull out the Shutter Slide. Turn the PastaMatic ON. Wait for dough lumps to emerge. Turn machine OFF. Replace dough lumps into the bowl and lock the cover.
Immerse a disc in warm water for a second. Align disc tabs with rotary housing notches. Screw the Ring Nut over the disc to secure it.
Turn the machine ON. Wait for extruded pasta to emerge. Remove the first few inches and return to the bowl. Cut pasta to desired length.
Stop the machine when dough is nearly out. Turn OFF. Remove Ring Nut and disc using the Wrench. Turn ON to extrude remaining dough.
Disassemble the machine, remove excess dough, and let parts dry overnight. Rap discs to remove dough. Wash all removable parts (dishwasher safe). Dry and reassemble.
Dough may be too wet. Lightly oil or flour hands and run pasta through. Remember to check dough consistency before extruding next time.
Hold strands as they extrude; bottom strands may be shorter. This should improve as disc warms.
This should improve as the disc warms. It affects the first 20 inches. Cut raggedy strands and return them to the mixing bowl.
Dough is too wet. Replace Shutter Slide, remove disc. Add flour, knead 3-5 mins. Reattach disc and continue extrusion.
Push dough down into the bowl, or remove some dough to prevent it from rising too high and hitting the cover during kneading.
Break remaining dough into small pieces to fit the hole at the bottom of the bowl. This can happen if the dough was too wet before extrusion.
Do not pull the Shutter Slide out completely. Leave it in part way as long as it doesn't block dough from dropping into the Rotary Housing chamber.
Let the pasta dry after disassembling the housing and discs. Tap each piece on a hard surface; dried pasta will fall off.
Put disc in freezer for 10 minutes, tap on a hard surface, and clean with a nut pick if necessary. Frozen dough should come off easily.
Wrap pasta airtight in plastic wrap and refrigerate for a few hours, or freeze in an airtight container for later use.
Description of the Capellini disc for making angel hair pasta.
Description of the Spaghetti disc for making spaghetti.
Description of the Spaghettoni disc for making large spaghetti.
Description of the Chitarre disc for making square spaghetti.
Description of the Linguine disc for making linguine.
Description of the Small Fettuccine disc for making small fettuccine.
Description of the Tagliatelle disc for making fettuccine.
Description of the Pappardelle disc for making large fettuccine.
Description of the Sfoglie disc for making lasagne sheets.
Description of the Bucatini disc for making hollow spaghetti.
Description of the Bucatini Rigati disc for making ridged hollow spaghetti.
Description of the Bucato disc for making large hollow spaghetti.
Description of the Penne disc for making ziti.
Description of the Maccheroni disc for making macaroni.
Description of the Pizza disc for making pizza dough.
Description of the Cookies disc for making cookies.
Description of the Grissini disc for making breadsticks.
Description of the Gnocchi disc for making gnocchi.
Description of the Conchigliette disc for making small shells.
Description of the Pasta Del Contadino disc for making farmer's pasta.
Description of the Fili D'Oro disc for making golden threads.
Description of the Maccheroni Quadrati disc for making square macaroni.
Description of the Maccheroni Quadrifoglio disc for making clover macaroni.
Description of the Sfoglia Larga disc for wide ravioli sheets.
Provides contact details for De'Longhi customer service, including phone number and website for parts and accessories.
Provides mailing address for Fox International for parts and service inquiries.
Provides contact information for Simac-Vetrelli S.p.A. in Italy, including phone, fax, and website.
Lists available manuals such as the Recipe Book and User Manual & Recipes, with file sizes.
| Brand | Simac |
|---|---|
| Model | PastaMatic MX700 |
| Category | Pasta Maker |
| Language | English |