Landlord / 1700 / 2700 Series
TP 300-2226-02-LL-SMA
1/20016
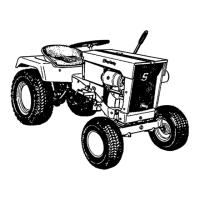
Figure 7. Steering Wheel Components
A. Steering Wheel C. Roll Pin , 5/16” x 2 1/2”
B. Cap D. Tube
Tractor
Assembly
Steering Wheel Assembly
1. Remove the plastic tie securing the steering wheel to
the steering shaft and transmission control lever.
2. Coat the steering shaft with anti-seize lubricant.
3. Make sure the steering tube (D, Figure 7) is placed
over the shaft, then place the steering wheel on the
shaft with thicker grip area facing the seat.
4. Align the hole in the steering wheel with the top hole
in the shaft, and insert roll pin (C) to secure steering
wheel to shaft. (Lower hole may be used if desired.)
5. Make sure the roll pin is driven in flush.
6. Make sure the cap (B) is fully engaged with the
matching recess in the steering wheel. (The cap is
removable, but is used only for decorative purposes
and does not provide access to any assembly hard-
ware.)
NOTE: To prevent damage, do not use excessive force
to remove or attach plastic cap. Use soft-faced mallet if
cap must be tapped back into position.
Seat & Safety Switch Assembly
1. Assemble the seat to the seat slide bracket using the
whizlock bolts provided.
2. Make sure the seat safety switch is connected (A,
Figure 8).
3. Lower seat to normal riding position.
Figure 8. Seat Switch
A. Seat Switch B. Wiring Harness
Installing the Battery -
Air Cooled Models
5. Carefully place the battery back in the engine com-
partment (see Figure 4). Secure the battery using the
hold-down rods (C) and hold-down bar.
6. Attach the red positive cable (B, Figure 6) and cover
to the positive post as shown.
7. Attach the black negative cable (A, Figure 6) to the
negative post as shown.
8. Install the vent hose on the battery cap and route the
hoses out of the bottom right side of the engine com-
partment through the frame. Make sure the tubes go
all the way through the frame and will not drip on any
belts, pulleys, or the mower deck (note: maintenance
free batteries do not have vent hoses).
 Loading...