24
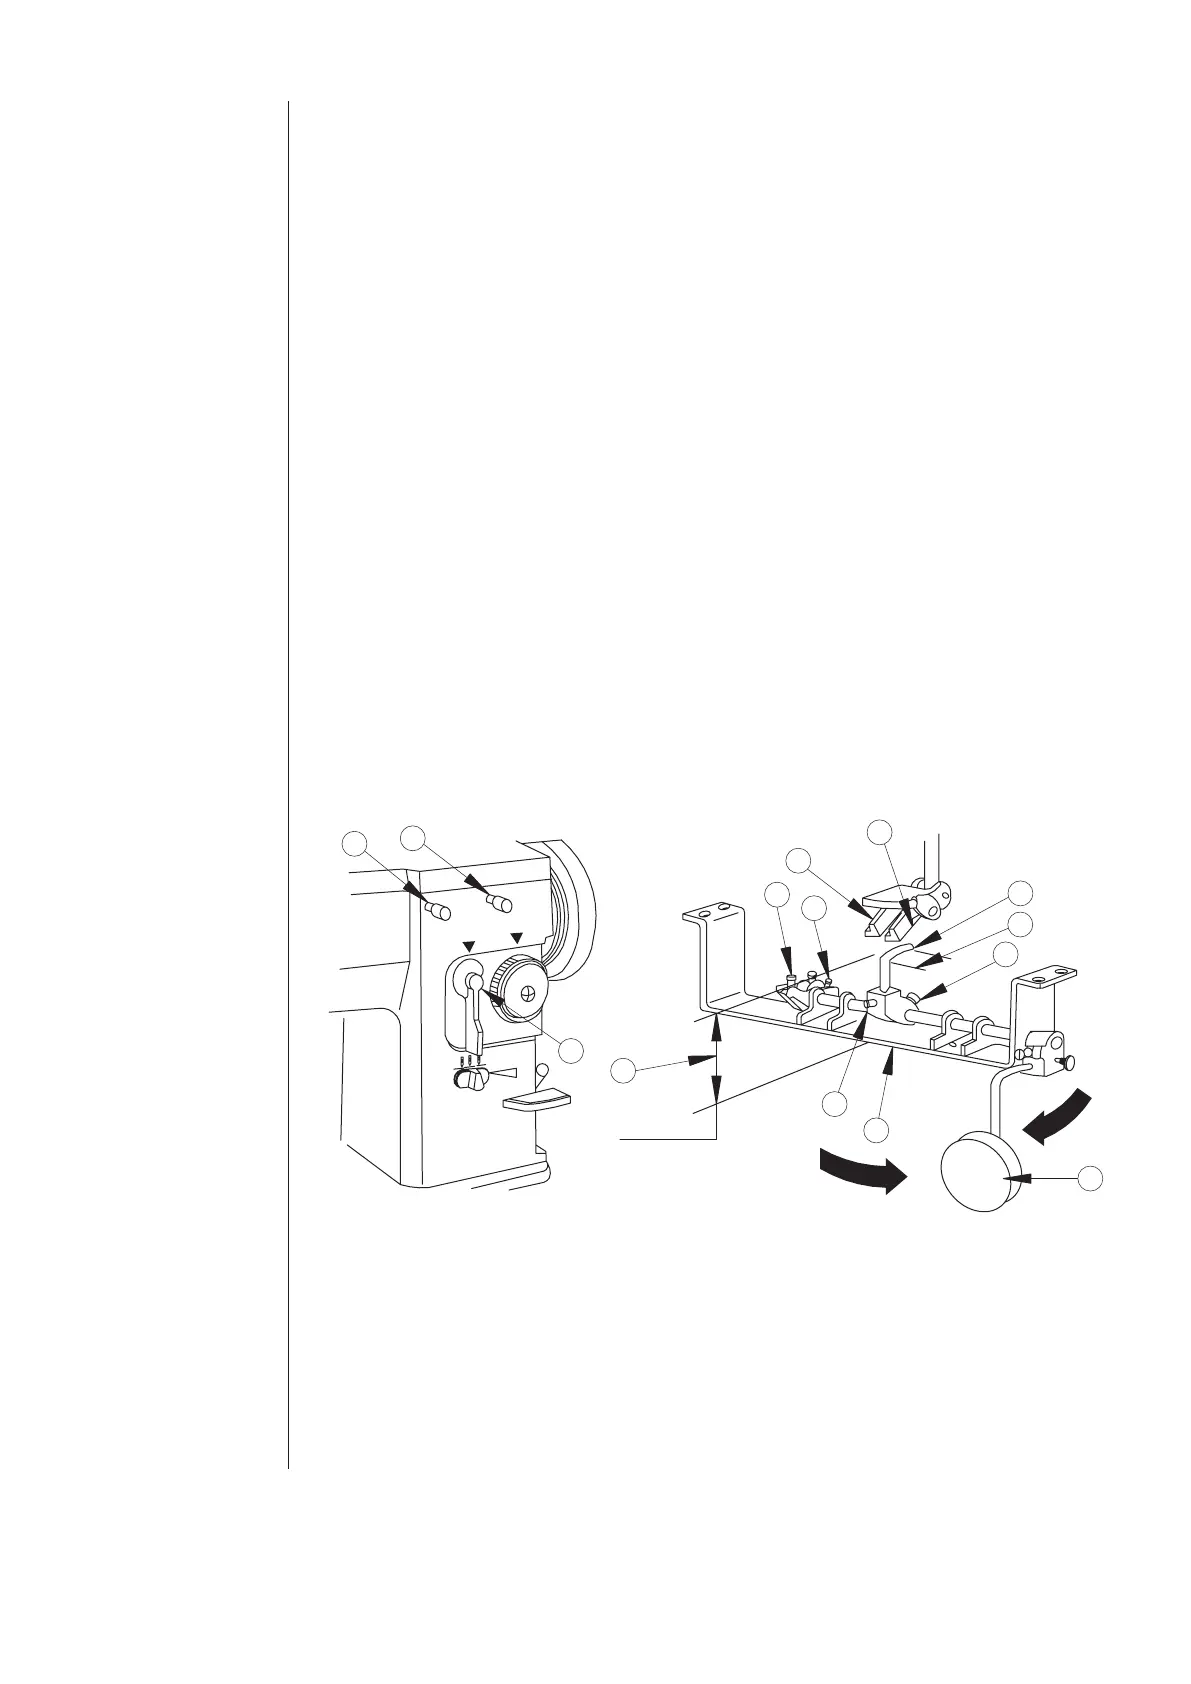
Figure 33
67 mm
B
A
Knee operating stitch width control
(Figure 34)
Bell cranks ‘2’ is fastened to the
underside of the bed, the bell crank
‘2’ is used for controlling the stitch
width with the knee.
To control the stitch width with the
knee, loosen screw ‘4’ holding the
knee lifter shaft arm ‘3’, and move
the knee lifter shaft arm just under
the bell crank’2’ and firmly tighten
screw ‘4’.
Loosen the lock nut holding screw
‘7’ and turn screw ‘7’ as required, so
that the bent end ‘6’ of knee lifter
shaft arm ‘3’ will be almost horizon-
tal when knee lifter knee plate ‘5’ is
pushed as far as it will go in the
direction indicated with arrow ‘A’.
Then firmly tighten the lock nut.
With knee lifter shaft arm ‘3’ set in
position as described above, loosen
screw ‘8’ and move knee lifter shaft
arm ‘3’ up or down as required, so
that height ‘10’ from its bent end ‘6’
to bracket ‘9’ is 67 mm.
Loosen stitch width regulating plate
thumb screws ‘11’ and ‘12’ so that
stitch width regulator ‘13’ can be
moved from zero to maximum
stitch width. (20U-105 / 105C:
9mm or 20U-125 / 125C: 12mm).
Loosen the lock nut holding screw
‘14’ and turn screw ‘14’ as
required, so that knee lifter knee
plate ‘5’ when pushed in the
direction indicated with arrow ‘B’,
will stop at the maxi-mum stitch
width position of stitch width
regulator ‘13’. Then firmly
tighten the lock nut.
Stitch width will become
wider when knee lifter knee plate
‘5’ is pushed in the direction
indicated with arrow ‘B’ and
will become smaller when
knee plate is released.
Caution
Switch off the
machine.
Set sewing head
upright again
using both hands.
Danger of crush-
ing between
sewing head and
table top.
1
2
3
4
7
8
5
6
14
9
11
12
13
10
Zigzag Sewing Mac
hine
|
Instruction Manual and Parts List



 To Next Page