25
7.
Remove
the
Set
Screw
in
the
Rock
Shaft
Collar (A, Fig.20).
8. Place the
Operating
Lever 234726, Fig. 20, in position
on the Rock Shaft Collar
(A),
using Screw 350126c, Fig. 20,
in place of Set Screw and Check Nut
201706c,
Fig. 20, to
hold
the
Lever
and
Rock
Shaft
Collar
in
position.
9. Raise the
Operating
Lever
until
the
point of
the
Upper
Knife Blade lightly touches the
Throat
Plate, holding
the
lever
with
the
left
hand,
turn
the
balance
wheel
with
the
right hand until the Piercer reaches its lowest position.
(CAUTION: If the Piercer touches the Knife Blades
before reaching
the
lowest position, it will be necessary to
raise it sufficiently to clear
both
knife
blades;
this will not
interfere
with
the
quality
of
hemstitching.)
10.
Fasten
the.Operating
Lever
with the Screw and
Nut,
using
care to have the point of
the
upper
Knife Blade 234720,
Fig. 20, just above the Throat Plate.
(CAUTION:
If the knife is set too low, the point of the
knife will be
broken
by
striking
the
Throat
Plate.)
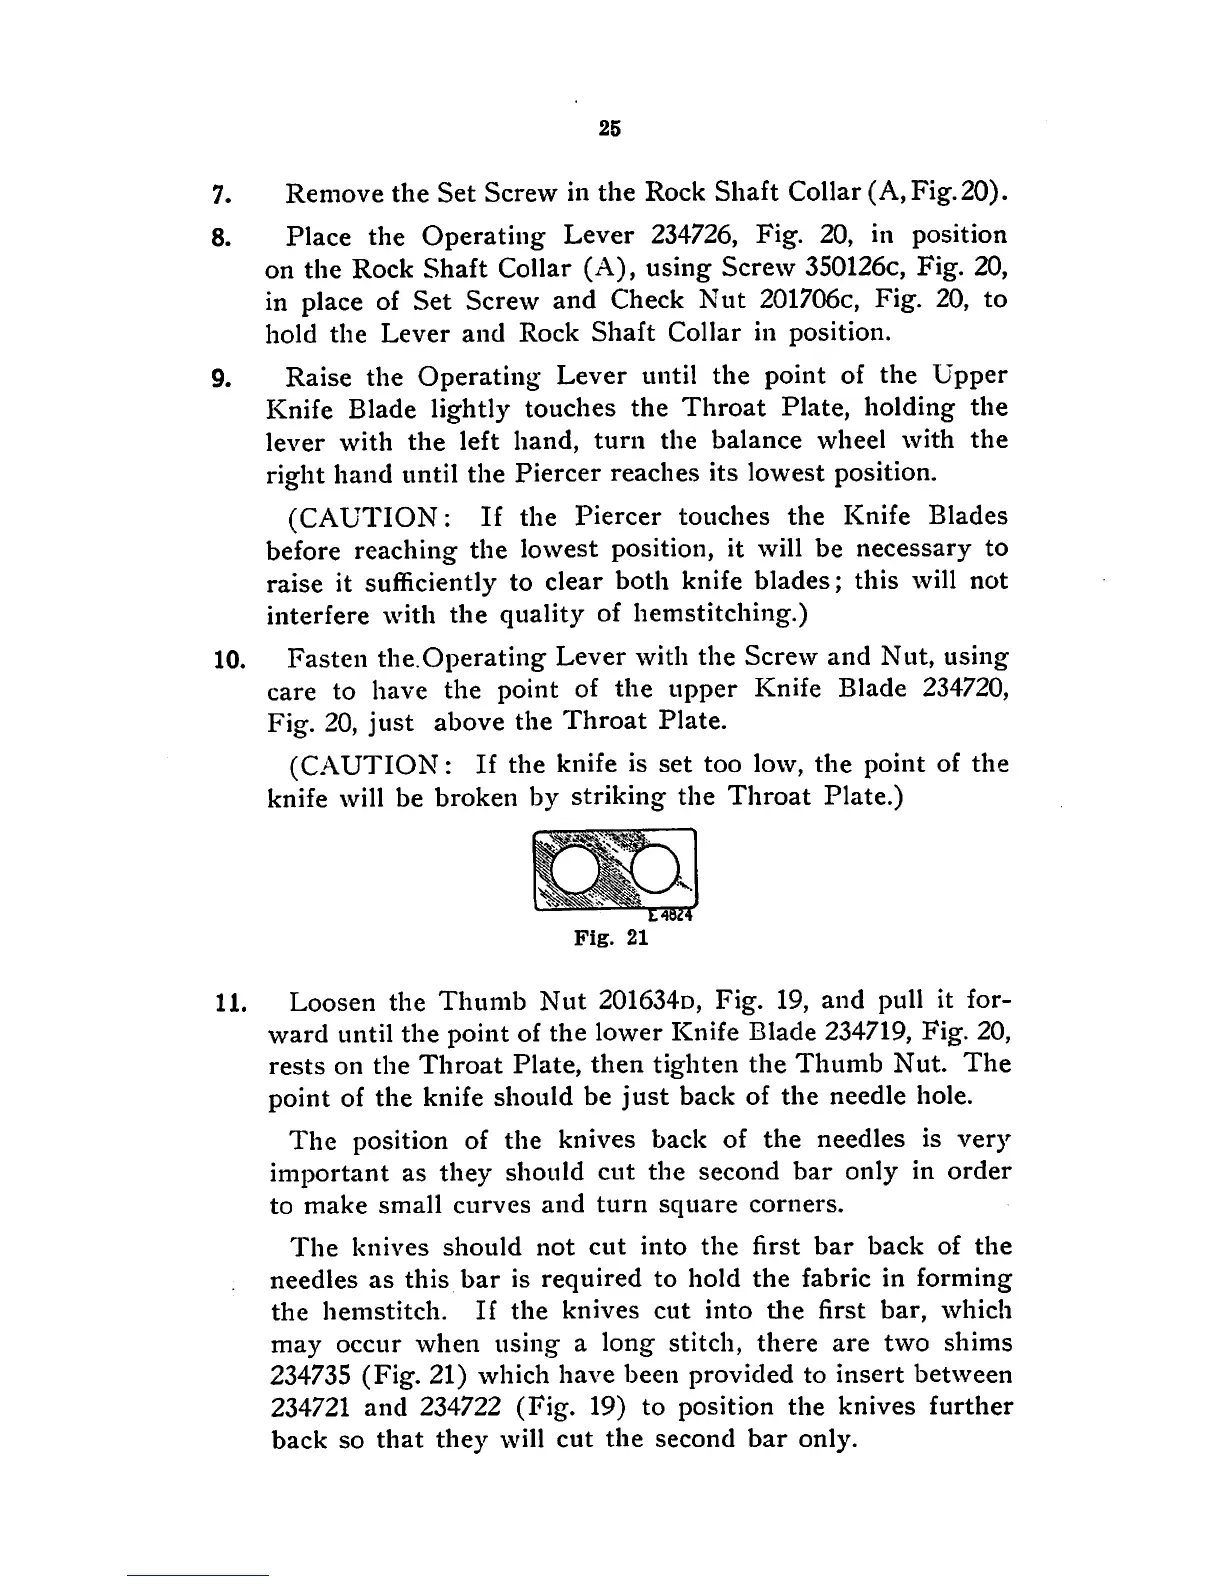
T45ZT
Fig.
21
11. Loosen
the
Thumb
Nut
201634d,
Fig.
19,
and
pull it for
ward until the point of the lower Knife Blade
234719,
Fig. 20,
rests
on
the
Throat
Plate,
then
tighten
the
Thumb
Nut.
The
point of the knife should be
just
back of the needle hole.
The
position of the knives back of
the
needles is very
important as they should cut the second
bar
only in order
to
make
small
curves
and
turn
square
corners.
The
knives
should
not
cut
into
the
first
bar
back
of
the
needles
as
this
bar
is
required
to
hold
the
fabric
in
forming
the
hemstitch.
If
the
knives
cut
into
the
first
bar,
which
may
occur
when
using
a
long
stitch,
there
are
two
shims
234735
(Fig.
21)
which
have
been provided to
insert
between
234721
and
234722
(Fig.
19) to position
the
knives
further
back
so
that
they
will
cut
the
second
bar
only.