Turn
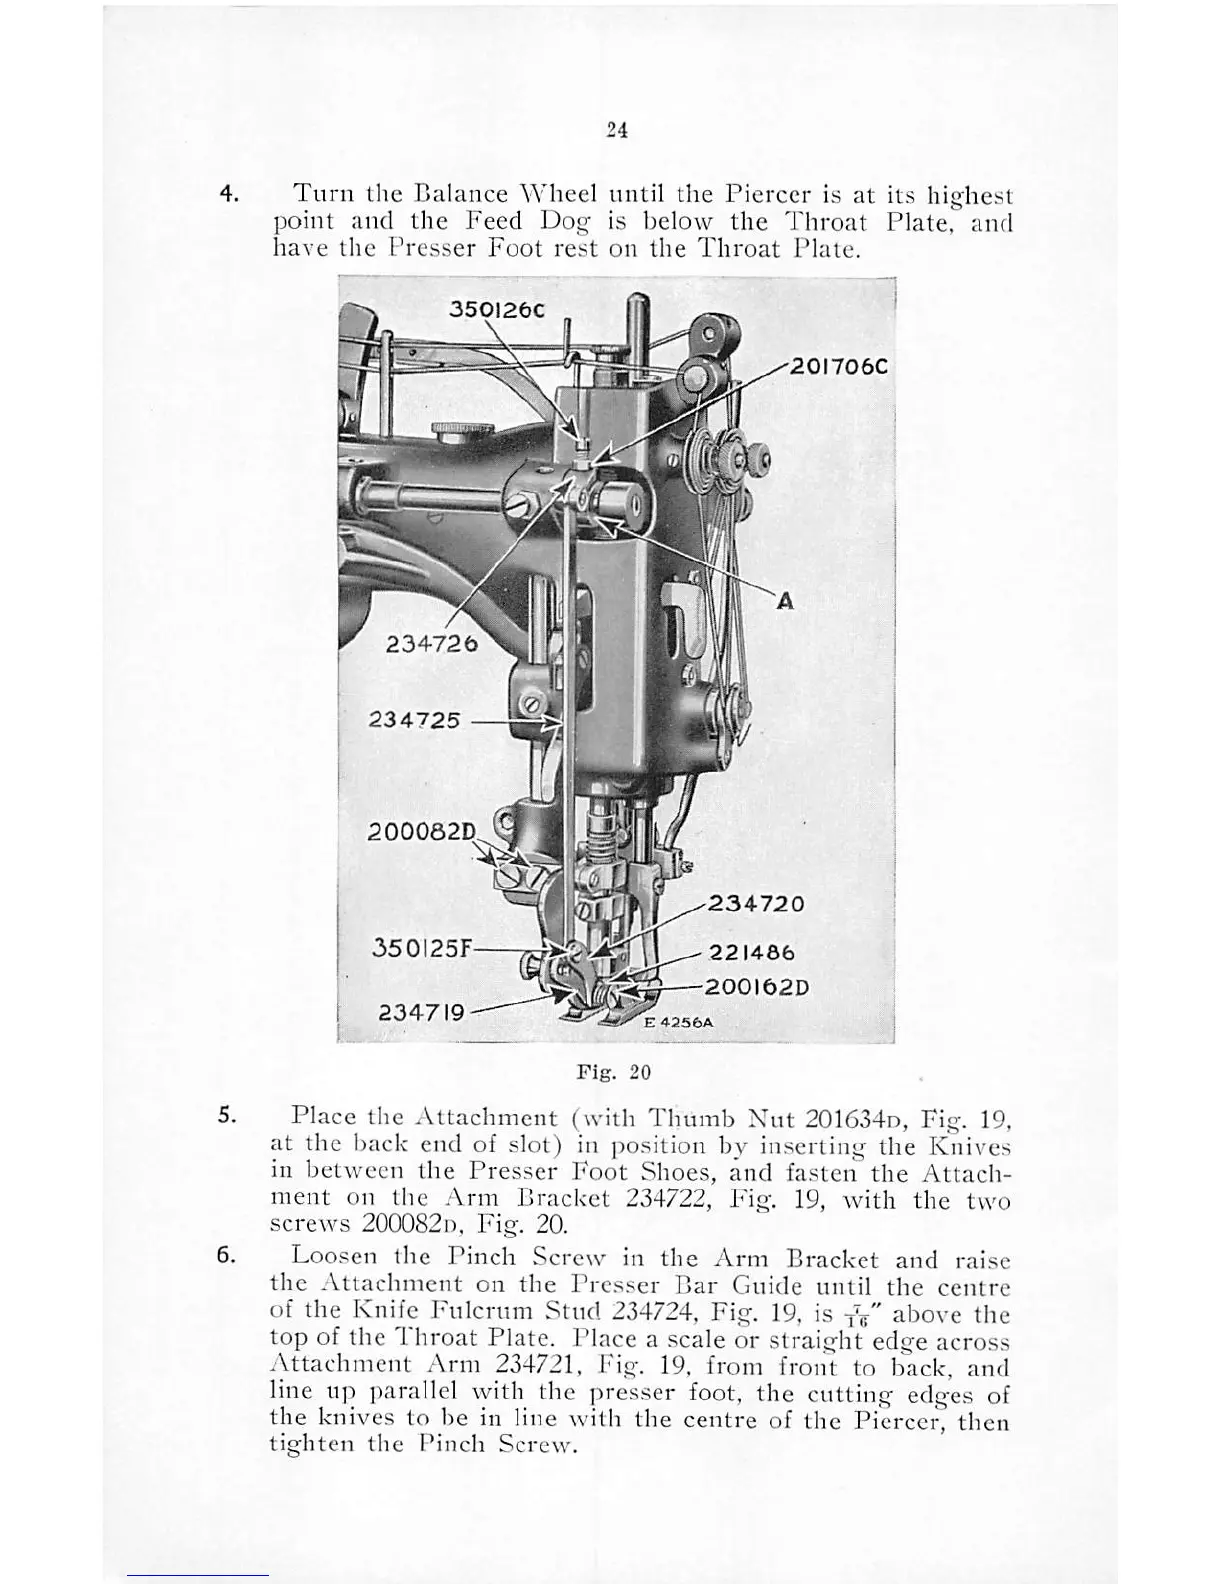
tlie Balance Wheel until the Piercer is at its highest
point
and
the
Feed
Dog
is
below
the
Throat
Plate,
and
have
the
Presser
Foot
rest
on
the
Throat
Plate.
350126C
234725
200062D
350I25F
234719
'20I706C
234720
221466
200)620
Fig.
20
Place the Attachment (with Thumb
Nut
201634n, Fig. 19,
at the back end of slot) in position by inserting the Knives
in
between
the
Presser
Foot
Shoes,
and
fasten
the
Attach
ment
on the
Arm
Bracket
234722, Fig. 19,
with
the
two
screws
200082!),
Fig.
20.
Loosen
the
Pinch
Screw
in
the
Arm
Bracket
and
raise
the
Attachment
on
the
Presser
Bar
Guide
until
the
centre
of the Knife Fulcrum Stud 234724, Fig. 19, is W" above the
top of the Throat Plate. Place a scale or straight edge across
Attachment Arm 234721, Fig. 19, from front to back, and
line up parallel with the presser
foot,
the cutting edges of
the knives to be in line with the centre of the Piercer, then
tighten
the
Pinch
Screw.