/
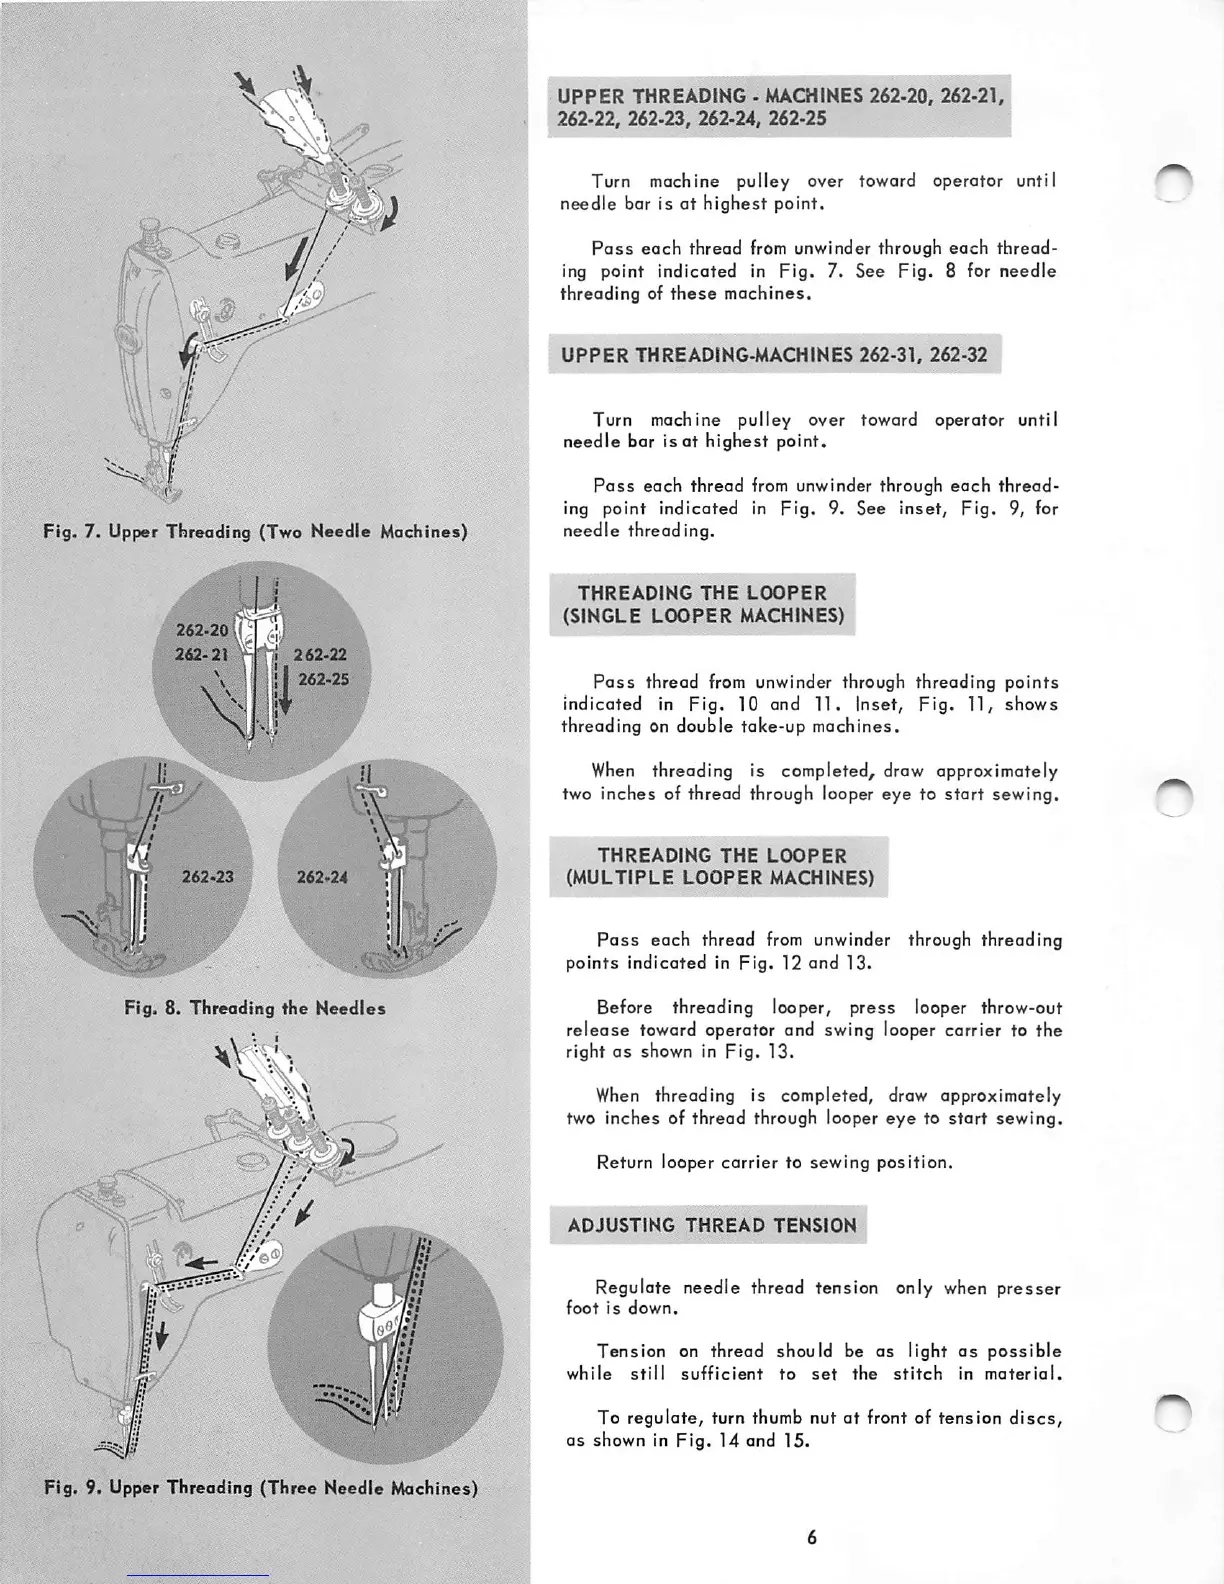
Fig. 7. Upper Threoding (Two Needle Machines)
26^20l(.
262-21^
fi
262^22
i
11
262-25
4262.2.1
262-24
Fig. 8. Threoding
the
Needles
%
• '
/•
•^ / • /
" r ^
!
Iff/
:w
Fig. 9. Upper Threading (Three Needle Machines)
UPPER
THREADING • MACHINES 262.20, 262-21,
262-22, 262.23, 262-24, 262-25
Turn machine pulley over toward operator until
needle
bar is
at
highest
point.
Pass
each
thread from unwinder through
each
thread
ing point indicated in
Fig.
7. See
Fig.
8 for
needle
threading of
these
machines.
UPPER
THREADING-MACHINES
262-31,
262-32
Turn machine pulley over toward operator until
needle
bar is
at
highest
point.
Pass
each
thread from unwinder through
each
thread
ing point indicated in
Fig.
9. See Inset,
Fig.
9, for
needle threading.
THREADING
THE
LOOPER
(SINGLE
LOOPER
MACHINES)
Pass
thread from unwinder through threading
points
indicated in
Fig.
10 and 11. Inset,
Fig.
11, shows
threading on double take-up machines.
When
threading Is completed, draw approximately
two inches of thread through looper eye to
start
sewing.
THREADING
THE
LOOPER
(MULTIPLE
LOOPER
MACHINES)
Pass
each thread
from
unwinder through threading
points
indicated
in
Fig.
12
and
13.
Before threading looper,
press
looper throw-out
release
toward operator and swing looper carrier to the
right
as
shown In Fig. 13.
When
threading Is completed, draw approximately
two inches of thread through looper
eye
to
start
sewing.
Return looper carrier to sewing position.
ADJUSTING
THREAD
TENSION
Regulate needle thread tension only when
presser
foot
is
down.
Tension
on thread should be
as
light
as
possible
while
still
sufficient
to
set
the
stitch
in
material.
To regulate, turn thumb nut
at
front of
tension
discs,
as shown in
Fig.
14 and 15.