Introduction – 1
INTRODUCTION
Optimal use and maintenance are described in these instructions. This product is not intended for industrial or commercial use.
Additional assistance, by region, may be found online at www.singer.com.
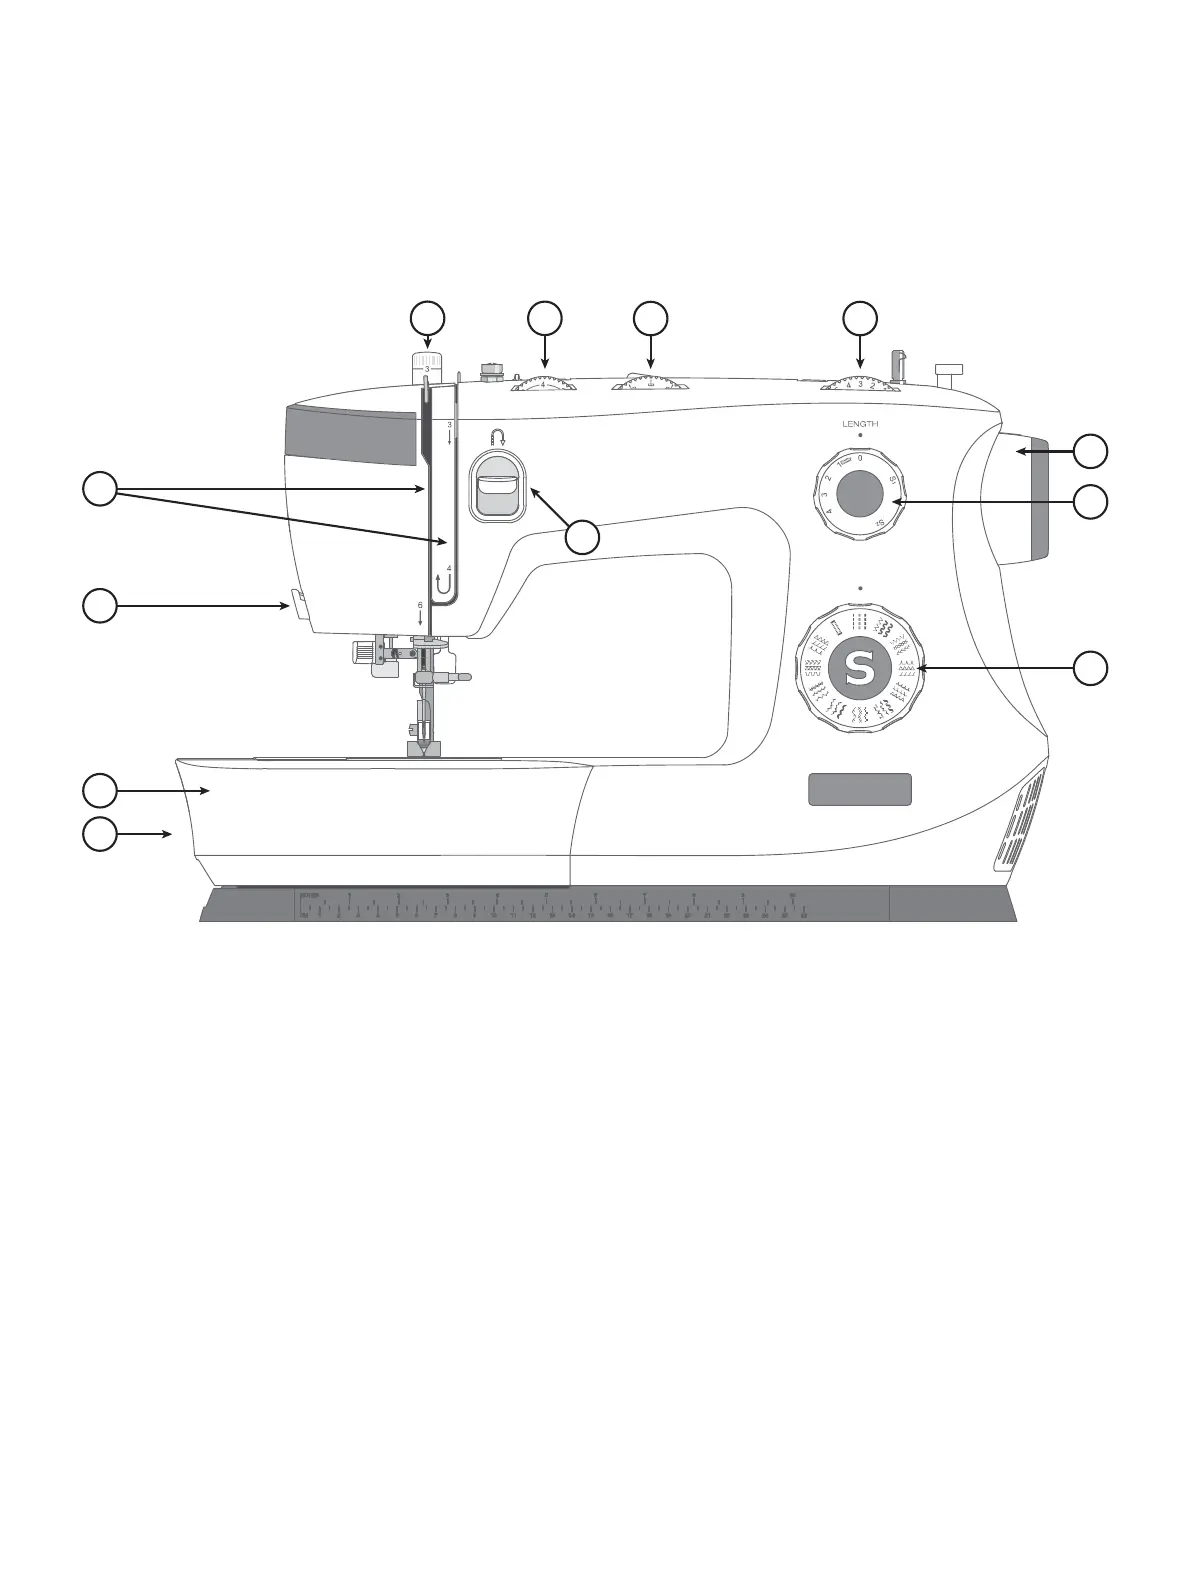
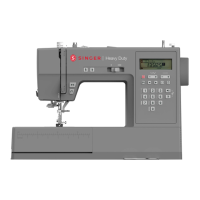
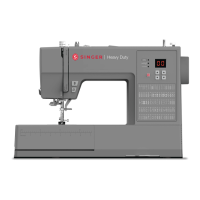
1. Feed Teeth Lever — move from side to side to engage or
disengage the feed teeth. Positioned at the back of the free
arm.
2. Accessory Tray / Free Arm — provides a at surface when
sewing and allows storage for your accessories. Remove the
accessory tray to use the free arm which makes it easier to
sew, e.g., trouser hems and sleeves.
3. Thread Knife — for trimming thread ends at the end of
sewing.
4. Threading Slots — thread paths with tension discs and take up
lever.
5. Reverse Sewing Lever — reverses stitching direction, for
example, when securing the beginning or ending of a seam.
6. Presser Foot Pressure — controls the pressure the presser foot
exerts onto the fabric.
7. Thread Tension Dial — adjustable for setting the desired
tension for your stitch, thread and fabric.
8. Three Needle Position Dial — the needle position can be
altered as desired (see page 16).
9. Stitch Width Dial — controls the width of stitches, making
them narrower or wider (see page 16).
10. Hand Wheel — used to manually control the movement of the
needle and the thread take-up lever.
11. Stitch Length Dial — controls the length of stitches, making
them shorter or longer as desired. It is also used for stretch
stitch selection (see page 16).
12. Stitch Selector Dial — is used to select stitch patterns and
buttonhole settings (see page 15).
Intended Use
Machine Overview
6
7
5
10
8
12
9
1
2
3
4
11