20
NOTE: Never use products containing oil for cleaning, as these will attract dirt. This will cause the
saw blade to jam while machining a workpiece.
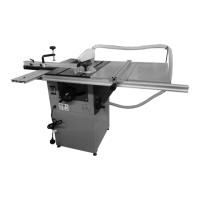
7.2.3 Assembly/exchange saw blade
• Adjust
the cutting height to the maximum possible level.
• Remove the saw blade guard (1) by slackening off the
locking knob (2) and unhooking from the riving knife.
• Loosen the two screw
s (3) that fix the table insert and
remove the table insert.
• F
ix the drive shaft at the flange (6) with the supplied
fl
a
ng
e
w
r
ench (4). For this purpose, the flange wrench
must be in line with the two flattened sides on the flange.
• Turn the screw (8) with a wrench (5) clockwise (left thread)
to loosen it.
• Remove the screw (8) with the washer (7), flange (6) and
saw blade (9) from the drive shaft.
• Clean the drive shaft and the flange (6) thoroughly from
impurities.
• Replace the old saw blade with a new one.
• Make sure that the new saw blade is undamaged and not
dirty.
• Place the saw blade (9) and the flange (6) on the drive
shaft.
• Screw the screw (8) with washer (7) back onto the drive
shaft, fix it (tightening torque: 25Nm
) with the flange
wrench (4) and tighten it counterclockwise with the
wrench (5).
NOTE Retighten the nut tightly to prevent the nut from
loosening during operation.
• Replace the table insert and retighten the two screws (3
)
to hold it in place.
• Fit the saw blade guard (1) on the riving knife.
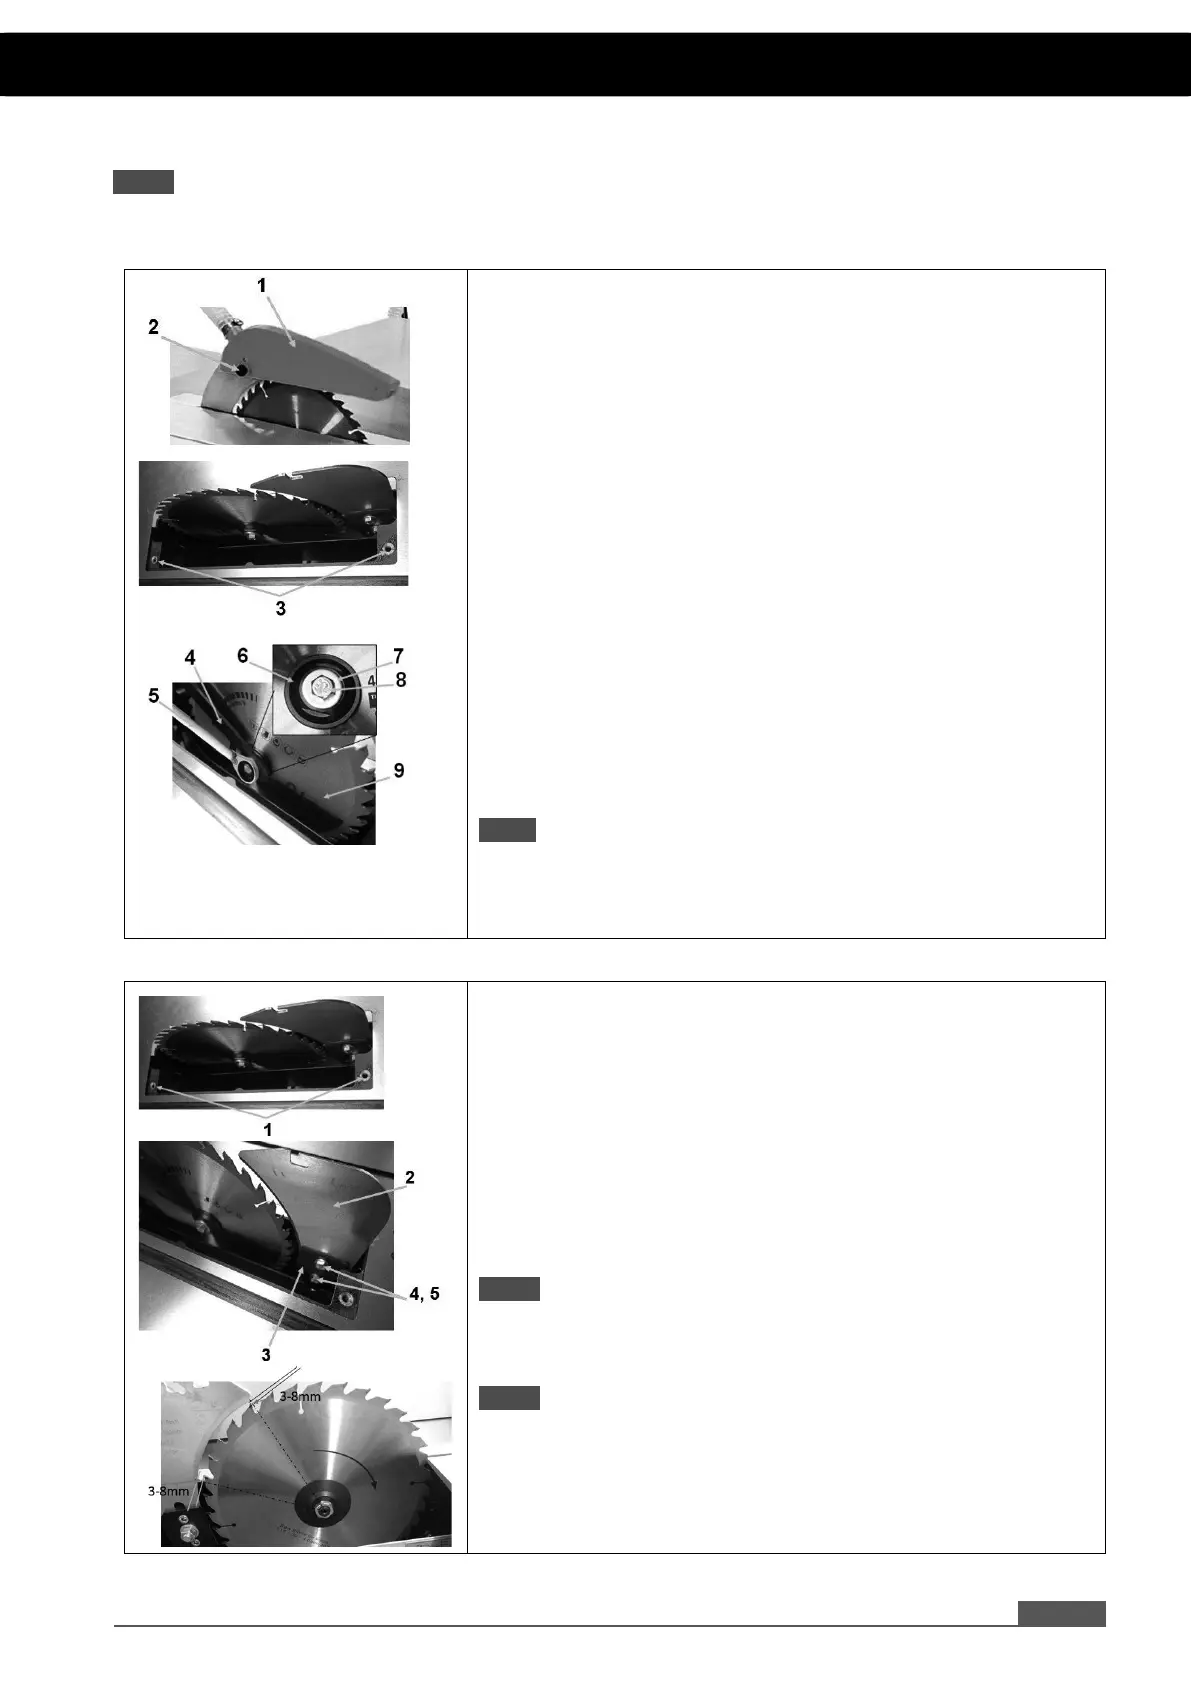
7.2.4 Assembly / adjustment riving knife
The riving
prevents the teeth on the rear circumference of
the saw blade from touching the workpiece and causing
unintentional damage or ejection.
• Loosen the two screws (1) that fix the table insert and
remove t
he table insert.
• Place a washer (4) on the thread of the screws (5), an outer
clamping plate (3) the riving knife (2) and the inner
clamping plate.
• Then, tighten the screws (5) slightly in the boreholes
provided.
• Adjust the distance between saw blade and riving knife.
NOTE: The distance between the saw blade and the riving
knife must be within 3-8mm. This procedure should be
repeated each time the saw blade is replaced.
NOTE: Check with the rip fence whether the riving knife is
parallel to the saw blade.
• F
inally t
i
g
ht
en
(
tightening torque: 25Nm
)
the screws (4, 5).
• Reinsert the table insert and fix it with 2 screws (1).
7. CLEANING, MAINTENANCE, STORAGE & DISPOSAL
 Loading...