Do you have a question about the Sirius Range Hoods SUT900 and is the answer not in the manual?
Guidelines for routing exhaust air to the outside, specifying materials and bends.
Method to calculate maximum duct length based on elbows, transitions, and caps.
Proper duct connection to the hood and safety regarding combustion gases.
Details on voltage, frequency, amperage, and connection point for the appliance.
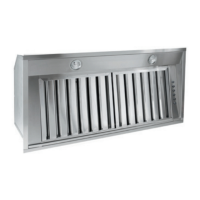
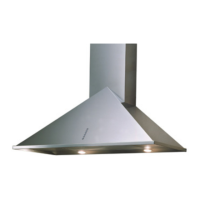
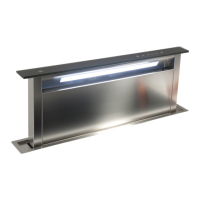
Describes how different models can be installed and provides specific dimensions.
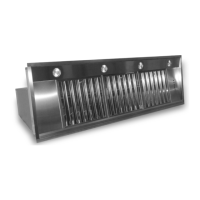
Guidance on installing liners (Sch31A or Pro Liners) for cabinet protection.
Step-by-step instructions for installing the SCH31A liner with specific hood models.
Instructions for installing these hood models without a liner, using pressure springs.
Details on the four holes inside the SUT900 for fixing the unit to the hood base.
Instructions for installing an adjustable pro liner with the SU901 model.
Attention note about minimum cabinet thickness for installation.
Instructions for installing SU902 using pressure springs.
Instructions for installing SU903 using pressure springs.
Instructions for installing SU908, referring to fixing holes.
Guidance on connecting electrical supply and ductwork, with a caution.
Ensure no damaged parts, read instructions, assemble LED bar later.
How to remove the metal grease filter and oil collector for installation.
Key steps like preparing power, exhaust hole, and avoiding abrupt direction changes.
How to make a cut-out for the appliance and calibrate fixing springs.
Steps for inserting the hood into the cabinet and hooking springs.
Securing the hood to the cabinet using screws on front and rear sides.
How to insert the LED bar and connect its power.
Instructions for hooking and fixing the oil container.
Connecting ductwork to the fan exhaust point for exterior venting, using duct tape.
How to fit carbon filters behind grease filters, noting tab orientation.
Connecting ductwork from the fan to the exhaust point, ensuring space and using duct tape.
Keep filters in place, clean surfaces, turn fan on, never leave cooking unattended.
Warnings about flammable substances, oil overheating, and range top grease fires.
Steps to take in case of a range top grease fire, including evacuation and using lids.
Explanation of the 5 buttons on the transmitter and their corresponding functions.
Procedure to change the radio control's transmission code.
Steps to restore the radio control to its original factory settings.
How to synchronize the hood's control unit with a new transmission code.
Using the emergency button to switch off the appliance if the remote fails.
Guidance on replacing the transmitter battery and important warnings.
Reminder to replace the transmitter battery annually for optimal performance.
Instructions for cleaning grease filters and replacing carbon filters.
How to clean internal and external surfaces, including stainless steel and glass components.
Instructions for replacing the light bulbs in the range hood fixture.
Procedure for substituting the LED bar on specific models.
Instructions on how to register the product online to validate the warranty.
How to notify Sirius for warranty service, including required information.
Details of the repair or replacement warranty for the first year.
Information on providing free replacement parts for three years.
Specifies who is covered and the duration of the warranty against defects.
Lists exclusions from the warranty, such as filters, misuse, and improper installation.
| Brand | Sirius Range Hoods |
|---|---|
| Model | SUT900 |
| Category | Ventilation Hood |
| Language | English |