650 DELTA USE AND INSTALLATION INSTRUCTIONS
PERFORM GAS LEAK TEST
GAS LEAK TEST
•
Using a solution of soapy water, paint the piping connections, which are upstream of the
control.
The presence of bubbles indicates a gas leak.
If a leak is detected, tighten the pipe connections and repeat leak test.
•
Light the main burner following the lighting instructions..
•
With the main burner in operation, paint all piping connections from the valve with a soap and
water solution.
•
If another leak is detected, tighten the connection.
•
If after tightening the connections the leak is still present, replace the leaky part or valve. Shut
off the main gas supply before attempting replacement of parts or the valve.
WARNING!
Stand away from the main burner while lighting.
Hidden gas leaks can cause flashbacks in the appliance area. Check for gas leaks with rich
soap and water solution any time work is done on a gas system.
WARNING!
Fire or Explosion hazard.
Can cause damage to property and severe injury or death.
Do not force the control knob. Use only your hand to turn the knob. If the knob does not move
by hand, the valve should be replaced by a trained service technician.
FINAL CHECKS
SETTINGS AND ADJUSTMENTS
The valve is preset at the factory, and is not field
adjustable.
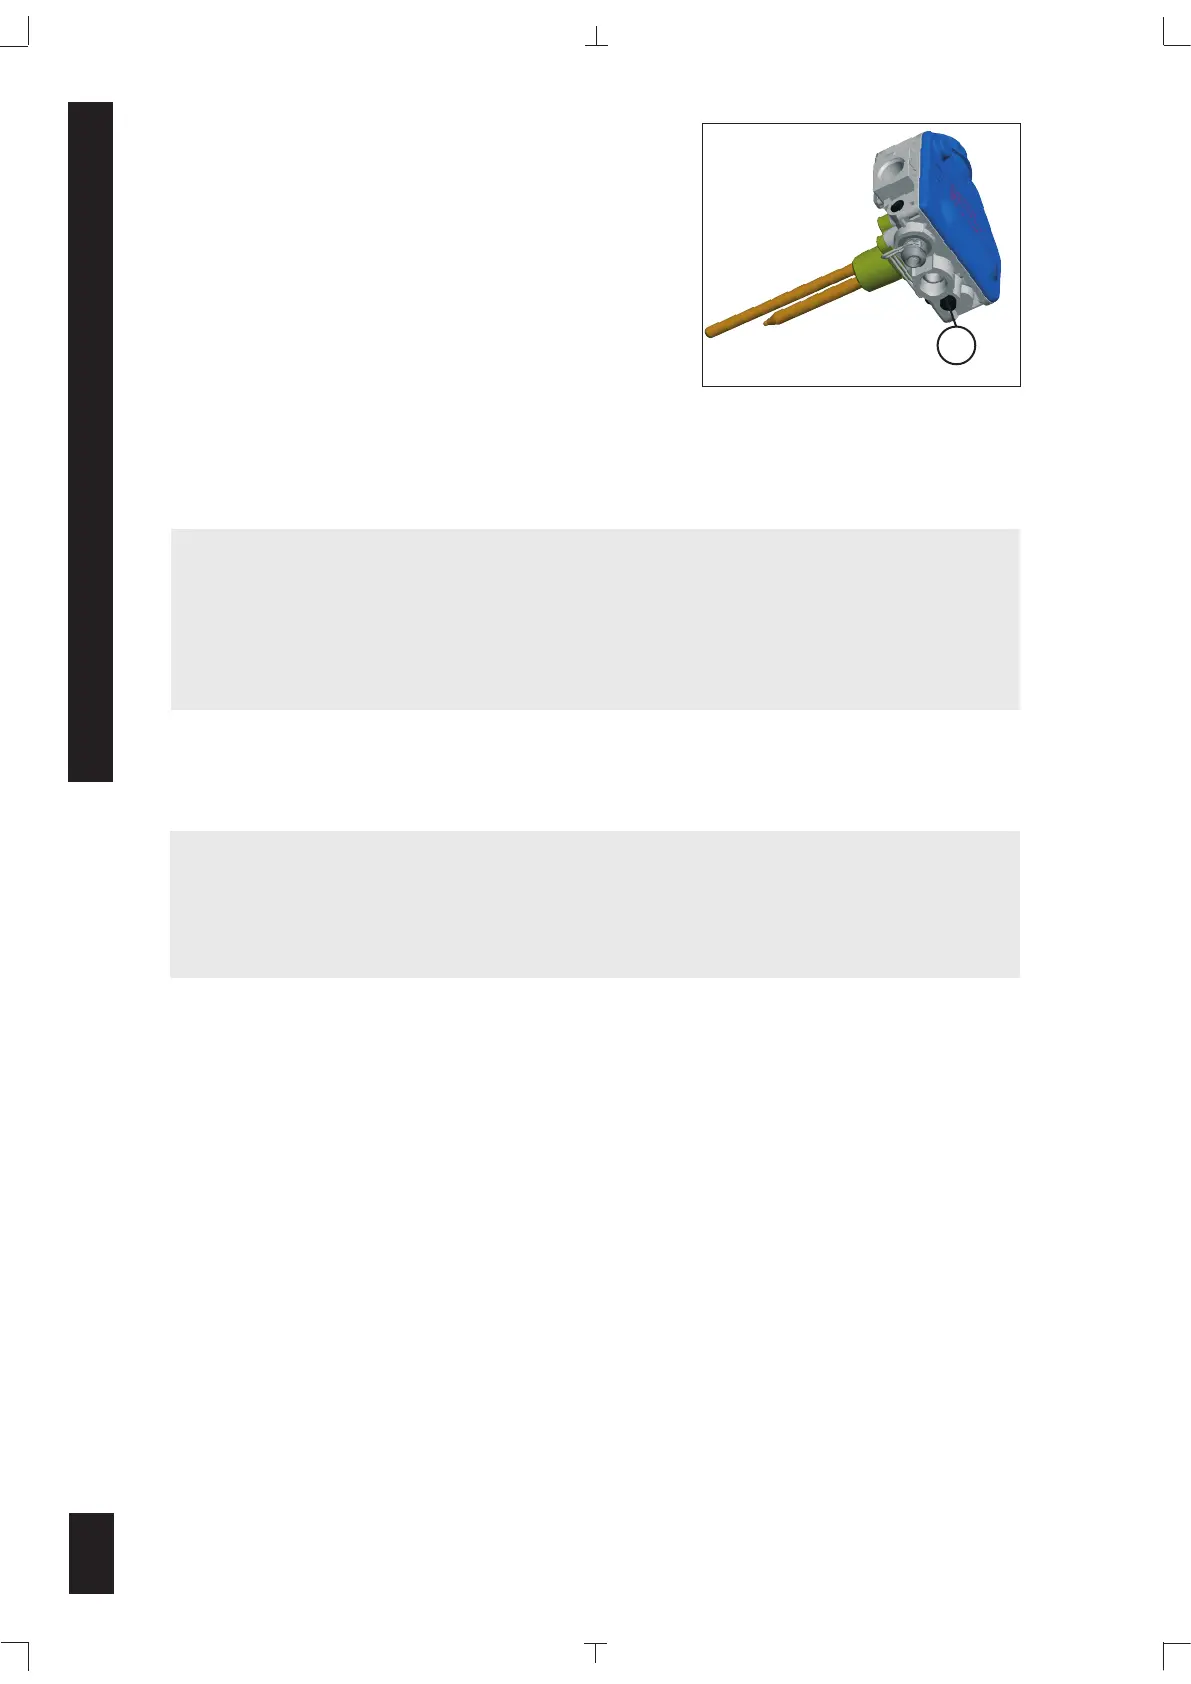
Verify the outlet pressure via the 1/8”NPT outlet pressure
test plug (8 in Fig. 11). Upon completion of testing, the
sealing plug must be reinstalled using a 3/16” hex key,
with 22 lbf·in of torque and a gas leak test must be
performed.
8
8
Fig. 11