-5-
Operation Instructions
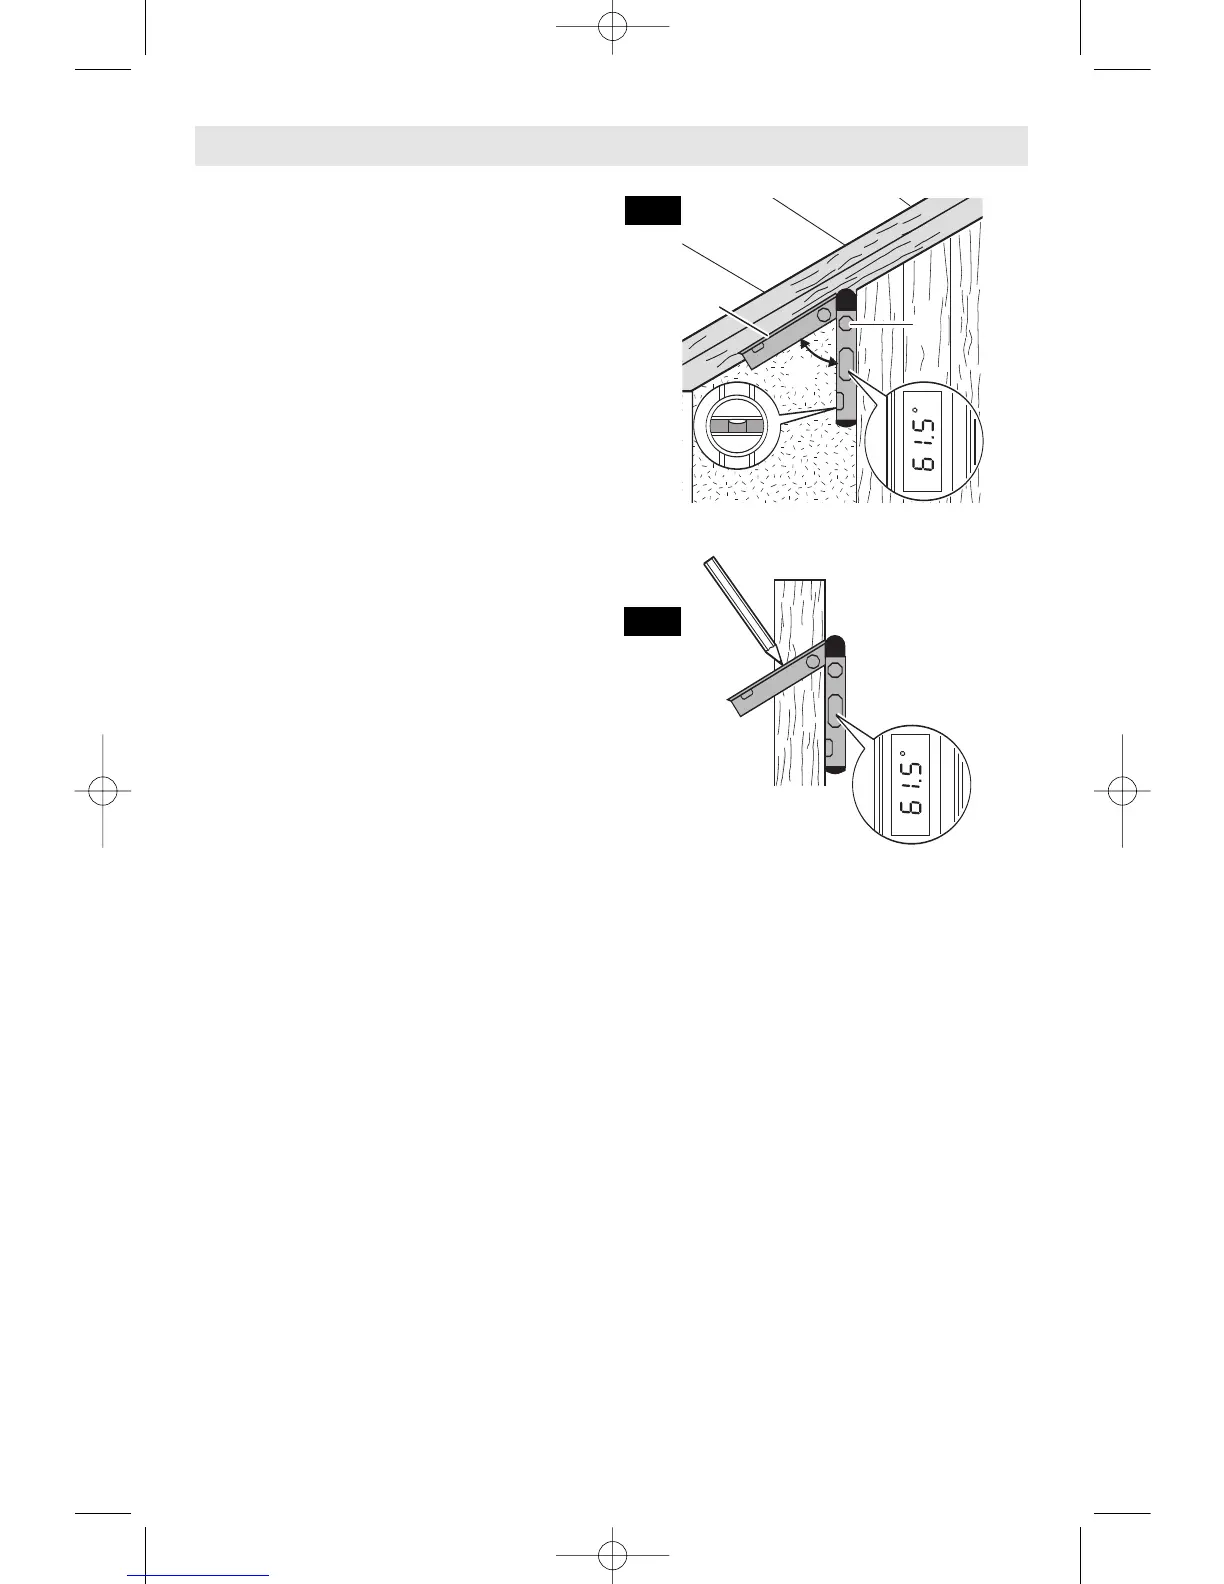
MEASURING ANGLES (Fig. 3)
Position the fold-out leg 1 and the base leg 3
plane against the edges to be measured.
The displayed reading corresponds with the
internal angle
w between the base leg and
the fold-out leg.
The reading is indicated on the display until
the legs are moved in relation to each other.
RETAINING THE MEASURED
VALUE (“HOLD”)
The current reading can be retained in the
display by pressing the
HOLD button 6.
When the hold mode is activated, “HOLD” d
is indicated in the display. The reading
remains unchanged (even when the legs are
moved in relation to each other) until the
HOLD button 6 is pressed again.
TRANSFERRING ANGLE TO
MITER ANGLES (Fig. 4)
Position the measuring tool with the fold-out
leg
1 or with base leg 3 against the angle you
want to measure. Adjust the required angle
with the other leg and project the angle onto
the workpiece.
When directly projecting a measured angle
onto a workpiece, pay attention that the fold-
out leg
1 and base leg 3 don’t move.
After
pressing the
HOLD button 6, which stores the
measured angle, the user can now activate
the
MTR (miter) button 5. By pressing the
MTR button 5, the Angle Finder is taking the
measured angle and converting it to the
correct Miter Cut Angle. This measurement is
what you need to set your miter saw in order
to create the correct cut.