13
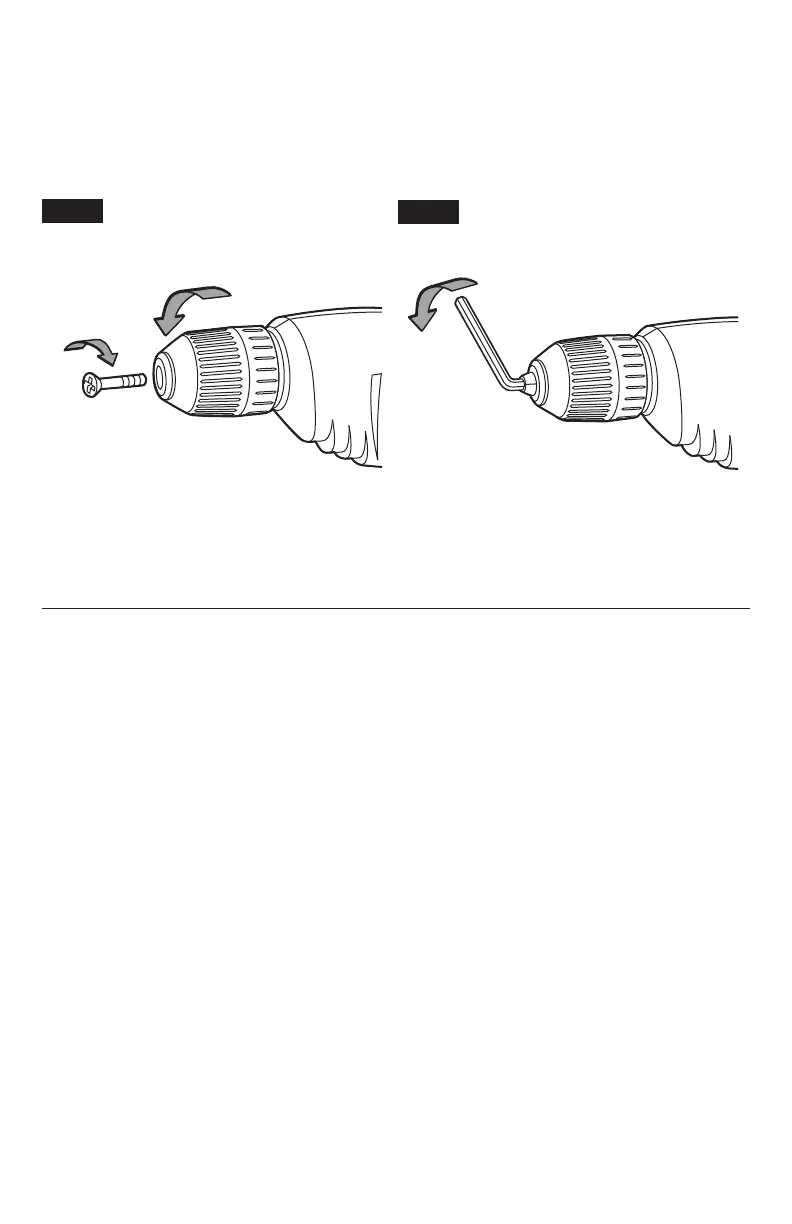
Removing Chuck
Open the chuck all the way, remove left-hand thread screw inside chuck by turning it clockwise
(Fig. 3).
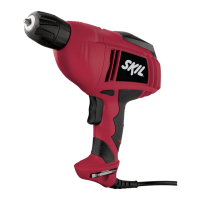
Insert the short arm of a 3/8” hex key wrench and close jaws on ats of wrench (Fig. 4). Strike
long arm of wrench sharply counter¬clockwise, remove wrench and unthread chuck from
spindle.
Fig. 3
Counter
Clockwise
Clockwise
Fig. 4
Counter
Clockwise
Installing Chuck
Always keep the spindle threads, the threads of the chuck and securing screw free of debris.
To install a chuck, reverse “removing the chuck” procedure.
Operating Tips
You will extend the life of your bits and do neater work if you always put the bit in contact with
the work before pulling the trigger. During the operation, hold the tool rmly and exert light,
steady pressure. Too much pressure at low speed will stall the tool. Too little pressure will
keep the bit from cutting and cause excess friction by sliding over the surface. This can be
damaging to both tool and bit.
Drill Bits
Always inspect drill bits for excessive wear. Use only bits that are sharp and in good condition.
TWIST BITS: Available with straight and reduced shanks for wood and light duty metal drilling.
High speed bits cut faster and last longer on hard materials.
CARBIDE TIPPED BITS: Used for drilling stone, concrete, plaster, cement and other unusually
hard nonmetals. Use continuous heavy feed pressure when employing carbide tip bits.