1. The battery pack accepts only about 80%
of its maximum capacity with its first few
charge cycles. However, after the first few
charge cycles, the battery will charge to full
capacity.
2. The charger was designed to fast charge
the battery only when the battery
temperature is between 32˚F (0˚C) and
113˚F (45˚C).3. A substantial drop in
operating time per charge may mean that the
battery pack is nearing the end of its life and
should be replaced.
4. If you anticipate long periods (i.e. a month
or more) of non-use of your tool, it is best to
run your tool down until it is fully discharged
before storing your battery pack. After a long
period of storage, the capacity at first recharge
will be lower. Normal capacity will be restored
in two or three charge/discharge cycles.
Remember to unplug charger during storage
period.
5. If battery does not charge properly:
a. Check for voltage at outlet by plugging
in some other electrical device.
Skil model SB18B-LI lithium ion battery pack is
compatible with all existing Skil 18V tools that
use the SB18B and SB18A Ni-Cd batteries.
Only use the specified charger
t
o charge your Li-Ion batteries.
Do not charge Li-ion batteries with a Ni-Cd
charger.
Plug charger cord into your standard power
outlet, then insert battery pack into charger.
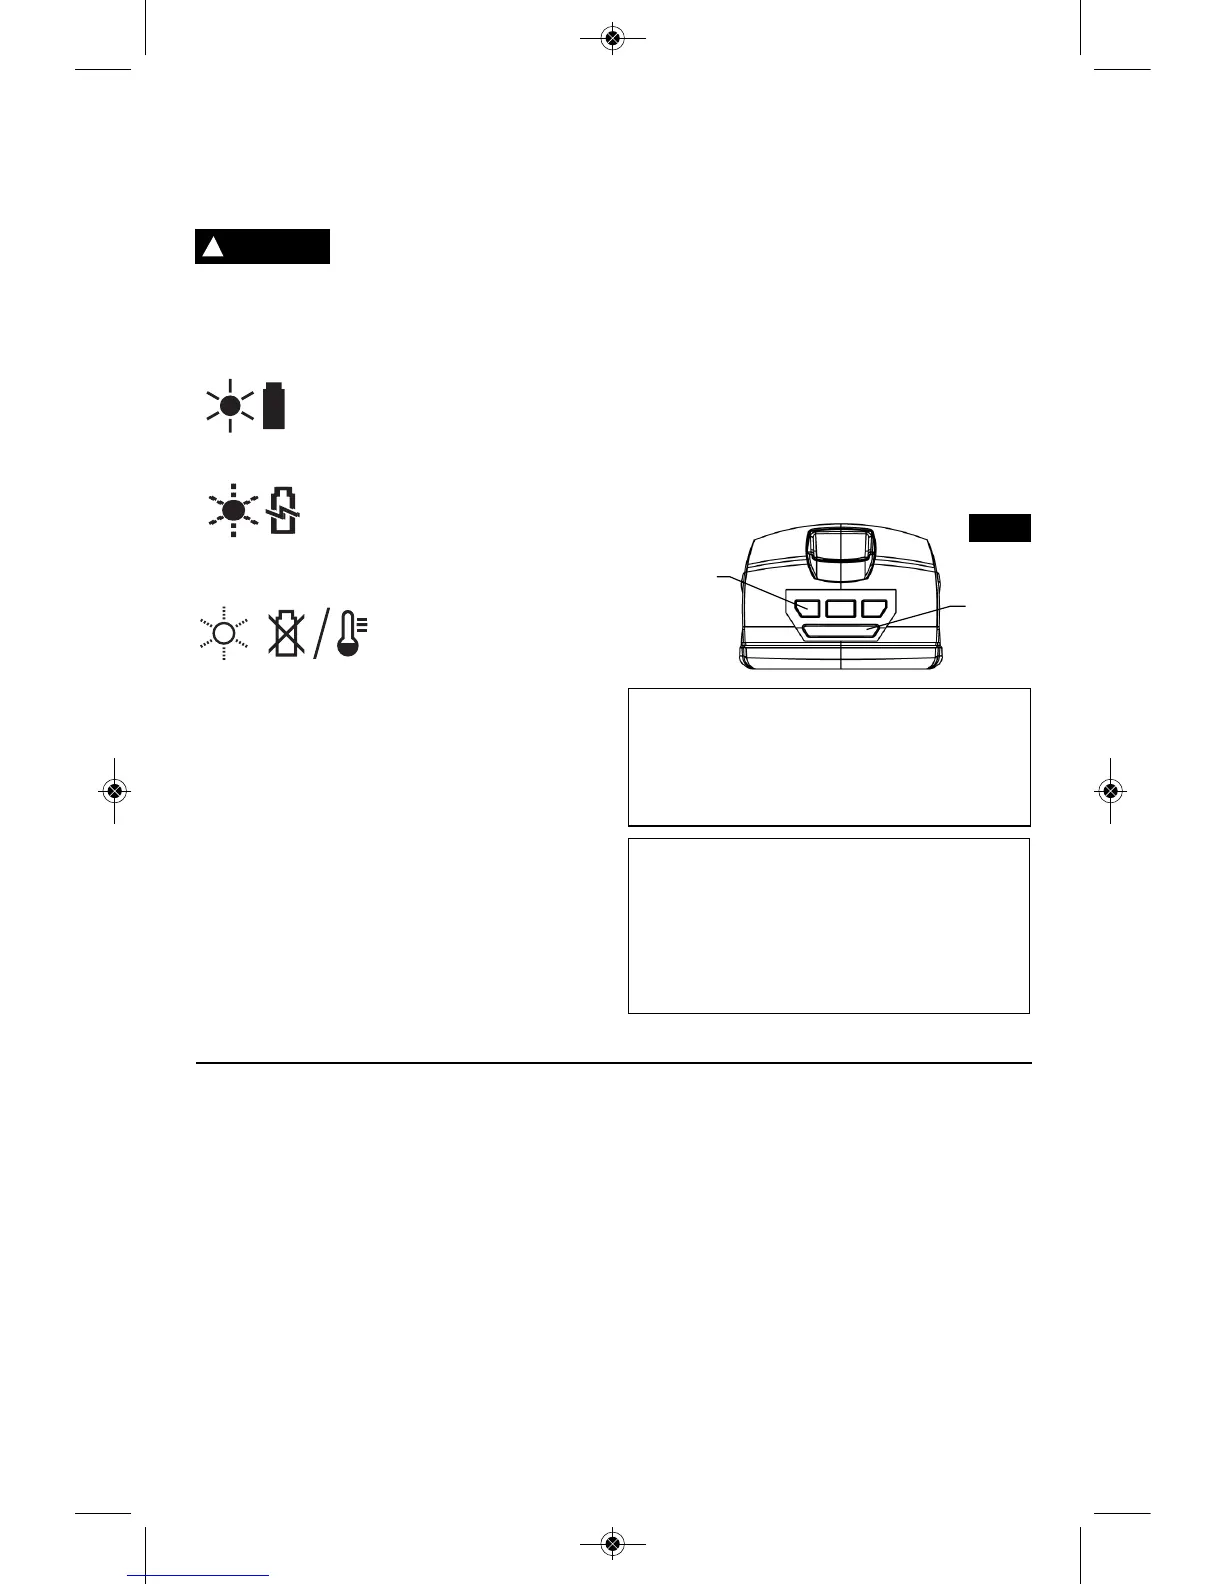
If the green indicator light is “ON”,
the charger is plugged in but the
battery pack is not inserted, or the
battery pack is fully charged.
If the green indicator light is
“BLINKING”, the battery pack is
being fast-charged. Fast-
charging will automatically stop when the
battery pack is fully charged.
If the green indicator light
is “BLINKING RAPIDLY”,
the battery pack is too
hot or cold for fast-charging. The charger will
automatically switch to fast-charging once a
suitable temperature is reached, := the battery
pack cannot accept a charge or the contacts of
the charger or battery pack are contaminated.
Clean the contacts of the charger or battery
pack (e. g. by inserting and removing the
battery several times) or replace the battery
pack, as required.
The purpose of the light is to indicate that the
battery pack is fast-charging. It does not
indicate the exact point of full charge. The light
will stop blinking in less time if the battery pack
was not completely discharged.
When the battery pack is fully charged, unplug
the charger (unless you're charging another
battery pack) remove battery pack from
charger and slip the battery pack back into the
tool handle.
%%#*#! %!
%!#%$
$%%#*
Your battery pack is equipped with charge
condition indicator lights (Fig. 7). The indicator
lights shows the charge condition of the
battery during operation.
To check battery charge condition, depress
and hold the button on the backside of the
battery pack.
-12-
# %%#*"$ ##
,;,.4?D
Continuous lighting 3 x blue 66% - 100%
Continuous lighting 2 x blue 34 - 65%
Continuous lighting 1 x blue 11 - 33%
Slow flashing 1x blue 0% - 10%
==:=0>>,20
Alternating Battery temperature is not
left middle within normal operating
right 1 temperature range of
x blue 0°C (32°F) to 45°C (113°F),
:= battery current is over
the normal operating range.
BATTERY
CHARGE
CONDITION
INDICATOR
LIGHTS
BUTTON
"!#% %# !%$ &%%#$
FIG. 7
!
WARNING
SM 1619X03849 11-08:SM 1619X03849 11-08 11/21/08 10:21 AM Page 12


 To Next Page