26
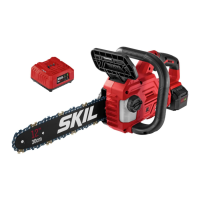
Disassembling the Worn Bar and Chain
(Fig. 23)
1. Remove the battery, allow the saw to cool
and tighten the oil tank cap.
2. Position the chain saw on its side on a rm,
at surface, so that the side cover is facing
upwards.
3. Wear gloves. Remove the side
cover by turning the side-cover knob
counterclockwise. Clean the side cover
with a dry cloth.
4. Remove the bar and chain from the
mounting surface. Remove the worn chain
from the bar.
NOTICE:
This is a good time to inspect the
drive sprocket for excessive wear or damage.
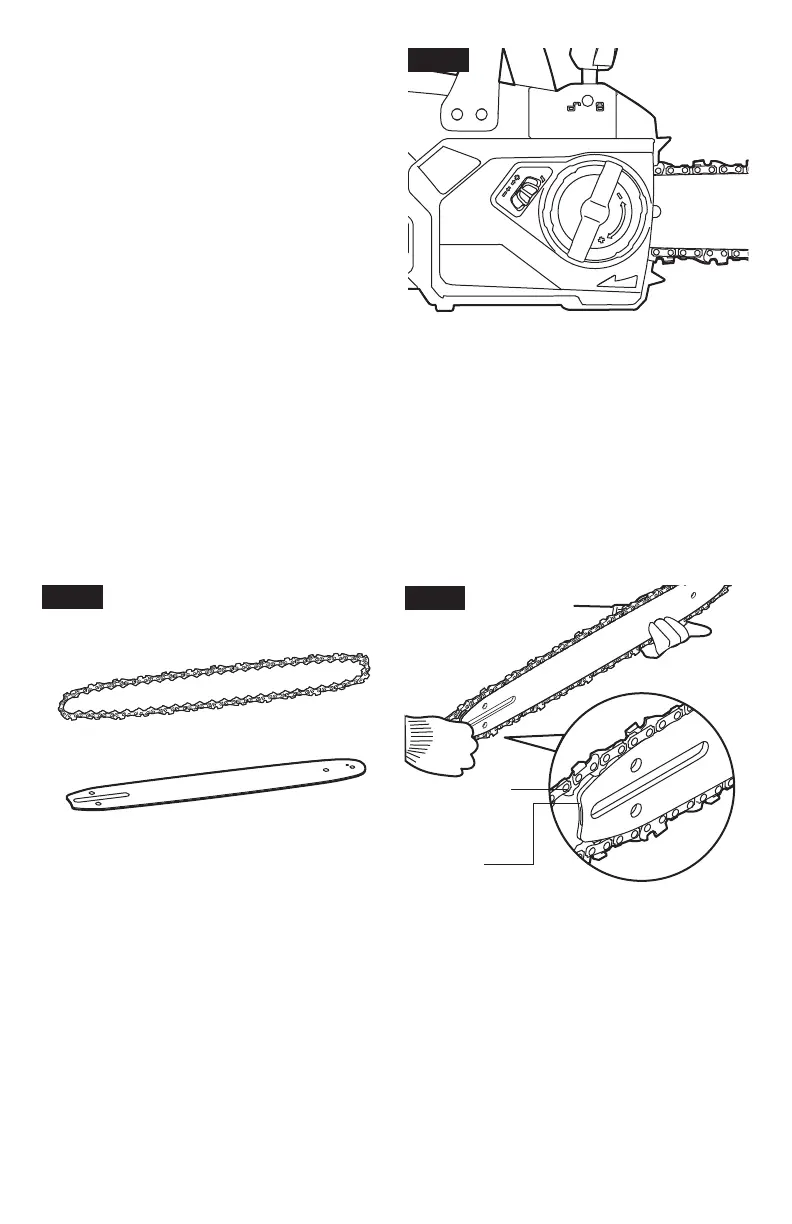
Assembling the New Bar and Chain
1. Remove the battery, allow the saw to cool and tighten the oil tank cap.
2. Lay the new saw chain in a loop on a at surface and straighten any kinks (Fig. 24).
3. Place the chain drive links into the guide bar groove. Position the chain so there is a loop
at the back of the guide bar (Fig. 25).
4. Hold the chain in position on the guide bar and place the loop around the sprocket of the
power head.
Fig. 24
Fig. 25
Chain Drive
Links
Guide Bar
Groove
NOTICE:
Small directional arrows are engraved in the saw chain (Fig. 26a). Another
directional arrow is molded into the housing (Fig. 26a). When looping the saw chain onto the
sprocket, make sure that the direction of the arrows on the saw chain will correspond to the
direction of the arrow on the housing. If they face in opposite directions, turn over the saw
chain and guide bar assembly (Fig. 26b).
Fig. 23

 Loading...