EasyManua.ls Logo

Skil DL181901 - User Manual

Skil DL181901
52 pages
Print Icon
To Next Page IconTo Next Page
Loading...
WARNING: To reduce the risk of injury, the user must read and understand the
Owner’s Manual before using this product. Save these instructions for future reference.
AVERTISSEMENT : Afin de réduire les risques de blessure, l’utilisateur doit lire et
comprendre le guide d’utilisation avant d’utiliser cet article. Conservez le présent guide
afin de pouvoir le consulter ultérieurement.
ADVERTENCIA : Para reducir el riesgo de lesiones, el usuario debe leer y comprender
el Manual del operador antes de utilizar este producto. Guarde estas instrucciones para
consultarlas en caso sea necesario.
Owner’s Manual
Guide d’utilisation
Manual del propietario
For Customer Service
Pour le service à la clientèle
Servicio al cliente
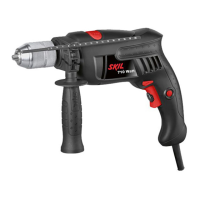
1/2 in. Corded Drill
Perceuse à l de 1/2 po
Taladro con cable de 1/2 pulg.
1-877-SKIL-999
OR
www.skil.com
Model/ Modelo/ Modèle: DL181901

Questions and Answers

  • P
    Paul GilbertJul 28, 2025
    What to do if Skil DL181901 Drill has excessive vibration?
    • B
      bhallJul 28, 2025
      Excessive vibration in your Skil Drill can often be traced to the accessory you're using. Check the accessory for any bends or damage, and replace it if necessary. Also, ensure that the accessory is properly secured in the chuck, referencing the 'Inserting Bit' section of the manual for guidance.
  • B
    Brittany GrossAug 4, 2025
    What to do if accessory binds when drilling with Skil DL181901?
    • B
      Brittany RodriguezAug 4, 2025
      If the accessory binds, stalls the motor, or kicks back while drilling with your Skil Drill, it could be due to a damaged or incorrect accessory. Discard the old accessory and replace it with a new one. Ensure you are using an accessory that is properly rated for the drill speed, as indicated by the accessory manufacturer.
  • Z
    zjacksonAug 13, 2025
    Why my Skil DL181901 Drill will not start?
    • B
      Benjamin CarrAug 13, 2025
      If your Skil Drill won't start, there are several potential causes. First, ensure the power cord is properly plugged into a functioning power source. Check your home's fuse or circuit breaker, and replace the fuse or reset the breaker if necessary. If the issue persists, inspect the power cord for any signs of damage, and if found, have it replaced by an authorized Skil service center. A burned-out switch could also be the culprit, in which case you should also seek assistance from a qualified service center.
  • S
    Stacy EstradaAug 19, 2025
    Why Skil DL181901 Drill does not come up to speed?
    • C
      calderonluisAug 20, 2025
      If your Skil Drill isn't reaching its full speed, the extension cord might be the issue. Try replacing it with one of adequate gauge, referring to the 'EXTENSION CORDS' section for guidance. Alternatively, the problem might stem from low house voltage, in which case you should contact your electric company to investigate.

Summary

GENERAL POWER TOOL SAFETY WARNINGS

Work area safety

Keep work area clean and well lit. Avoid explosive atmospheres and keep children away.

Electrical safety

Ensure plugs match outlets, avoid grounded surfaces, and protect cords from damage.

Personal safety

Stay alert, use common sense, wear PPE, prevent unintentional starting, and maintain balance.

SAFETY WARNINGS FOR DRILLS

Power tool use and care

Use correct tool, maintain it, keep cutting tools sharp, use safely, and handle dry surfaces.

Service

Have power tools serviced by qualified personnel using identical replacement parts.

Safety instructions for all operations

Use auxiliary handle, hold by insulated surfaces, and be aware of hidden wiring.

ADDITIONAL SAFETY WARNINGS

Safety instructions when using long drill bits

Never exceed bit speed rating, start low, and apply pressure in line with the bit.

Securing workpiece and avoiding hazards

Secure workpiece, avoid drilling into walls, wear eye protection, and keep cord away from bit.

Handling binds and kickback

Release trigger immediately if bit binds, reverse rotation, and be ready for torque.

Chuck and bit installation safety

Insert bits properly, remove wrenches before starting, and use sharp, undamaged bits.

SYMBOLS

Safety Symbols

Understand safety symbols like DANGER, WARNING, CAUTION for injury prevention.

Damage Prevention and Information Messages

Follow instructions to prevent equipment or property damage, and always wear eye protection.

GET TO KNOW YOUR DRILL

Corded Drill Diagram

Diagram identifying parts like Chuck, Auxiliary Handle, Trigger Switch, and Grip.

SPECIFICATIONS

General Specifications

Details Model No., Chuck size and type, and RPM (No-load speed).

OPERATING INSTRUCTIONS

Variable-speed Trigger Switch

Control ON/OFF and speed by squeezing the trigger. Apply more pressure for higher speed.

Lock-On Button

Allows continuous operation at max RPM. Lock ON by squeezing, depressing lock-on, releasing trigger.

Reversing Switch Button

Used to reverse rotation. Move to far left for forward, far right for reverse. Stop tool before changing.

Tool Features and Setup

Inserting and Securing Drill Bits

Properly insert and tighten bits using the chuck key. Understand chuck tightening and release.

Auxiliary Handle Functionality

Mount and adjust the auxiliary handle for better control and support around the housing collar.

Depth Gauge Adjustment

Set the desired drilling depth using the depth gauge rod and auxiliary handle.

Drilling Techniques and Tips

Drill Level and General Operation

Use drill level for accuracy and follow tips for better work and bit life.

Variable Speed Drilling

Utilize variable speed for controlled drilling, starting slow and increasing as bit bites.

Drill Bits and Wood Drilling

Select sharp bits, use twist bits for wood, and apply proper techniques for clean holes.

Drilling Metal

Metal Drilling Tips

Use higher pressure for harder materials, slower speed. Lubricate, drill pilot holes for larger sizes.

MAINTENANCE

Tool Servicing and Lubrication

Service by authorized personnel. Lubricate gears at brush change for peak efficiency.

Component Care: Brushes, Bearings, and Cleaning

Examine brushes, replace noisy bearings, clean openings with compressed air, avoid solvents.

EXTENSION CORDS

Extension Cord Requirements

Use adequate size conductors for current. Grounded tools need 3-wire cords.

TROUBLE SHOOTING

Tool will not start

Check power cord, fuse/breaker, cord damage, or switch failure. Service if issues persist.

Tool does not come up to speed

Check extension cord gauge/length or house voltage. Use adequate cords or contact electric company.

Excessive vibration

Discard or replace bent or damaged accessories. Ensure accessory is secure in chuck.

Accessory binds, stalls motor or kicks back when drilling

Discard damaged accessories or use correctly rated ones for drill speed.

LIMITED WARRANTY

Warranty Terms and Exclusions

One-year limited warranty on material/workmanship. Excludes accessories. Liability limitations apply.

Skil DL181901 Specifications

General IconGeneral
Voltage18V
Chuck Size1/2 inch
Chuck TypeKeyless
Speed2-Speed
Battery TypeLithium-Ion
Weight3.5 lbs
Battery IncludedYes
Number of Batteries Included1
LED LightYes
TypeCordless Drill/Driver

Related product manuals