Do you have a question about the Skil 3320 and is the answer not in the manual?
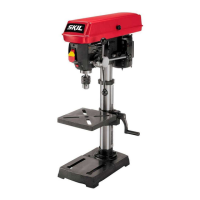
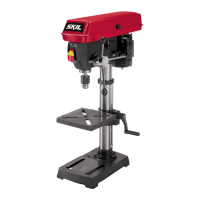
Identifies the specific model of the drill press.
Emphasizes the importance of reading instructions before operation.
Keep area clean, well-lit, and free of hazards like flammable materials.
Ensure proper grounding, avoid wet conditions, and protect the power cord.
Stay alert, use PPE, prevent unintentional starting, and dress appropriately.
Use the correct tool, do not force it, and perform regular maintenance.
Have tool serviced by qualified personnel using original parts.
Use the right tool, secure work, and never leave the tool running unattended.
Use in a well-lit area; protect eyes, hands, and body from hazards.
Use recommended accessories; feed workpiece against rotation for sanding.
Observe panel warnings and always wear safety goggles.
Use the right tool, secure work, and never leave the tool running unattended.
Use in a well-lit area; protect eyes, hands, and body from hazards.
Use recommended accessories; feed workpiece against rotation for sanding.
Observe panel warnings and always wear safety goggles.
Lists drill press speeds and emphasizes general safety awareness.
Covers safety for work area, electrical connections, and personal protection.
Guidelines for using, caring for, and servicing power tools.
Guidelines for using, caring for, and servicing power tools.
Group of important safety guidelines for tool use and care.
Use in a well-lit area; protect eyes, hands, and body from hazards.
Use recommended accessories; feed workpiece against rotation for sanding.
Observe panel warnings and always wear safety goggles.
Lists drill press speeds and emphasizes general safety awareness.
Details technical specifications of the drill press motor and electrical requirements.
Warnings about shock hazards from improper grounding or damaged cords.
Guidance on selecting appropriate extension cords for power tools.
Lists technical specifications like power, frequency, consumption, and speeds.
Warnings about shock hazards from improper grounding or damaged cords.
Guidance on selecting appropriate extension cords for power tools.
Lists technical specifications like power, frequency, consumption, and speeds.
Guidance on proper grounding and extension cord selection.
Table specifying wire size for extension cords based on length.
Do not connect power until assembly is complete and manual is read.
Do not attempt assembly if parts are missing; obtain them first.
Avoid using volatile solvents like gasoline or naphtha.
Lists all parts included with the drill press for verification.
Do not connect power until assembly is complete and manual is read.
Do not attempt assembly if parts are missing; obtain them first.
Avoid using volatile solvents like gasoline or naphtha.
Lists all parts included with the drill press for verification.
Identifies major components of the drill press with numbered labels.
Identifies major components of the drill press with numbered labels.
Do not connect power until all assembly steps are complete.
Lists necessary tools for assembly.
Instructions for attaching the base to the column.
Detailed steps for assembling the table to the column.
Detailed steps for assembling the table to the column.
Warning regarding clearance for table rotation during assembly.
Instructions for placing the head assembly onto the column.
Instructions for attaching the feed handles.
Instructions for installing and removing laser batteries.
Warning about removing laser batteries during storage to prevent damage.
Instructions for securely mounting the drill press to a stand or workbench.
Tighten set screws to secure the drill press head.
Instructions for attaching the feed handles.
Instructions for installing and removing laser batteries.
Warning about removing laser batteries during storage to prevent damage.
Instructions for securely fastening the drill press to a stand or workbench.
Clean and inspect the drill chuck and spindle taper holes.
Steps for opening chuck jaws and seating the chuck onto the spindle.
Warning about using a metal hammer directly for chuck installation.
Steps for removing the chuck using a separator and hammer.
Be prepared to catch the chuck when it falls during removal.
Keep pulley cover in place and in proper working order during operation.
Safety precautions to follow before making any adjustments.
Steps for opening cover, loosening tension, positioning belt, and tensioning.
Warning about proper belt tension to prevent slippage.
Pull motor to tension belt and tighten knobs.
Warning about proper belt tension to prevent slippage.
Safety precautions to follow before making any adjustments.
Steps for opening cover, loosening tension, positioning belt, and tensioning.
Pull motor to tension belt and tighten knobs.
Warning about proper belt tension to prevent slippage.
Check and adjust pulley alignment using a straight edge and motor adjustment.
Loosen and tighten motor mount nuts for alignment.
Lock motor position for correct belt tension.
Explains the 5 spindle speed settings and how to achieve them by adjusting belt position.
Lock motor position for correct belt tension.
Explains the 5 spindle speed settings and how to achieve them by adjusting belt position.
Steps to open cover, loosen tension, adjust belt position, and re-tension.
Warning about proper belt tension to prevent slippage.
Loosen lock handle and turn crank to adjust table height.
Loosen lock handle to rotate table around the column.
Tilt the table to the desired angle using the scale.
Loosen/tighten bevel lock bolt to adjust and secure table tilt.
Warning about proper belt tension to prevent slippage.
Loosen lock handle and turn crank to adjust table height.
Loosen lock handle to rotate table around the column.
Tilt the table to the desired angle using the scale.
Loosen/tighten bevel lock bolt to adjust and secure table tilt.
Steps to align table square to drill bit using a combination square.
Loosen/tighten bevel lock bolt to adjust and secure table squaring.
Explains two methods for drilling blind holes to a specific depth.
Method using workpiece marking to set drilling depth.
Method using the depth scale to set drilling depth.
Factory adjustments should not be modified unless necessary due to wear.
Explains the spindle's auto-return mechanism.
Steps to adjust spring tension using housing nuts.
Warning against overtightening housing nuts, which can cause sluggish movement.
Procedure to check and adjust angular play in the spindle.
Loosen lock nut, turn screw to eliminate play, then tighten nut.
Using the chuck key to open, center, and tighten drill bits.
Warnings about using the correct chuck key and removing it before drilling.
Warning about laser beam hazard and safety rules.
Location of the laser switch on the drill press housing.
Steps to align the laser lines with the drill bit on the workpiece.
Using hex screws to adjust the laser housing and lines.
Instructions for turning the drill press on, off, and locking the switch.
Place backup material and position workpiece/material to the left.
Use a vise for small workpieces that cannot be clamped.
Ensure chuck key is removed before drilling.
Dent workpiece and lower drill bit to align with the mark.
Turn switch on, pull feed handles, and control feed rate to prevent burning or stalling.
Technique for drilling deeper holes, including chip removal.
Lubricate drill bit with oil when drilling metal to prevent overheating.
Explains two methods for drilling blind holes to a specific depth.
Method using workpiece marking to set drilling depth.
Method using the depth scale to set drilling depth.
Ensure chuck key is removed before drilling.
Factors affecting drill speed: material, hole size, bit type, cut quality.
Factors affecting drill speed: material, hole size, bit type, cut quality.
Smaller bits and softer materials need higher speeds.
Use metal bits, lubricate, clamp workpieces securely, and use wood backing if needed.
Use brad point bits, avoid auger bits, position table correctly, and use backing.
Use adequate force for cutting, avoiding slow feed (burning) or fast feed (stalling).
Turn off power, unplug, blow out dust, apply wax, lubricate spindle.
Warning about plastic-damaging agents and power cord hazards.
Repairs by trained personnel only; use recommended accessories.
Details on Skil appliance warranty, exclusions, and claims.
Freight and insurance costs are the client's responsibility for warranty claims.
Contact details for Skil Division of Electric Tools in Brazil.
List of technical service and customer assistance contacts by country.
Instructions for environmentally friendly recycling of tools and accessories.
Statement that specifications are subject to change without notice.
Turn off power and unplug before troubleshooting.
Lists problems and solutions for when the saw does not start.
Lists problems and solutions for when the blade does not reach full speed.
Lists problems and solutions for when the saw does not start.
Lists problems and solutions for when the blade does not reach full speed.
General warranty terms and conditions for Skil electric tools.
Conditions and defects excluded from the warranty coverage.
Circumstances under which the warranty becomes void.