10
PREPARING THE ROUTER TABLE FOR USE
HELPFUL TOOLS TO HAVE ON HAND
•
#1 and #2 Phillips screwdrivers
(not included)
•
3/8" wrench or nut driver (not included)
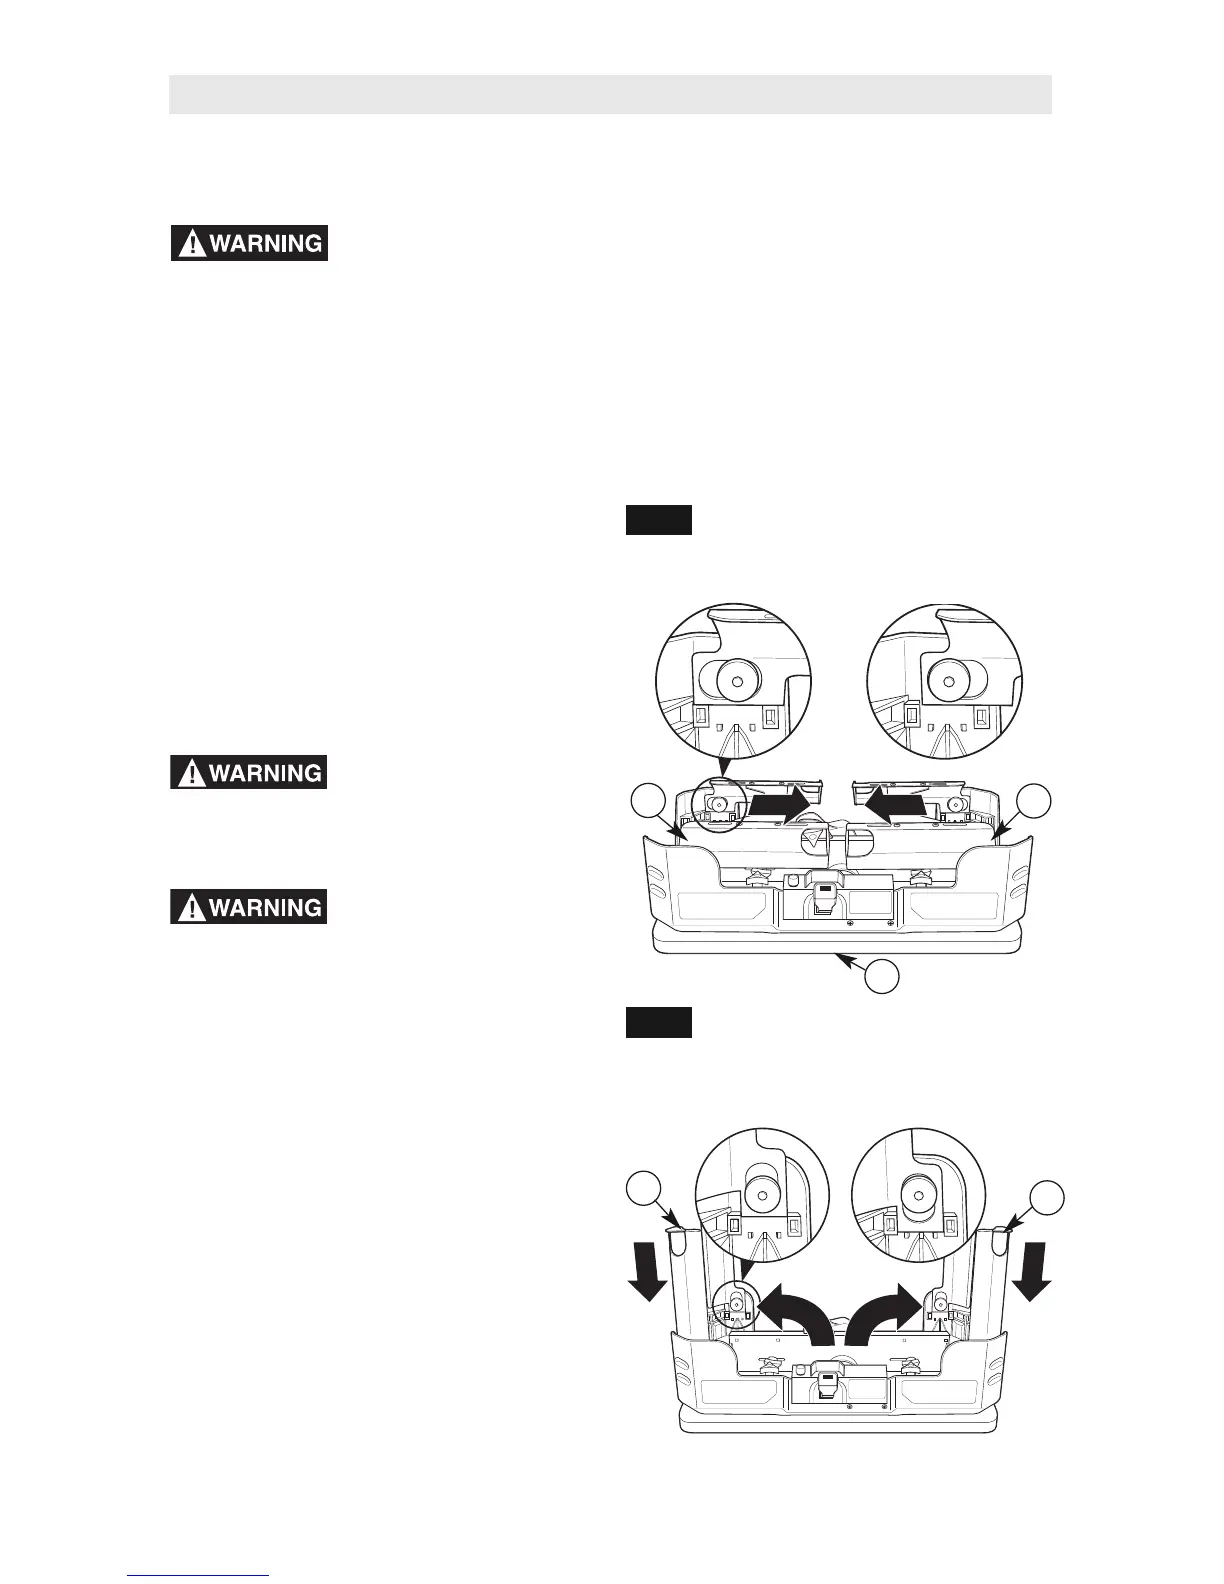
UNFOLDING AND LOCKING LEGS
(Figs. 1 and 2)
1. Gently lift and place the router table
assembly upside down on the tabletop (1).
2. Gently pull both leg assemblies (8 and 10)
inward towards center of the table until the
leg assemblies are in the unlocked position
as shown in Fig. 1.
Always rotate leg
assembly from end of leg
and keep fingers clear of joint. This avoids a
pinch point.
Never rotate leg
assemblies until the
locking tabs have been completely
disengaged. This will prevent possible
damage to the locking tabs or table housings.
3. After the leg assemblies (8 and 10) are
unlocked, rotate both leg assemblies to
the fully upright and extended position.
(See Fig. 2.)
4. Gently press down on both leg assemblies
(8 and 10) to secure and lock the left and
right leg assemblies in the upright position
as shown in Fig. 2.
Lift router table only by
the table edges. Lifting
table by any other surface could cause
personal injury.
Router Table Setup
8
10
1
FIG. 1
FIG. 2
8
10
LOCKED
(LEGS SLID
TOWARDS
OUTSIDE)
UNLOCKED
(LEGS SLID
TOWARDS
CENTER)
LOCKEDLOCKED
(LEGS SLID DOWN
TOWARDS TABLE)
UNLOCKED
(LEGS SLID UP
AWAY FROM TABLE)
 Loading...