26
EDGE CUTTING WITH PILOTED
ROUTER BITS (Figs. 28 and 29)
Disconnect the router
from the power supply
before making adjustments or changing
accessories. Such precautionary safety
measures reduce the risk of unintentional
tool operation.
NOTE: If the outfeed shim plate is installed,
remove it before proceeding.
If you are using a wet/dry vac, it should be
connected to the vacuum port on the back of
the fence assembly.
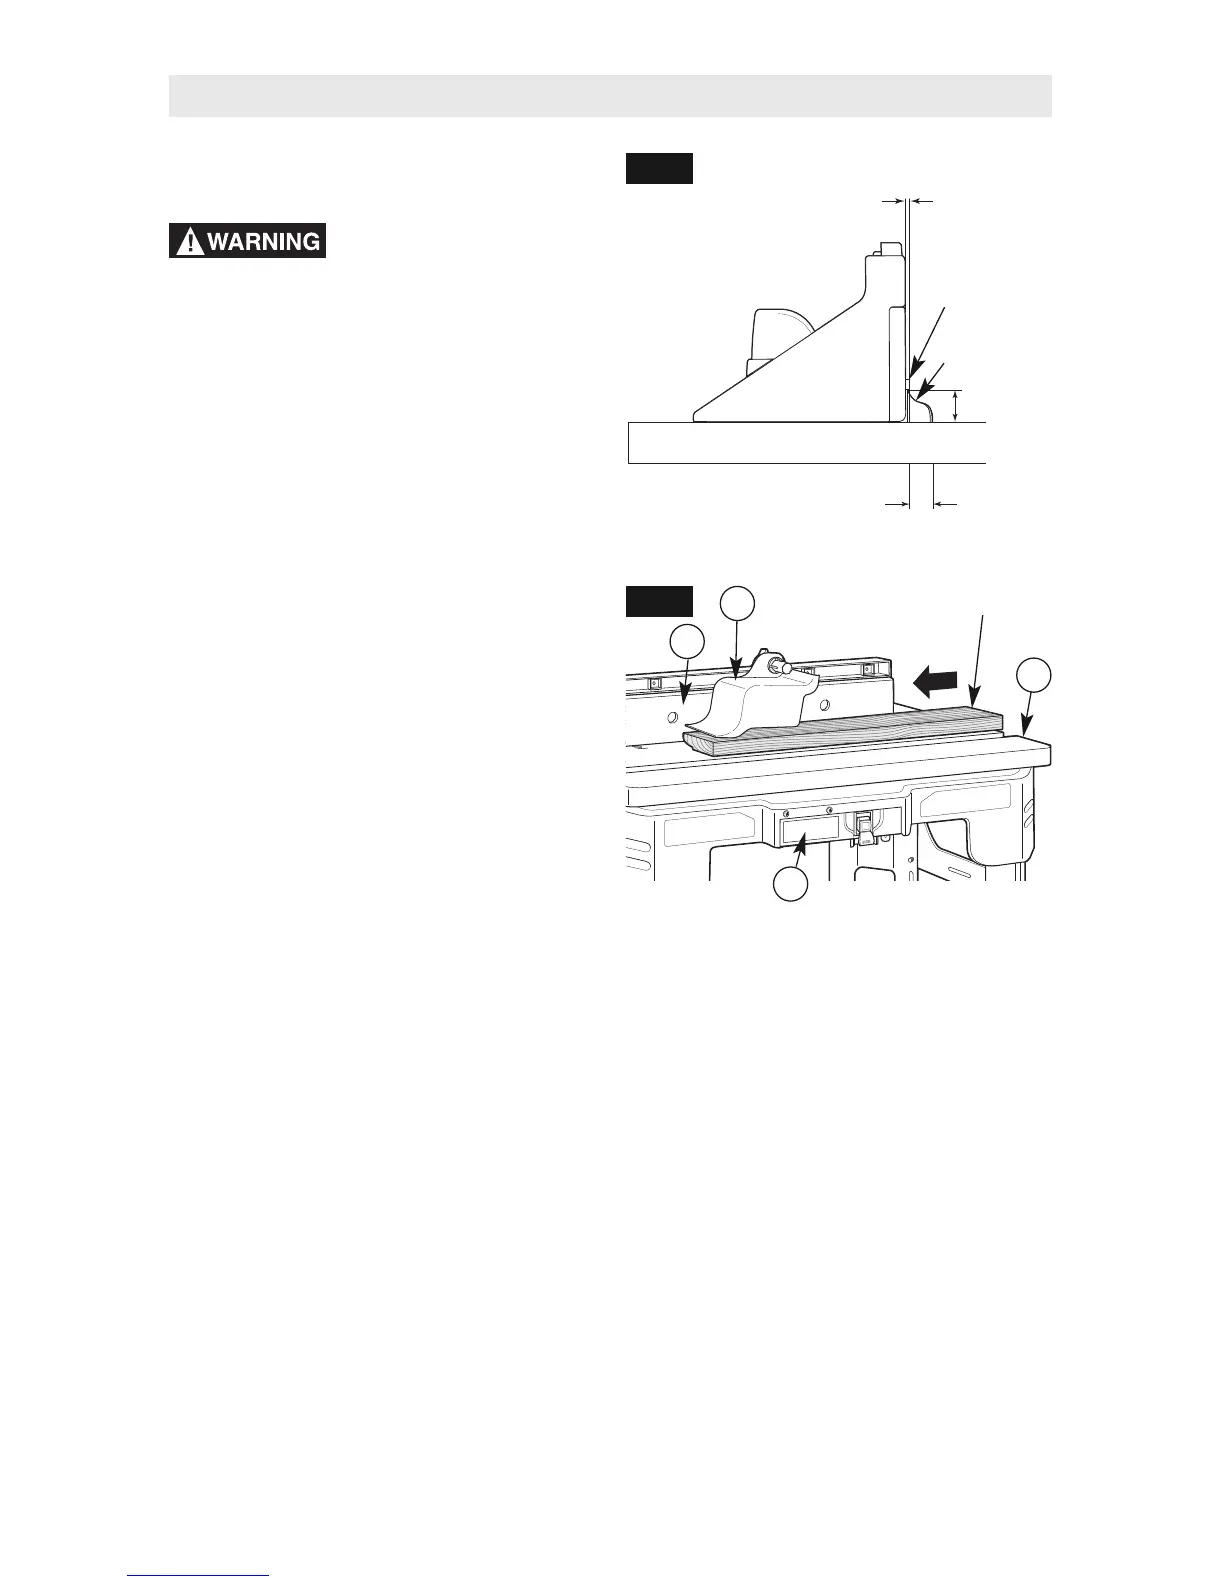
1. Install the desired piloted bit in the router.
2. Follow the instructions on page 23 to set
the desired height of cut (Fig. 28). Make
sure that the router is securely in place.
3. Adjust the router table fence back just
enough that the pilot on the router bit will
control the depth of cut. The router bit pilot
should just barely protrude past the fence
faceplates (16). Tighten the fence clamping
knobs SECURELY.
4. Position both fence faceplates (16) so that
they clear the bit by 1/4".
5. Tighten the two clamping knobs and
carriage bolts holding the fence faceplates
(16) in place.
6. Remove the board from the table (1) and
make sure the overhead guard (15) is
securely in place.
NOTE: When making adjustments, use
a piece of scrap wood to make trial cuts
before making the cut with the actual
workpiece.
7. Make sure that both the router and switch
box are OFF; then plug the router into the
switch box (12).
PILOTED
ROUTER BIT
DEPTH OF CUT
HEIGHT
OF CUT
ROUTER BIT
PILOT
CLEARANCE
BETWEEN
FENCE AND
BIT
WORKPIECE
Guard not shown for clarity
FIG. 28
FIG. 29
16
15
12
1
Router Table Operation
8. While firmly holding a piece of scrap wood
against the fence faceplate (16) and down
against the router table (1), feed a piece of
scrap wood toward the bit in the direction
shown by the arrow in Fig. 29.
9. Using the switch box (12), turn the router
OFF. If any adjustments are needed, unplug
the power cord and repeat steps 2–8 until
all adjustments are correct. Once you are
satisfied with all settings, make the cut with
the actual workpiece.
 Loading...