EasyManua.ls Logo

Skil RAS900 User Manual

Skil RAS900
120 pages
To Next Page IconTo Next Page
Page #1 background imageLoading...
Page #1 background image
WARNING: To reduce the risk of injury, the user must read and understand the
Owner’s Manual before using this product. Save these instructions for future reference.
AVERTISSEMENT : Afin de réduire les risques de blessure, l’utilisateur doit lire et
comprendre le guide d’utilisation avant d’utiliser cet article. Conservez le présent guide
afin de pouvoir le consulter ultérieurement.
ADVERTENCIA : Para reducir el riesgo de lesiones, el usuario debe leer y comprender
el Manual del operador antes de utilizar este producto. Guarde estas instrucciones para
consultarlas en caso sea necesario.
Owner’s Manual
Guide d’utilisation
Manual del propietario
For Customer Service
Pour le service à la clientèle
Servicio al cliente
Router Table
Table à Toupie
Mesa de Fresado
1-877-SKIL-999
OR
www.skil.com
Model/ Modelo/ Modèle: RAS900

Table of Contents

Other manuals for Skil RAS900

Question and Answer IconNeed help?

Do you have a question about the Skil RAS900 and is the answer not in the manual?

Skil RAS900 Specifications

General IconGeneral
SpeedVariable
Base TypeFixed
Fence AdjustmentYes
Dust CollectionYes
MaterialPlastic and metal
Collet Size1/4 in
Router CompatibilityCompatible with most routers

Summary

SYMBOLS

Safety Symbols

Explains the purpose and meaning of safety alert symbols used in the manual.

ROUTER TABLE SETUP

Unfolding and locking legs

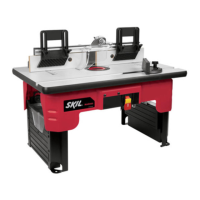
Step-by-step guide for unfolding and securely locking the router table legs into position.

Attaching the quick-clamp router mounting plate to the router

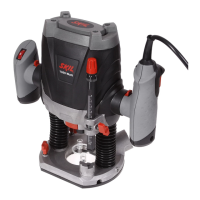
Guide on how to securely mount the quick-clamp router plate onto the router.

Installing the quick-clamp mounting plate and router to the router table

Steps to install the router and its mounting plate onto the assembled router table.

Mounting the router table to a work surface or workbench

Method 1

Instructions for securing the router table to a workbench using clamps.

Method 2

Steps to mount the router table to a workbench using screws or through-holes.

ROUTER TABLE OPERATION

Switch operation

Explanation of how to operate the router using the switch box paddle and lockout key.

Using the Router Table

Adjusting depth and height of cut

Steps to set the desired depth and height of the router bit for cutting operations.

Full edge cutting or jointing

Guide for performing full edge cutting or jointing operations with the router table.

Grooving, fluting, and veining

Instructions for performing grooving, fluting, and veining operations with the router table.

Related product manuals