18
Using the Depth-Stop Turret to Set Up Deep
Cuts (Fig. 9)
NOTICE:
Making a single, deep cut is never
advisable. Smaller diameter cutter bits are
easily broken by too much side thrust and
torque. Larger cutter bits will cause a rough cut
and be difcult to guide and control. For these
reasons, do not exceed 1/8-in. depth of cut in a
single pass.
To produce deep cuts, always make several
progressively deeper cuts by starting with the
highest step on the depth-stop turret, and, after
each cut, rotate the turret to the next lower step
until the lowest step is reached.
Each of the steps progresses by 1/4 inch
increments. The 4 steps represent a total of “0”
inch to 3/4-inch with a full 360º rotation of the turret. Repeat this process if necessary.
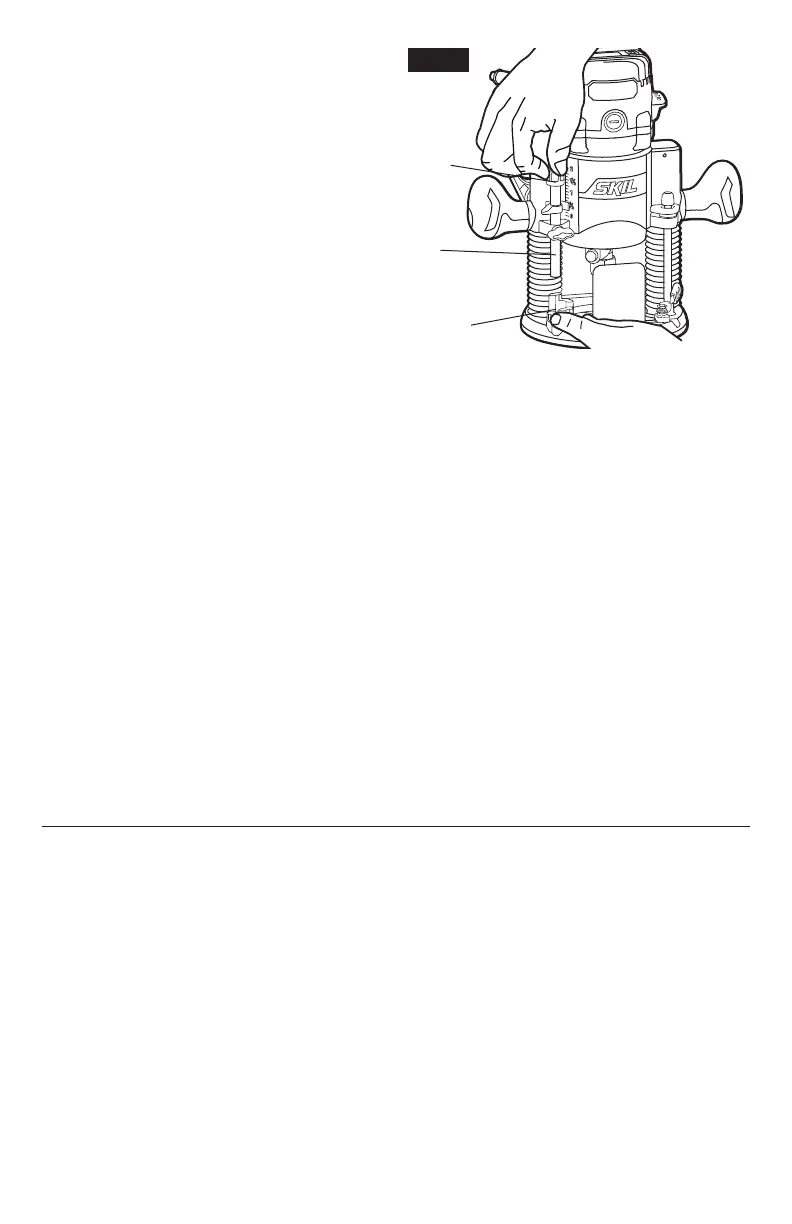
Micro-adjustments with the Depth Rod and Depth-Stop Turret (Fig. 9)
The depth rod has a ne-adjustment knob (A) that turns a screw (B) (inside the rod) either
clockwise or counterclockwise to lower or raise the depth rod on the turret (C) for micro-ne
adjustments of the plunge depth.
Each complete revolution of the ne adjustment knob adjusts the plunging depth by
approximately 1/32 inch.
A reference indicator line is embossed into the depth rod under the ne-adjustment knob to
set a reference point of “0”.
When micro-adjusting the plunge depth, always make sure that the ne-adjustment knob has
been turned down (clockwise) several revolutions from the top before setting the depth rod
and depth-stop turret.
Always set your micro-adjustments with the plunge action locked in the raised, (or up) position.
To use the ne-adjustment knob after the depth rod and turret have been set, check the nal
depth setting and micro-adjust as follows:
•
To micro-increase the plunge depth, raise the fine-adjustment knob by turning the knob
counterclockwise the desired amount.
•
To micro-reduce the plunge depth, lower the fine-adjustment knob by turning the knob
clockwise the desired amount.
Fig. 9
C
B
A