16
Fine Adjustments
NOTICE:
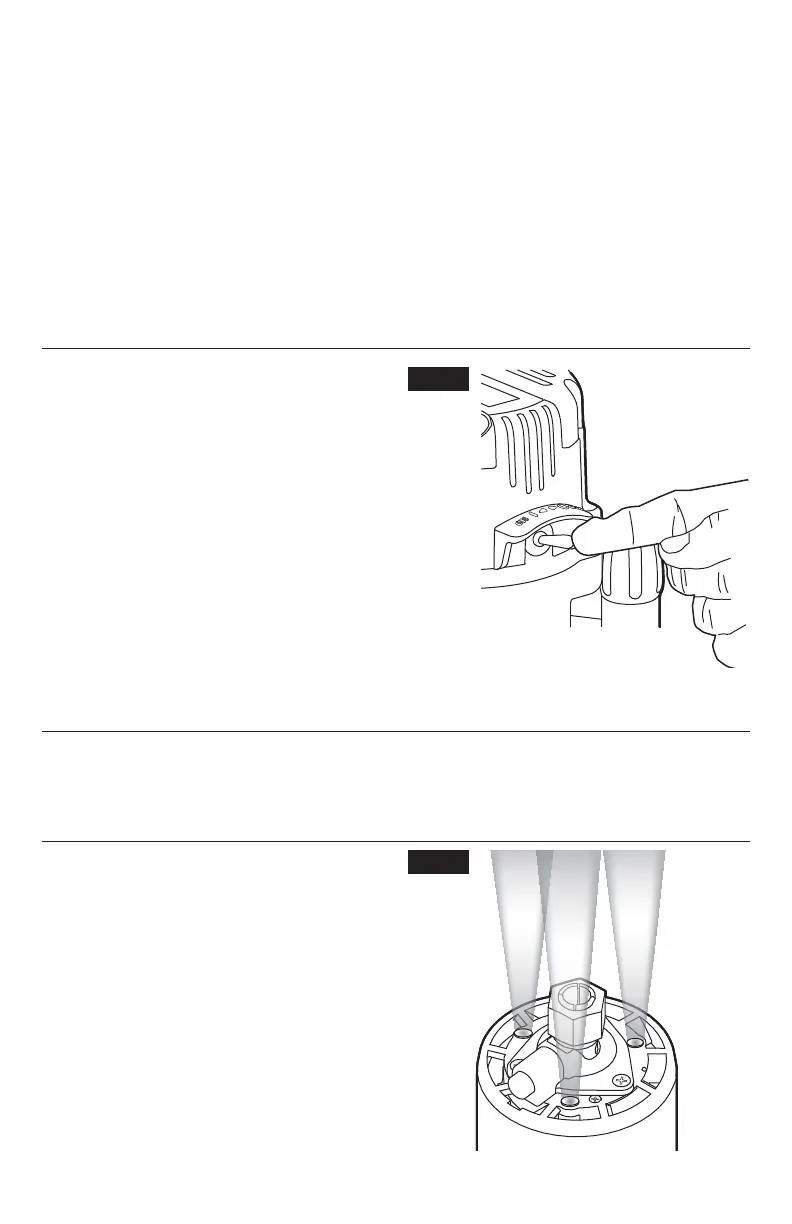
Be sure that the micrometer-ne adjustment system is engaged before making ne
adjustments. Test it by turning the ne adjustment dial (C) clockwise and counter-clockwise to
see if the bit lowers and raises.
The depth indicator ring (D) located on the ne adjustment dial is marked in 1/256- inch
increments. Turning the ne adjustment dial counterclockwise 180° (1/2 turn), lowers the
cutter bit 1/32 inch. One full turn counterclockwise 360° (zero “0” to zero “0”) lowers the bit
1/16 inch.
NOTICE:
The depth-indictor ring (D) may be reset to zero “0” without moving the ne
adjustment dial. This allows the user to begin adjustments from any reference point desired.
NOTICE:
Making a single deep cut is never advisable. Smaller diameter cutter bits are easily
broken by too much side thrust and torque. Larger cutter bits will cause a rough cut and be difcult
to guide and control. For these reasons, do not exceed 1/8 in. depth of cut in a single pass.
Toggle “On/Off” Switch
Use the toggle switch located on the top cap of
the motor housing to turn the router “ON” and
“OFF”.
The left side of the toggle switch hood (as you
face it) is marked “I” for “On” and the right side
(as you face it) is marked “O” for “Off”.
To turn the motor “ON”, push the toggle switch
to the left side marked “I”, or “On”. To turn the
motor “OFF” push the toggle switch to the right
side marked “O”, or “Off”.
Contact the workpiece with the router and
cutter bit only after the router has reached full
speed. Turn the router motor “OFF” and allow
the cutter bit to come to a complete stop before
removing the router and cutter bit from the workpiece.
Soft-Start Feature
The soft-start feature minimizes torque twist, customary in larger router motors, by limiting the
speed at which the motor starts. This increases the motor’s life.
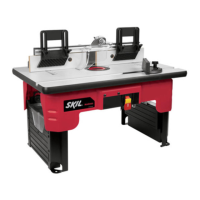
LED Worklights (Fig. 7)
Your router motor has 3 built-in worklights
located around the collet/nut to provide high
visibility of workpiece when cutting. These
lights are always “On” when the toggle switch
is in the “On” position.
Fig. 6
Fig. 7