Protected by copyright. Copying for private or commercial purposes, in part or in whole, is not permitted
unless authorised by ŠKODA AUTO A. S. ŠKODA AUTO A. S. does not guarantee or accept any liability
with respect to the correctness of information in this document. Copyright by ŠKODA AUTO A. S.�
1.5 Removing and installing fuel cooler
Removing
Note
♦
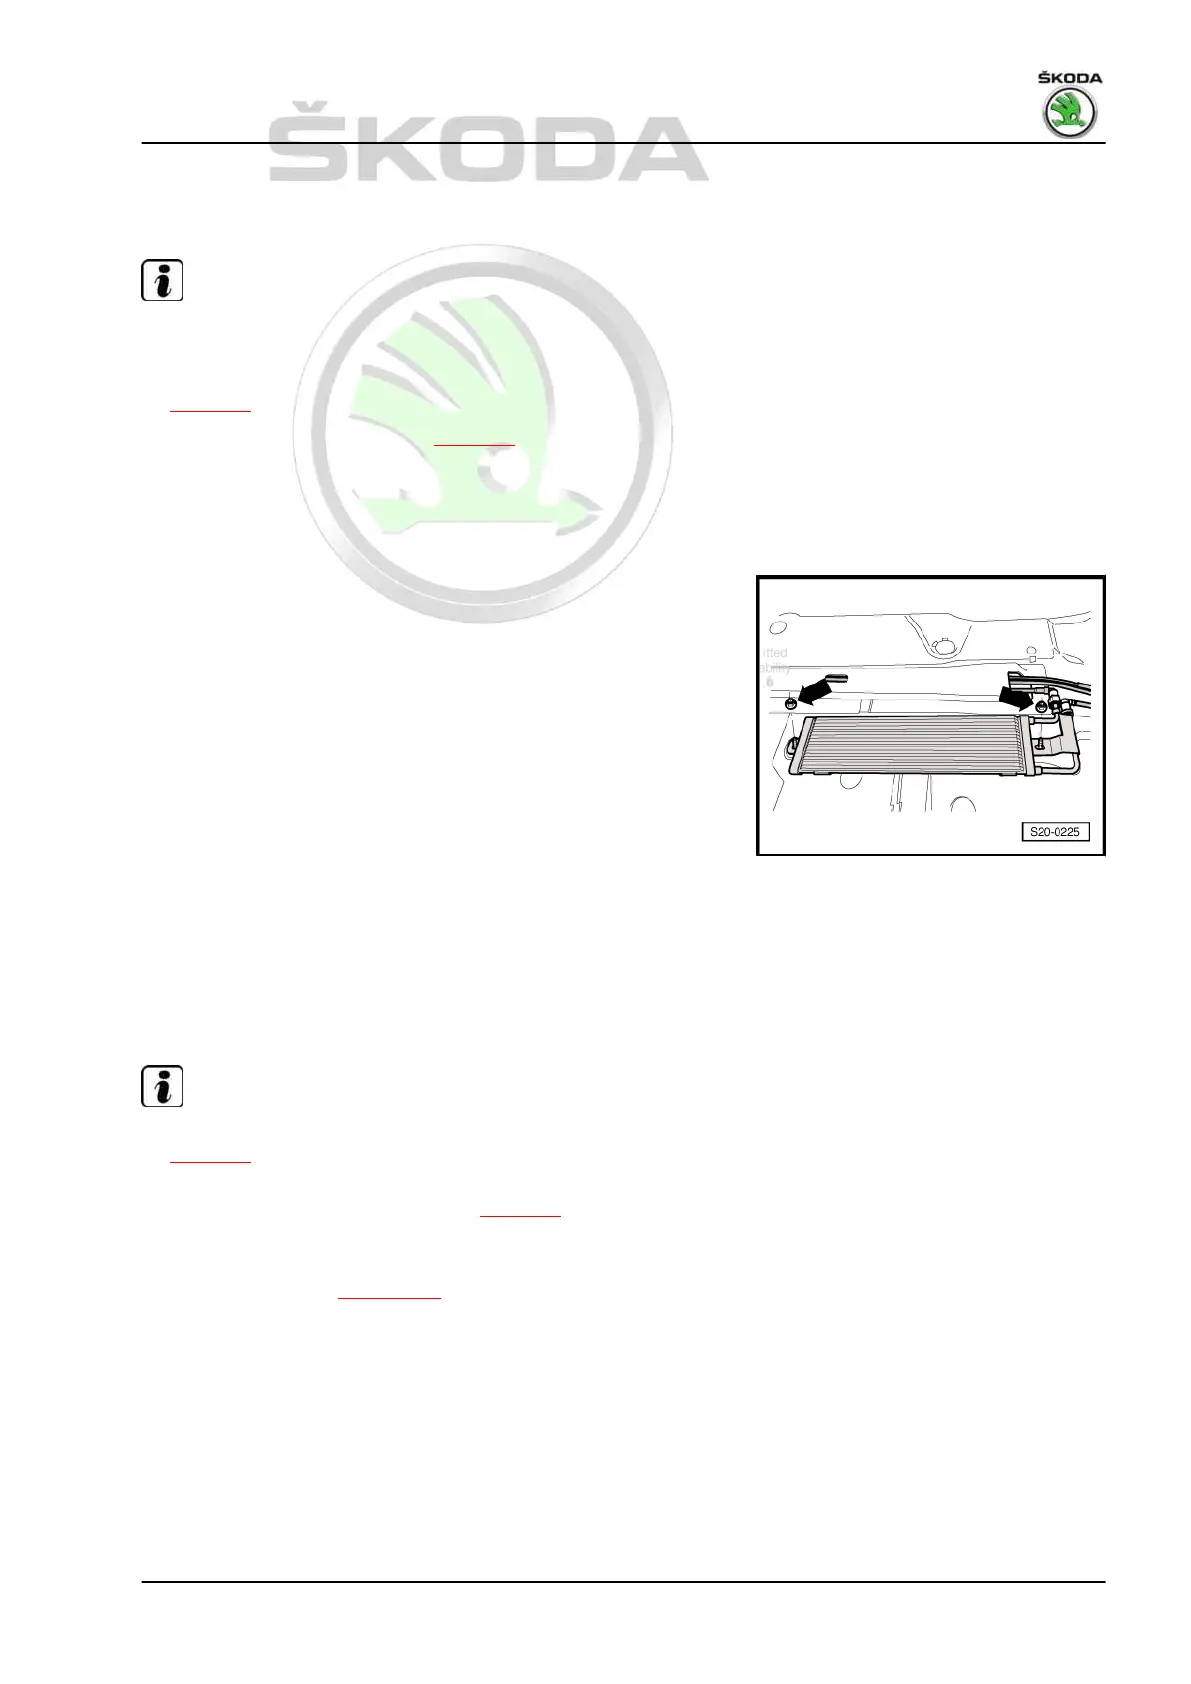
The fuel cooler is located on the fuel return-flow line to the fuel
tank. It is attached to the underfloor of the vehicle body.
♦
Safety precautions when working on the fuel supply system
⇒ page 3 .
♦
Observe rules for cleanliness ⇒ page 4 .
– Switch off ignition and pull out ignition key.
– Removing the right underfloor trim panel.
– Separate fuel lines at fuel cooler.
– Unscrew fixing nuts for fuel cooler -arrows- and remove fuel
cooler.
Installing
Installation occurs in reverse order to removal. Pay attention to
the following:
– Tighten fixing nuts for the fuel cooler to 15 Nm.
1.6 Remove and install the fuel tank for ve‐
hicles with front-wheel drive
Special tools and workshop equipment required
♦ Engine/gearbox jack , e.g. - V.A.G 1383 A-
Removing
Note
♦
Safety precautions when working on the fuel supply system
⇒ page 3 .
♦
Observe the regulations concerning cleanliness when working
on the fuel supply/injection system ⇒ page 4 .
– Switch off ignition and pull out ignition key.
– Drain the fuel tank ⇒ page 155 .
– Removing rear seat bench ⇒ Body Work ⇒ Rep. gr. 72 .
Octavia II 2004 ➤ , Octavia II 2010 ➤
2.0/100; 103 kW TDI PD Engine - Edition 01.2018
1. Removing and installing parts of the fuel supply system 157
 Loading...