›
Fold down the hooks in direction of arrow
3
» Fig. 102 on page 100 as far as
the stop.
›
Support the variable loading floor on the hooks folded downwards » Fig. 110.
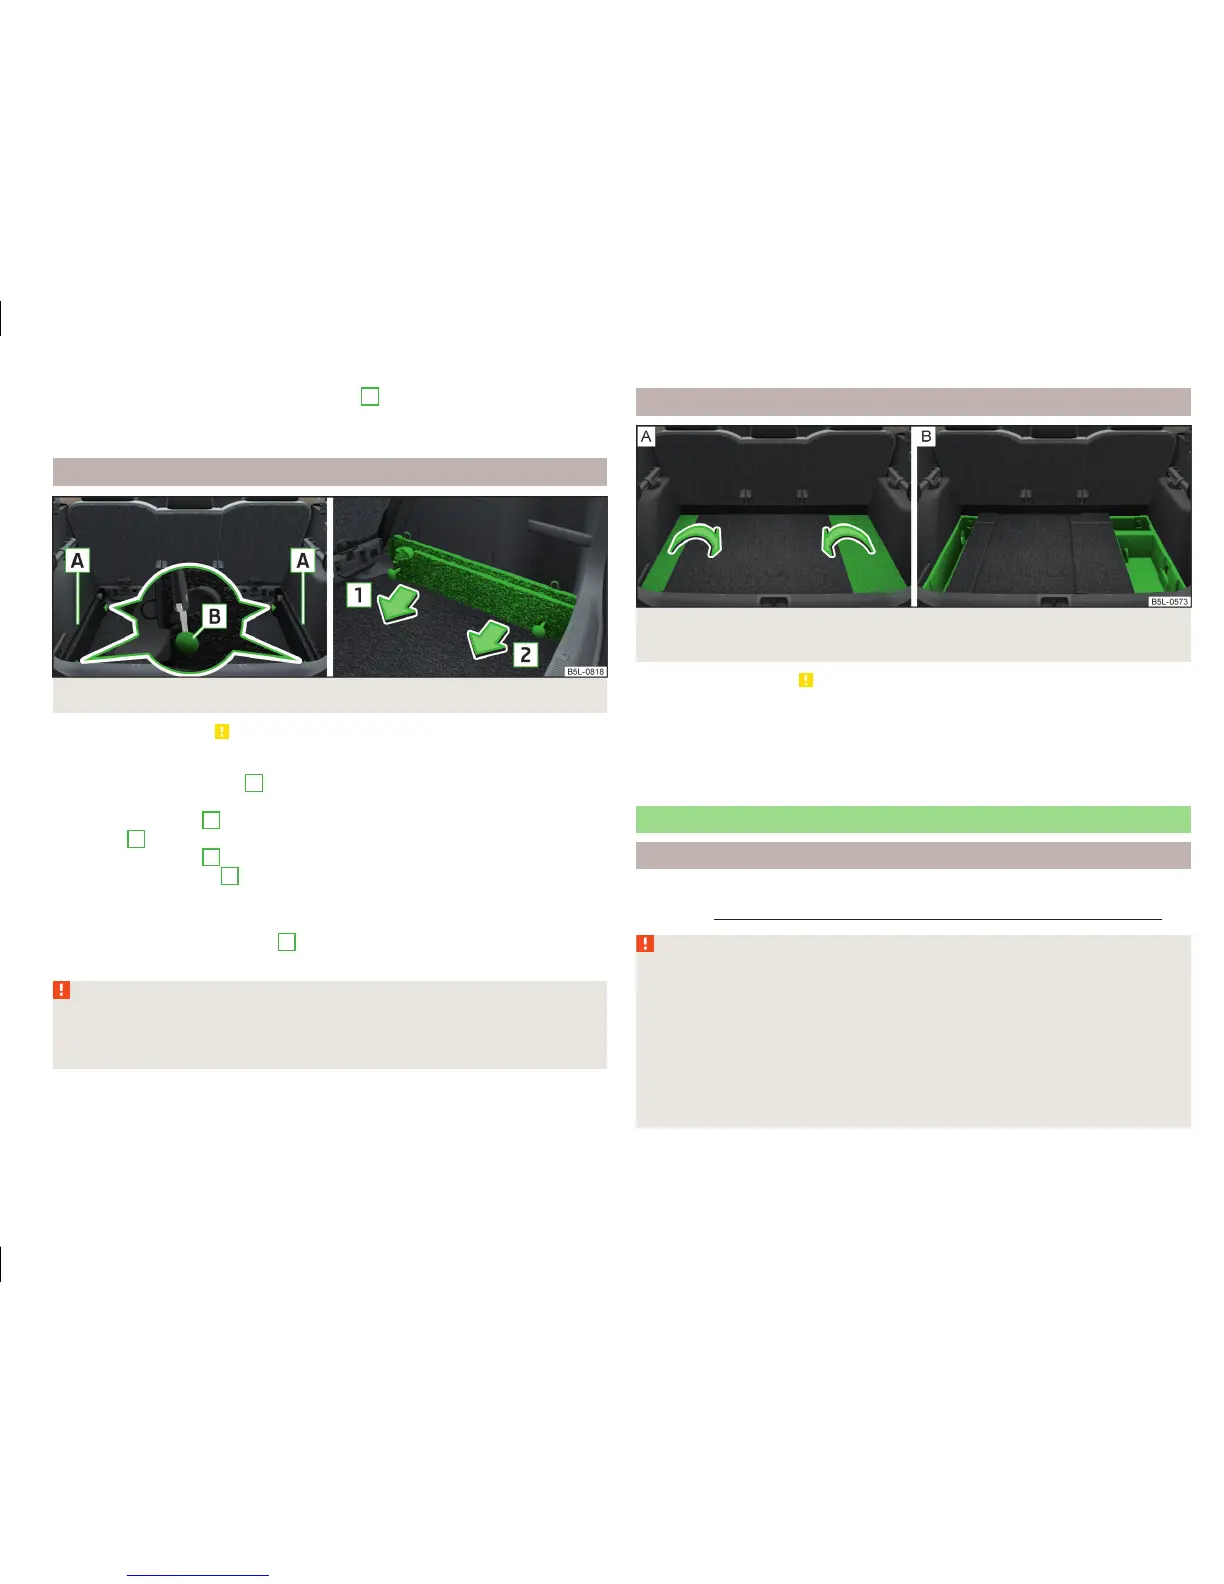
Removing and refitting carrier rails
Fig. 111 Slacken check points/remove carrier rails
Read and observe
on page 104 first.
Removing
›
Undo the securing points
B
» Fig. 111 on the carrier rails using the vehicle
key or a flat screwdriver.
›
Hold the carrier rail
A
in the front area and remove by pulling in the direction
of arrow
1
.
›
Hold the carrier rail
A
in the rear area and loosen and remove by pulling in
the direction of arrow
2
.
Fitting
›
Position the carrier rails on the sides of the boot.
›
Press the two securing points
B
» Fig. 111 on each carrier rail to the stop.
›
Check the attachment of the carrier rails by pulling it.
WARNING
Pay attention when installing the variable loading floor that the carrier rails
and the variable loading floor are correctly fixed, otherwise the occupants
are at risk.
Using the variable loading floor with a spare wheel
Fig. 112 Fold up the side panels of the variable loading floor / space under
the variable loading floor
Read and observe
on page 104 first.
The sides of the variable loading floor can be folded in the direction of arrow
» Fig. 112 -
.
The room under the variable loading floor » Fig. 112 -
can be used to stow
objects.
Roof rack
Introduction
This chapter contains information on the following subjects:
Roof load
106
WARNING
■
The transported items on the roof rack must be securely attached – risk
of accident!
■
Always secure the load with appropriate and undamaged lashing straps
or tensioning straps.
■
Distribute the load evenly over the roof rack system.
■
When transporting heavy objects or objects which take up a large area on
the roof rack system, the handling of the car may change as a result of the
displacement of the centre of gravity. The style of driving and speed must
therefore be adapted to the current circumstances.
105
Transporting and practical equipment

 Loading...