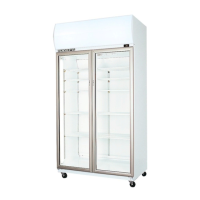
The SKOPE TME Series Vertical Chiller is a commercial refrigeration unit designed for displaying and storing products at controlled temperatures. This manual, MAN10259 Rev. 4.0, published in July 2014, provides comprehensive instructions for its installation, operation, servicing, and troubleshooting.
Function Description:
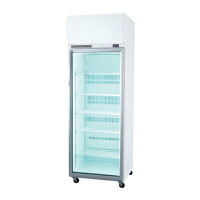
The TME Series chiller is primarily used for the vertical display and cooling of various products in commercial settings. It maintains an internal air temperature typically between 2°C and 4°C, ensuring that stored items remain fresh and properly chilled. The unit features self-closing doors with internal torsion bars, designed to seal correctly and efficiently. It is equipped with LED lighting for both the interior and, in New Zealand models, an illuminated sign, enhancing product visibility and promotional capabilities. The refrigeration system includes a compressor, condenser, and evaporator fans that work in conjunction to circulate air and maintain the desired temperature.
Important Technical Specifications:
- Temperature Range: Typically 2°C to 4°C (adjustable via thermostat).
- Ventilation: Requires a minimum of 200mm clear ventilation space above the refrigeration unit for efficient and reliable operation.
- Maximum Ambient Temperature: 40°C.
- Power Supply: Flexible power cord with a 3-pin plug. Twin unit chillers have two separate power supplies. Users must refer to the rating label inside the chiller for safe power supply and current draw specifications.
- Lighting:
- Interior Lights: Designed for LED tubes only; not compatible with fluorescent tubes.
- TME475, TME650: 1 x side light, 22W, 1500mm, T8 LED tube (SKOPE Part No. ELL10180).
- TME1000: 2 x side lights, 22W, 1500mm, T8 LED tube (SKOPE Part No. ELL10180).
- TME1500: 2 x pillar lights, 24W, 1500mm, T8 twin LED tube (SKOPE Part No. ELL10603).
- Sign Light (New Zealand models only): 1 x T8 LED tube.
- TME475: 5W, 360mm, T8 LED tube (SKOPE Part No. ELL10435).
- TME650: 11W, 600mm, T8 LED tube (SKOPE Part No. ELL10741).
- TME1000: 12W, 900mm, T8 LED tube (SKOPE Part No. ELL10742).
- TME1500: 24W, 1500mm, T8 LED tube (SKOPE Part No. ELL10743).
- Shelving: Five layers of shelves, adjustable in height.
- Shelf Load Capacity: Maximum of 20kg per shelf.
- Stabiliser Feet: TME475 chillers are fitted with two stabiliser feet at the front castors, which must be screwed down to contact the floor firmly for stability.
Usage Features:
- Installation: Requires careful positioning in the coolest possible location, ensuring adequate space for door operation and a level surface to prevent condensate tray overflow. A minimum 200mm ventilation gap above the refrigeration unit is crucial. Stabiliser feet on TME475 models must be firmly engaged with the floor.
- Start-Up: After positioning, the chiller should stand for at least 30 minutes before connecting to power. Upon connection, interior and sign lights will activate. The thermostat is pre-set but can be adjusted (clockwise for colder, anti-clockwise for warmer). Compressor and condenser fans operate continuously, switching off only when the internal temperature reaches approximately 2°C and restarting at 4°C.
- Loading Product: The chiller should run for 30 minutes before loading. Products should be loaded to allow adequate air space for even cooling. Shelf load must not exceed 20kg, and products should not overhang shelves to avoid obstructing doors.
- Illuminated Sign (New Zealand models): The sign is packed inside the chiller for transit and requires assembly, involving fitting side panels, back panel, and connecting the ENSTO 3-pole plug to the rooftop power supply socket.
- Adjustable Shelves: Shelves can be positioned at different heights using shelf clips that engage in marked support strips, allowing customization for various product sizes.
Maintenance Features:
- Safety First: Always disconnect the chiller from the mains power supply before any cleaning or maintenance. For twin units, ensure both power supplies are disconnected.
- Cabinet Cleaning: Periodically wipe the inside and outside of the cabinet with a damp cloth, avoiding electrical parts.
- Condenser Coil Cleaning: Essential for trouble-free performance. The condenser coil must be cleaned monthly with a soft brush or vacuum cleaner to remove dust. A more thorough cleaning by qualified service personnel is recommended every six months. Access to the condenser coil involves loosening sign retaining clips, lifting the sign unit, and disconnecting the sign plug.
- Lighting Replacement:
- Interior Side Light: Disconnect power, remove the diffuser by squeezing, rotate the LED tube to align pins with slots, and slide it out. Fit a new LED tube with the power end at the top, then refit the diffuser.
- Interior Pillar Light: Disconnect power, prop doors open, remove the fixing screw from the bottom of the pillar cover, and unclip the pillar cover to access the LED tube. Rotate the LED tube to align pins with slots and slide it out. Fit a new LED tube with the power end at the top, then refit the pillar cover and secure it with the screw.
- Sign Light (New Zealand models): Disconnect power, start at a top corner of the sign unit, and pull the sign panel out from under the sign top cover along its length. Carefully remove the sign panel. Rotate the failed tube to align pins with slots, slide it out, and fit a new tube. Refit the sign panel, ensuring end strips fit neatly into corner notches.
- Troubleshooting: The manual provides a table for common problems like the chiller not operating, interior light not on, high power consumption, or warm temperatures, along with possible causes and suggested solutions (e.g., checking power supply, replacing LED tubes, cleaning condenser coil, ensuring adequate ventilation, and proper door closure).