Skytech: TS-3 Wired Thermostat
REV. 8-30-17 Page 3
SETTING °F / °C SCALE
The factory setting for temperature is degrees Fahrenheit (°F) . To change this setting to Centigrade (°C), you must press
and hold both the ON and OFF buttons on the transmitter at the same time until the LCD displays the change. If you want
to convert back, repeat the above procedure.
THERMO UPDATING FEATURE
This SKYTECH wired wall thermostat has a THERMO UPDATING Feature built into its software. The THERMO
UPDATING Feature operates in the following manner, but only in the THERMOSTAT MODE:
The TS-3 normally reads the ROOM temperature every 2 minutes checking the ROOM temperature against the SET
temperature and then sends a signal to the appliance.
NOTE: When locating the TS-3 on a wall remember it should be kept away from direct sources of heat such as
heating appliance, incandescent lighting, and direct sunlight. Leaving the TS-3 in direct sunlight, for example, will cause
its heat-sensing diode to read the room temperature higher than it actually is; if in THERMOSTAT mode, it may not turn
ON the appliance even if the ambient ROOM temperature is below the SET temperature.
INSTALLATION INSTRUCTIONS
WALL MOUNTING THE TS-3 THERMOSTAT
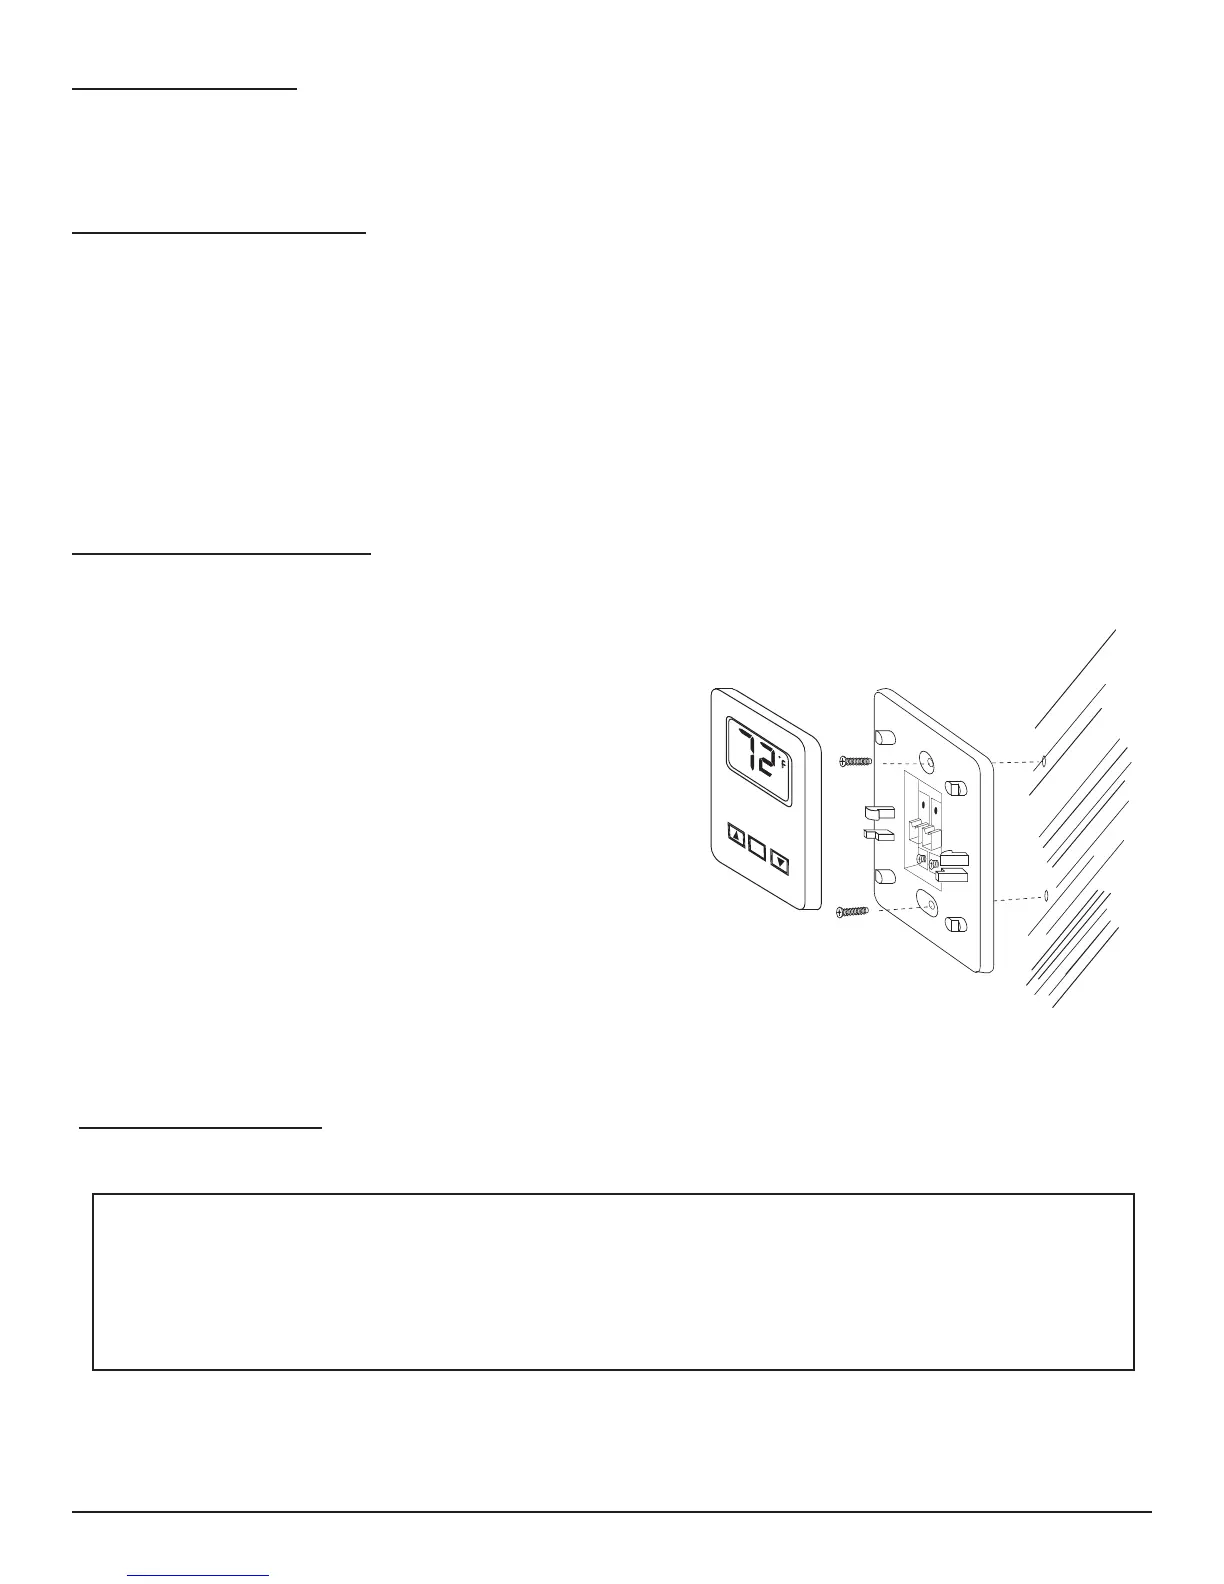
1. Remove face from backing plate as shown in Figure 1 then locate
the TS-3 to where the (2) thermostat wires from the appliance can
be pulled through the hole on the backing plate and connect them
to the (2) terminal screws.
2. After locating the (2) two mounting holes and mark the holes on
the wall.
3. Use the (2) two dry wall anchors and screws (that are supplied) to
mount the base plate to the wall as shown.
4. Thermostat can also be mounted onto an existing (Plastic)
electrical box.
5. Base plate should be mounted level on the wall for best operation.
6. Reinstall the face to the backing plate this is done by sliding
the face in and down about 1/2” then check that the (2) male
terminal connectors on the face are engaged in the female
terminal connectors on the backing plate. As shown in Figure 1.
GENERAL INFORMATION
This TS-3 wired wall thermostat must be installed exactly as outlined in these instructions. Read all instructions
completely before attempting installation. Follow instructions carefully during installation. Any modications of the
TS-3 or any of its components will void the warranty and may be pose a re hazard.
Do not connect any gas valve or electronic module directly to 110-120VAC power. Consult gas appliance
manufacturer’s instructions and wiring schematics for proper placement of all wires. All electronic modules are to
be wired to manufacturer’s specications.
WARNING
 Loading...