EN
52 Harness adjustments
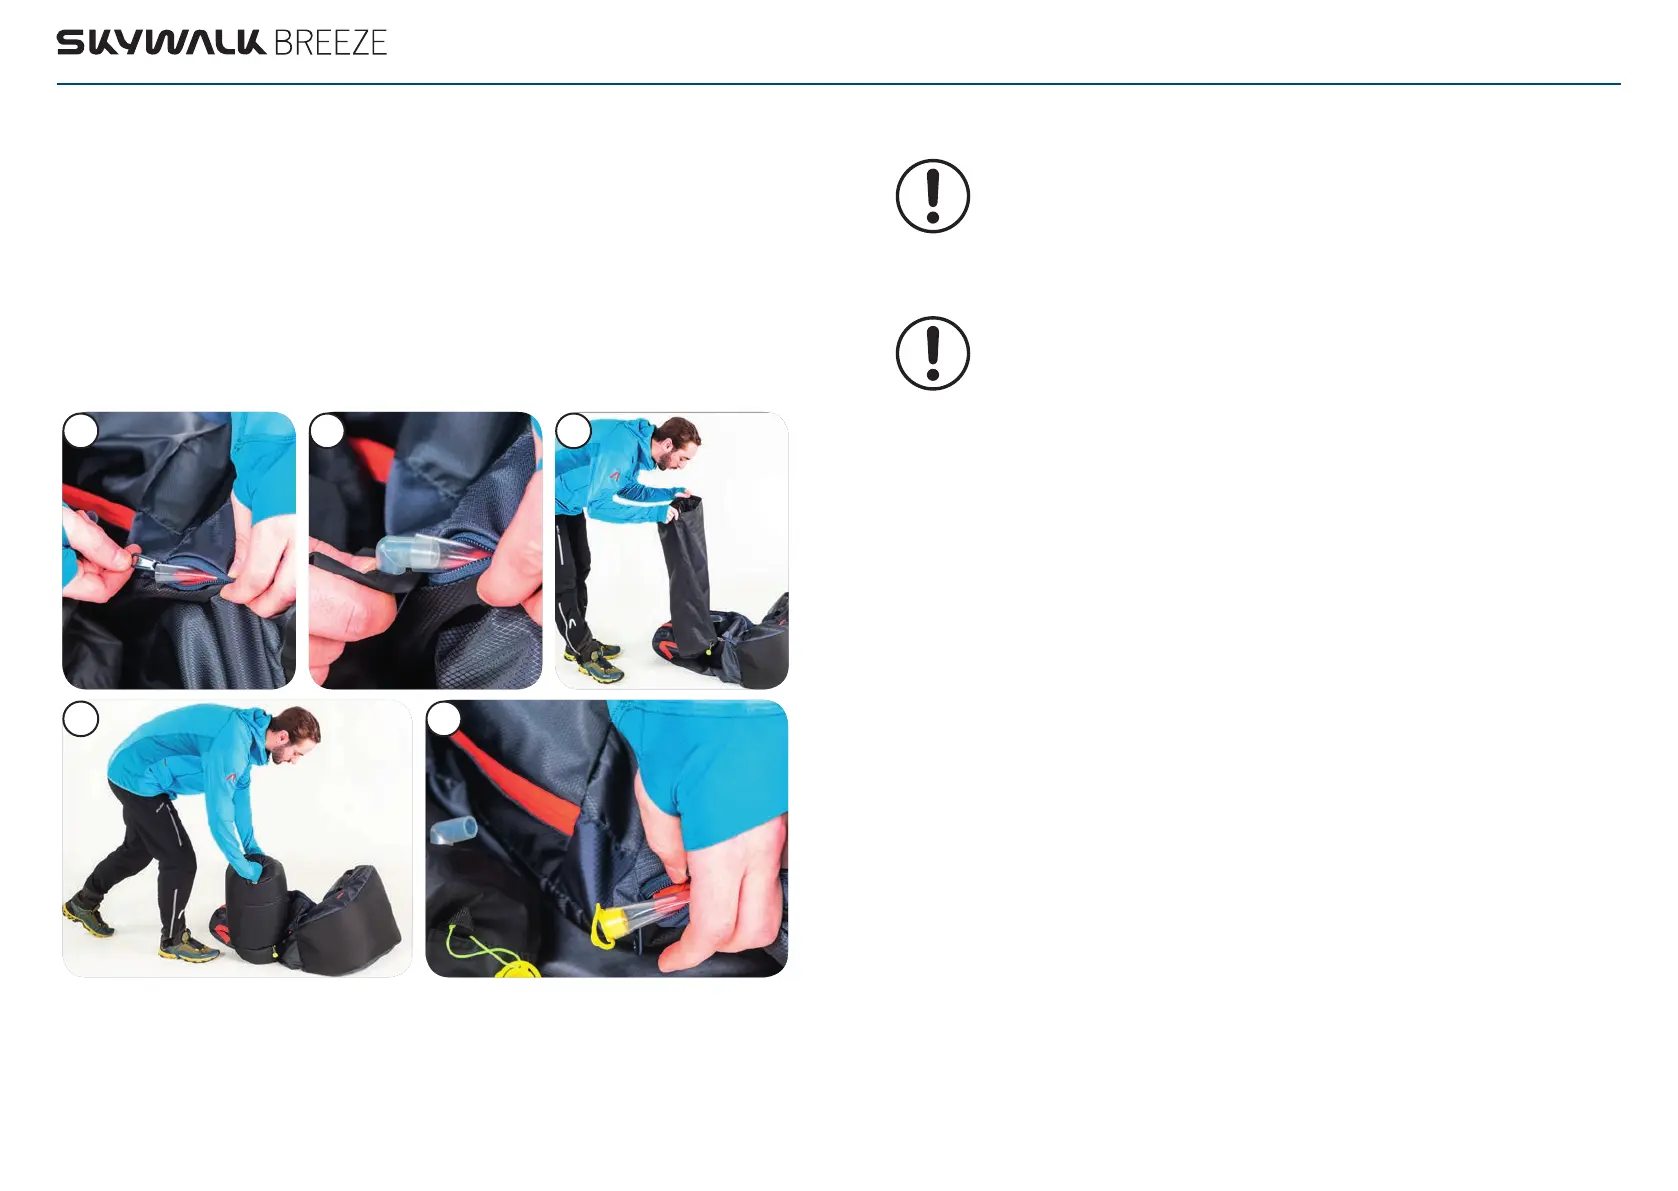
7. Apply more pressure by pumping on the inflation bag to allow air to flow into the
Permair protector. Make sure that the hose connection and the hose itself are not
twisted. (pic 4)
8. You will feel a pressure increase in the inflation bag when the protector is com-
pletely filled. After that, it is not possible to pump more air into the protector.
9. Repeat step 6-7 if the protector is not completely filled.
10. Maintain pressure and kink the hose to prevent the air from escaping.
11. Disconnect the inflation bag from the tube and close the tube with the yellow cap
within three seconds. (pic 5)
12. Close the zipper.
1 2
4
3
5
Harness adjustments 53
CAUTION
THE PROTECTOR MUST BE SEALED AFTER INFLATION WITHIN 3 SECONDS
TO ENSURE THE FUNCTIONALITY ACCORDING TO LTF 91/09. IF THIS IS NOT
DONE, PROTECTION WILL BE INSUFFICIENT! THE PROTECTOR MUST ALWAYS
BE FILLED WITH THE MAXIMUM VOLUME.
CAUTION
THE PROTECTOR MUST BE INFLATED ONLY WITH THE INFLATION BAG OR
MOUTH!! PUMPS OR ANY KIND OF EXTERNAL INFLATION IS EXPRESSLY
FORBIDDEN!
Packing and compressing
To bleed the protector, just pull out the yellow cap from the hose. When stowing the har-
ness, leave the hose open to squeeze out the remaining air by compressing it. Fold the
harness and pack it in the inflation bag. Close the rolltop of the inflation bag and open the
yellow cap on the inflation bag. Now squeeze all the remaining air out of the inflation bag
and gently pull on the hose connection until the air flows out. Then close the hose con-
nection with the cap.
Replacing the protector
To perform a leak test or to replace the protector, you can remove the protector from the
harness. After each hard landing and any fall from a height of more than 0.5 m, a leak
test (page 58) must be performed on the protector.
To remove the protector from the BREEZE, follow these steps:
1. Separate the cover as described on page 50.
2. Open the connection pocket for the Permair.
3. Remove the yellow cap and loosen the tube from the Velcro connection.
4. Slide the hose through the opening at the bottom of the compartment.
5. Open the zipper on the inside of the cover and release the protector from the Velcro
on the inside.
6. Now you can remove the protector.
Installation is the reverse order.