8
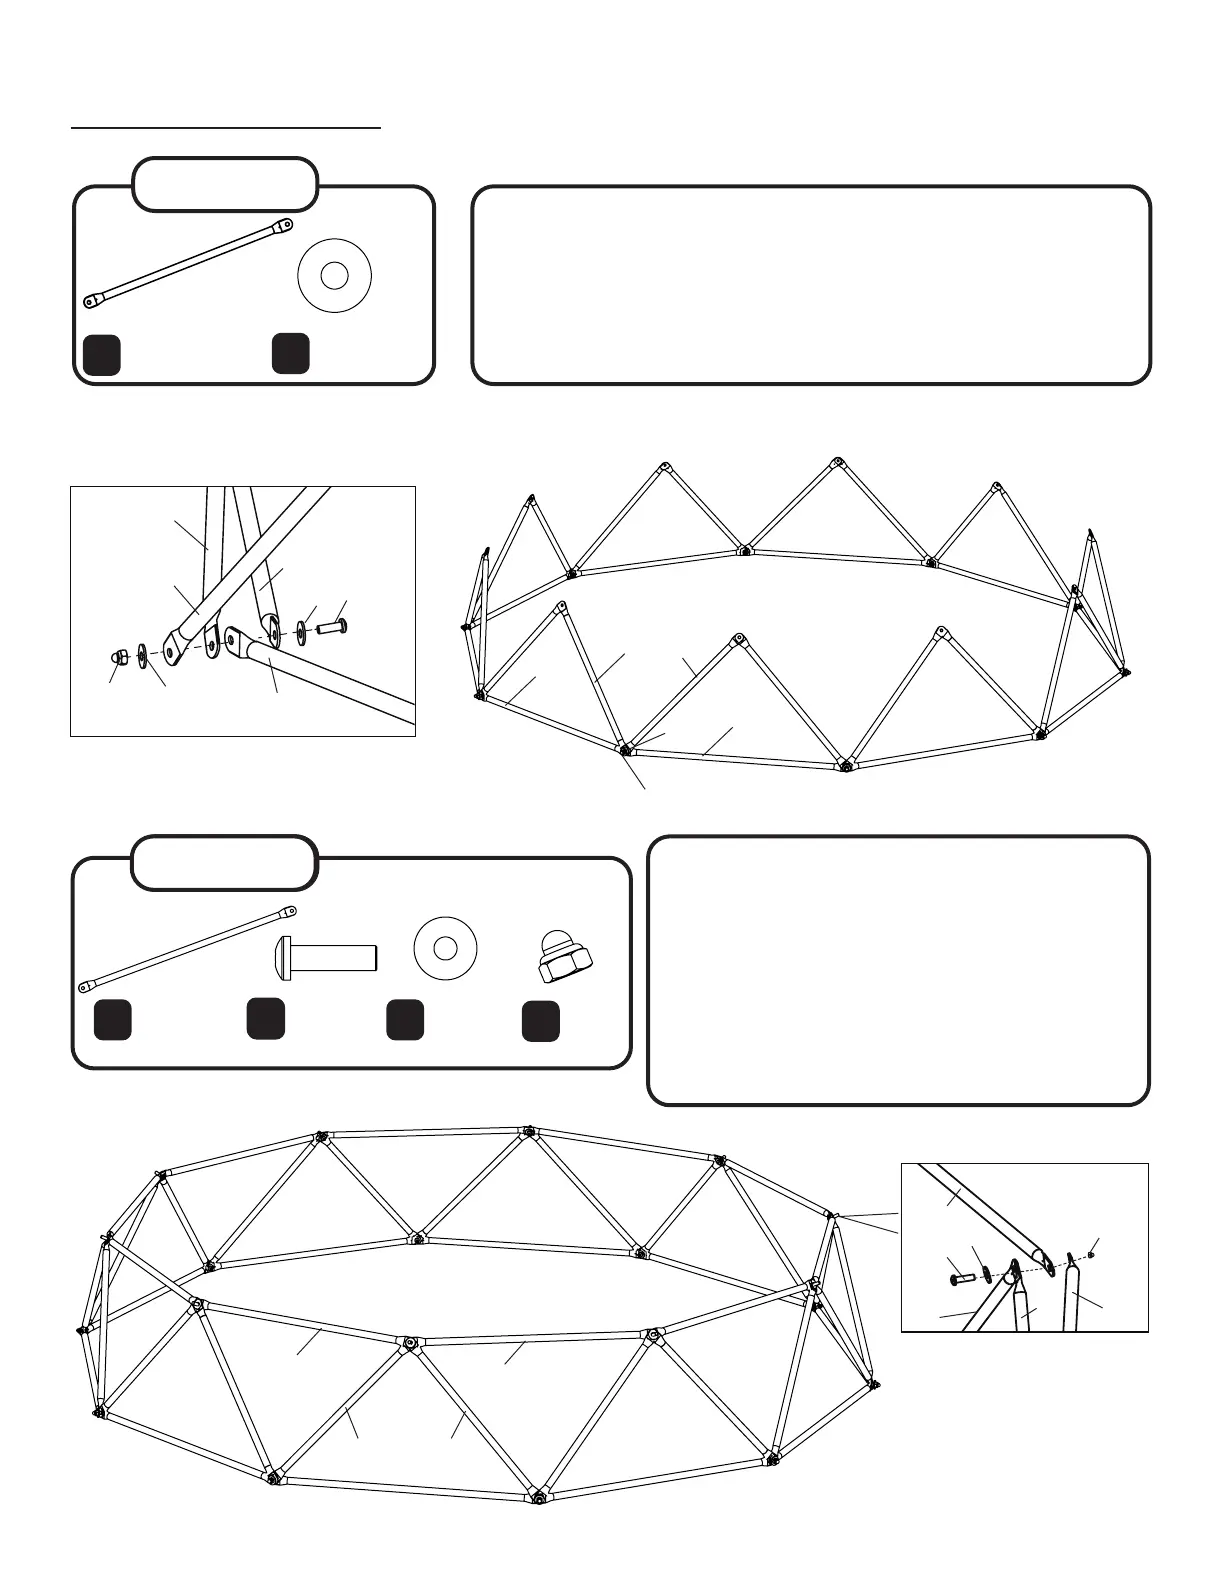
STEP 3
ASSEMBLY
Remove a nut and place two tube 2’s (2) onto the bolt and in front
of the bars from the bottom ring. Place a M10 washer [10] and lightly
replace the M10 nut [11]. The just placed tubes should meet in the
middle to form a triangle like the below image. Continue attaching until
all 20 tubes are connected to the bottom ring of the geo dome. Each
bolt needs to connect four tubes [two on bottom ring and two that
angle upwards.) Note: Do not tighten the nuts.
Tube 2 (x20)
Size: 671mm
2
(2)
(11)
(2)
STEP 4
STEP 4
Now attach tube 3’s (3) where the tube 2’s from
the preious step meet using M10X35mm bolts(8),
M10 washer (10), and M10 nuts (11) [lightly attach
nuts as they will be removed in later steps].
Continue attaching until you have completed the
second ring of the geo dome.
Note: We found that as you continue adding rings to
the geo dome, you may have to shift the assembled
tubes around slightly in order to line up all of the
holes.
Tube 3 (x10)
Size: 818mm
3
10
10
M10x35mm
Bolt (x10)
M10 Washer
(x10)
8
(3)
(3)
(8)
(10)
(3)
(3)
M10 Washer
(x10)
10
(10)
(1)
(1)
(2)
(2)
(1)
(10)
(7)
(1)
(10)
(11)
11
M10 Nut
(x10)
(2) (2)
(2)
(2)
(11)