7
ASSEMBLY
STEP 1
Register your Geo Dome. For info on warranty registration, see page 2.
READ THIS BEFORE YOU BEGIN
• We’ve provided some tools to help with assembly, but you’re more than welcome to use your own
• The assembly steps refer to parts by their descriptions and key numbers (see the part list on page 3)
• The assembly steps are written in a specific order, and if you don’t follow them exactly, you may end up having to
start all over again
• Most importantly, this may not be the easiest thing you’ve ever done, but it will be worth it. Trust us
If you’re a visual learner, check out our assembly videos! They’re pretty great!
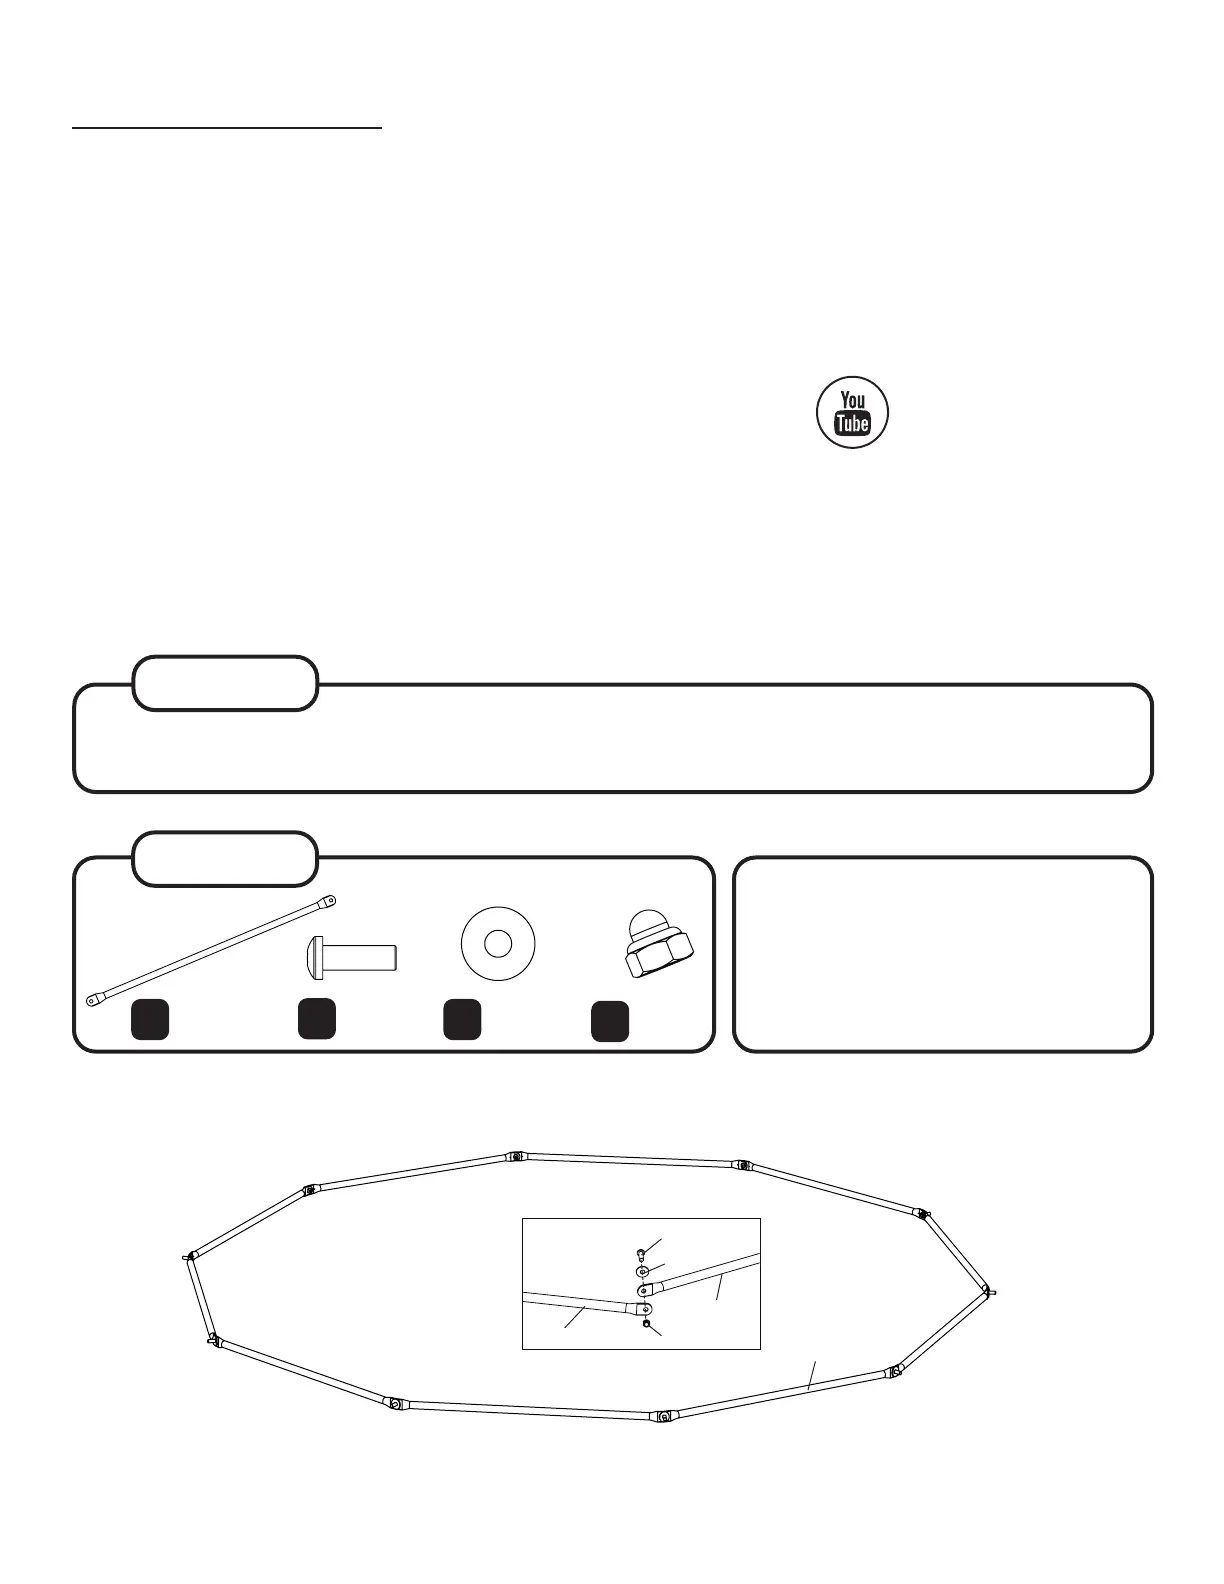
Connect a tube 1 (1) to another tube 1 (1) with a
M10X30mm bolt (7) and a M10 washer (10) .
Lightly thread on a M10 nut (just a turn or two,
as it will be removed in later steps.)
Continue attaching until you have completed
the bottom ring of the geo dome.
Having two people is necessary for assembly.
Tube 1 (x10)
Size: 895mm
1
M10x30mm
Bolt (x10)
M10 Washer
(x10)
7
10
STEP 2
(1)
(1)
(1)
(7)
(10)
M10 Nut
(x10)
11
(11)
skywalkertrampolines