21
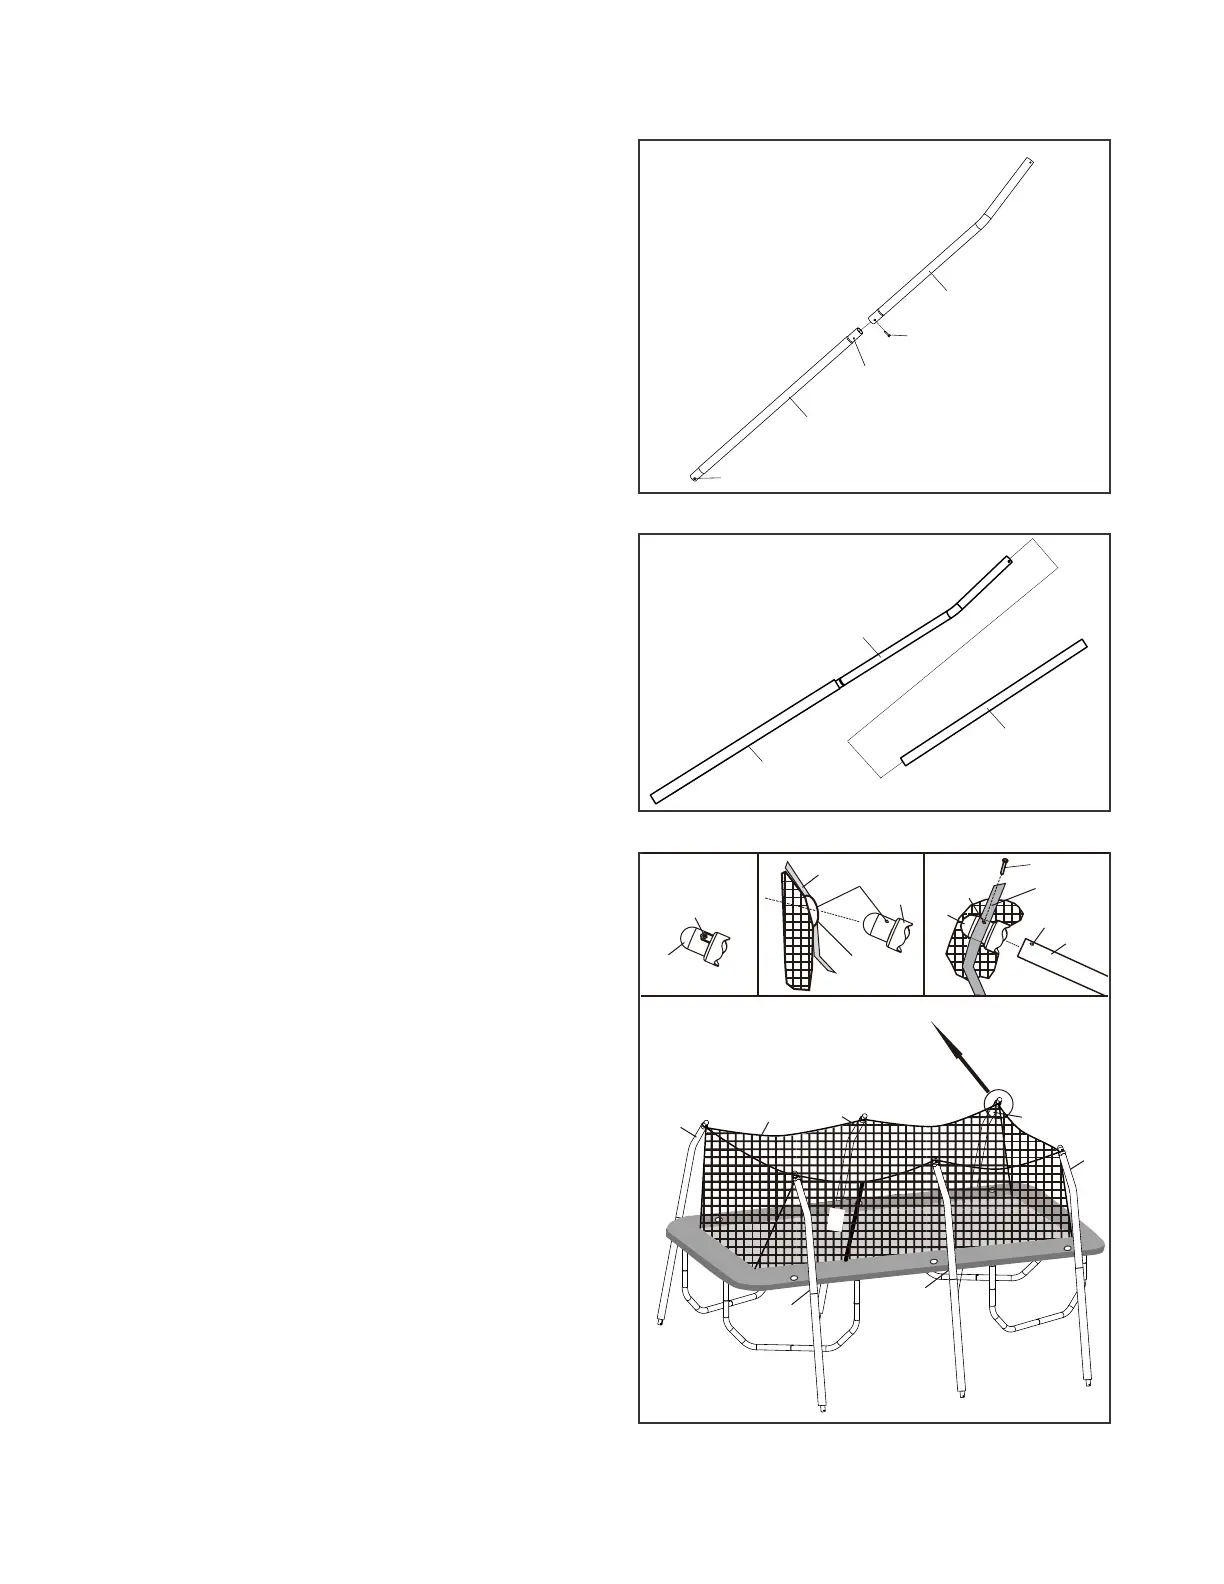
1. Orient one Lower Enclosure Tube(17) as shown. Attach
one Upper Enclosure Tube(18) to the Lower Enclosure
Tube with an M4.8x16 Screw(15). Repeat this procedure
with all remaining poles.
Note: The short end of the bend on the Upper Enclo-
sure Tube(18) is at the top.
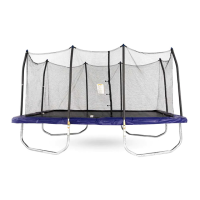
2. Starting from the Upper Enclosure Tube(18), slide two
Foams(19) over pole assembly as shown. Repeat this
process with remaing enclosure tubes.
Note: The Foams have been assembled. Adjust them
for step 1 assebmly. Adjust them back per this step.
17
19
19
18
18
15
Through Hole
One Side Hole
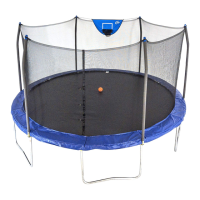
3. This step you will attach the net to the six pole.
Note: There is a Hexagon hole on the Pole Cap(23) with a
nut inside as shown A. Insert the Pole Cap(23) through one
strap ring on the top edge of the Enclosure Net(1) as
shown in Inset Drawing B. Make sure the Hexagon hole
and nut side of the cap is against the Mesh, and the
holes on both the strap ring and the caps are aligned.
Hold the Pole Cap close to a Upper Enclosure Tube(18)
with Foam as shown in Inset Drawing C. Insert the Upper
Enclosure Tube(18) in to the pole cap. Make sure the
holds on the Upper Enclosure Tube, Pole Cap and
strap ring are aligned. Insert the M5x50mm Bolt(27) until
it touches the nut in the Hexagon hole of the pole cap, tie
tight the two ends of the straps together. Later if and when
the top edge of the enclosure net sags you adjust the
tension by re-tieing the strap ends
Repeat this process to assemble the rest of the Pole
Caps(23) to the Upper Enclosure Tube(18) with foam by
the same manner.
Inset drawing
C
Holes
B
Strap ring
Strap
Hole
Hole
A
23
18
23
23
1
27
18
Hexagon hole
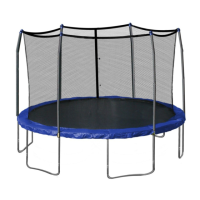
ENCLOSURE ASSEMBLY
18
18
18
18
Net
18